Do you remember the Kodak Q-Lab System? In case you were a commercial photographer in the 1990’s you probably do. To certified photographic laboratories Kodak offered this Monitoring Service for E6 Film Processing. It should guarantee photographers the same process quality, regardless to which lab they handed over their films.
This was obviously a smart marketing move which more or less obliged the lab owner to work with Kodak chemicals. It certainly had value to photographers though. To fashion and sports photographers it wasn’t unusual to shoot hundreds of rolls of film at the other side of the globe. Far away from their trusted lab. The E6 process for colour positive film is pretty critical. Sloppy processing leads to noticeable deviations in colour, contrast and density.
Q-Lab aimed to make the process quality measurable. A certified lab was obliged to send an employee to Kodak for training. They had to invest in a kit containing reagents, a densitometer and some software. The lab itself was evaluated by a Kodak Technical Sales Rep. If all requirements had been fulfilled, that same rep would come back a few weeks later to hand over a cake and a Q-Lab sign to display at the entrance.
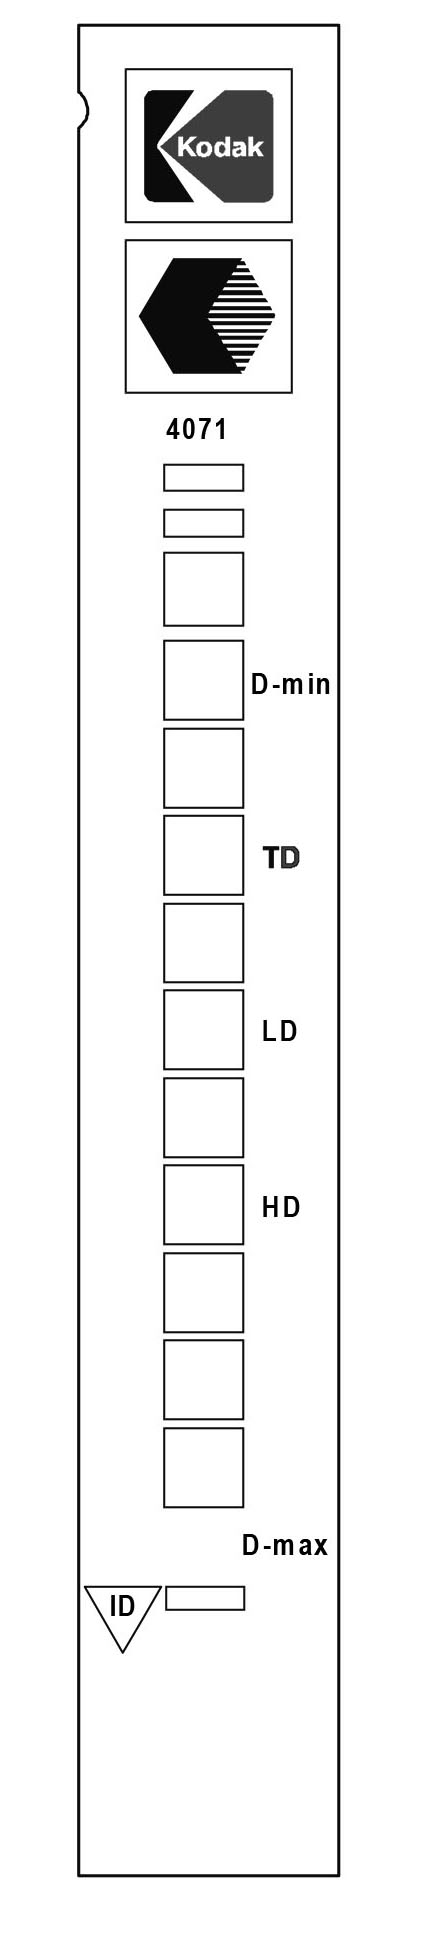
To monitor the process Kodak provided pre-exposed film strips. The ones for daily use were supplied on a 30m roll. The lab technician had to tear one off in the dark to process at the beginning, end and halfway the working day. The strip’s colour and grey patches were measured at the densitometer and compared to the aims. In case it was out of tolerance, the chemical test kit had to be used. Samples of the First Developer, Reversal and Colour Developer could be mixed with reagents which enabled a visual analysis of the chemicals. Needless to say that it came with a reference guide suggesting solutions for every possible deviation. Things like a minimal adjustment to the first rinse’s temperature or adding some sodium hydroxide to the colour developer.
This all seems ages ago. In nowaday’s archival/cultural heritage photography though there’s also a strong need to make quality measurable. Apart from the chemicals it bears a more than superficial similarity to what Kodak offered to the photo finishing industry. The FADGI and METAMORFOZE initiatives strive to give clear guidelines that can be objectively verified. Admittedly, they go a step beyond the Q Lab procedure.
Quantifying the digitisation process’ Quality
While striving for excellence is honourable, not all materials require the same amount of precision. Digitizing a famous artist’s historical handwriting requires a higher quality level than the archives of a newspaper. In both cases text recognition is equally important. The handwriting’s file however needs to show the structure of the paper and have a tonal range resembling the original as close as possible. Qualities you may forgo when digitizing the paper. Therefore both FADGI and METAMORFOZE offer various quality levels. FADGI uses stars to distinguish its levels. FADGI**** is the highest obtainable quality with today’s technology. METAMORFOZE has three quality levels, which roughly correspondent with FADGI two, three and four stars. The FADGI one-star level has no equivalent in METAMORFOZE. It’s for localisation only, like a thumbnail in a library.
In Europe the ISO Standard 19264-1 is widely accepted. It’s distilled from the FADGI and METAMORFOZE norms. Currently it doesn’t provide guidelines for translucent materials, these will be added though.
METAMORFOZE was initiated by the Dutch National Library and the Dutch National Archives. Therefore it focuses solely on the digitization of printed materials. Guidelines for translucent materials are missing. The Federal Agencies Digitization Guidelines Initiative (FADGI) has a broader scope. For that reason we’ll look at FADGI below.
Requirements
FADGI provides guidelines for the digitization of a multitude of materials, ranging from rare bound volumes to photographic transparencies to radiographic X-Ray film. For all these materials it quantifies:
File Format
Resolution
Bit Depth
Color Space
Tone Response
White Balance Accuracy
Illumination Uniformity
Color Accuracy
Color Channel Misregistration
MTF Requirements
Scale Accuracy
Maximum Sharpening
Maximum Noise
Resolution is an easy one; it can be calculated and doesn’t need any specific measurment tools nor software. For a FADGI**** digitization of photographic negatives from 35mm through 4×5” a resolution of 4000 ppi is required. Photographic prints require 600 ppi to adher to the same standard.
The resolution of a “Small Medium Format” camera like the Fujifilm GFX-100 or Hasselblad X2D easily exceeds the Fadgi**** requirements to digitise 35mm film. For larger film formats only the sensor in a Phase One IQ4 back meets that standard. It goes without saying that the best optics and lighting are needed to adhere to the other requirements.
Measurement is crucial
Certification for FADGI compliance requires objective testing methods. These are outlined in the Digital Imaging Conformance Evaluation program (DICE). A DICE procedure always requires:
Reflective and/or transmisive image targets
Software to analyse the captured targets
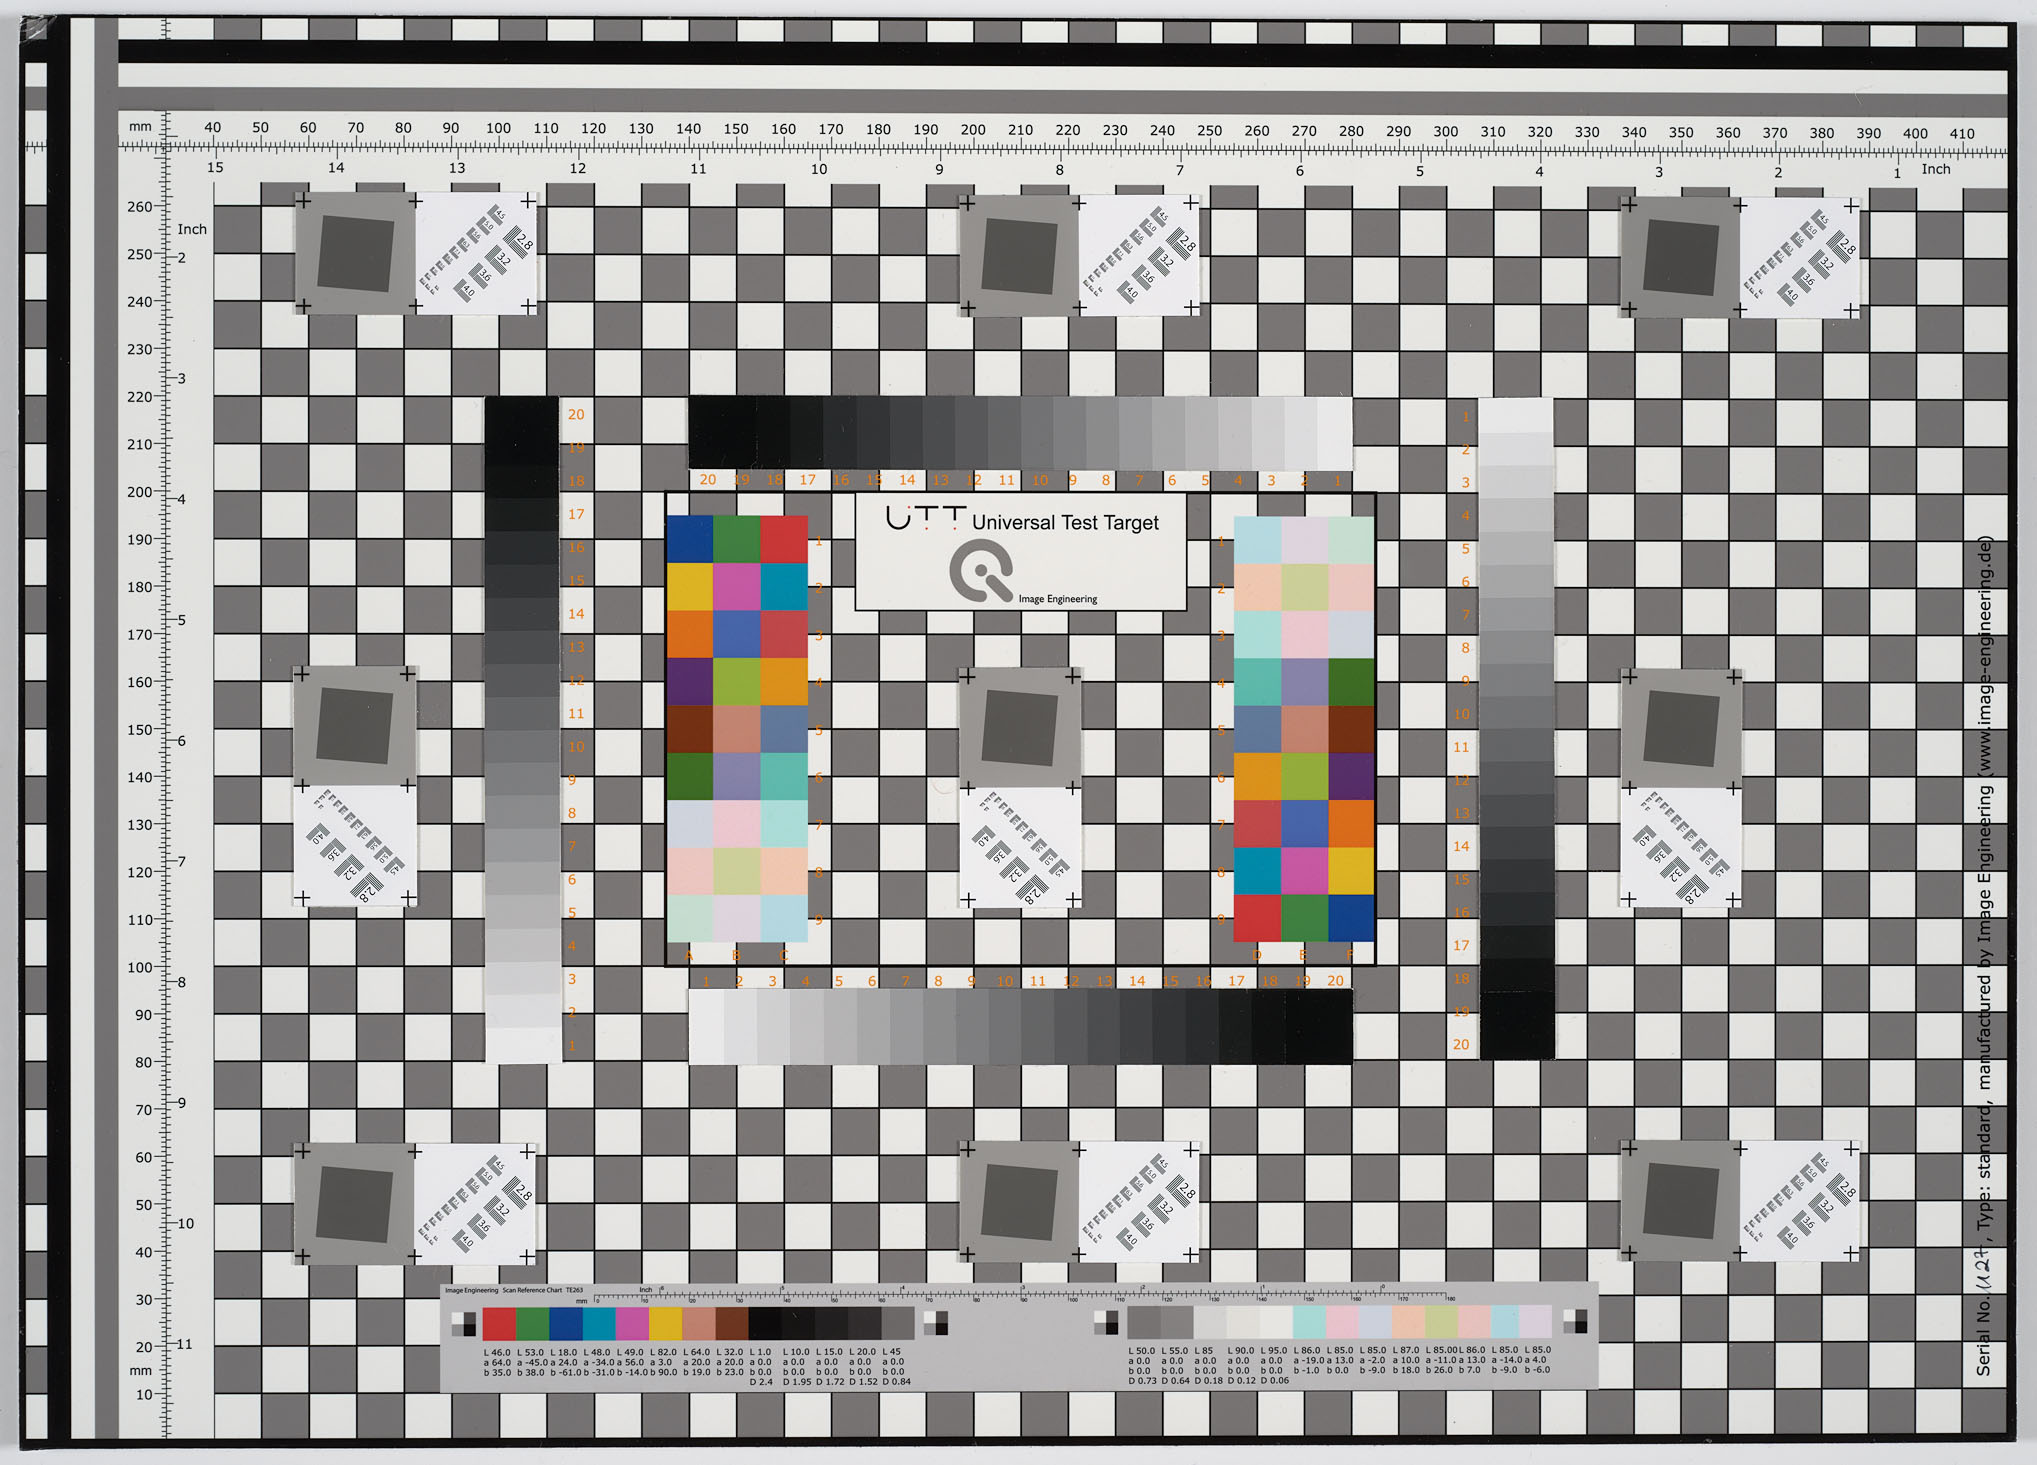
A Device Level Target (DLT) takes the place of the object that’s to be digititzed and fills the best part of the frame. It includes color and grey patches, a ruler and patches to evaluate sharpness and to detect aberations. A DLT is typically captured at the beginning and end of a batch.
An Object Level Target (OLT) basically features the same patches as a DLT but is small enough to be captured alongside every object. Whereas a DLT is easier to evaluate thanks to its larger size, some institutions oblige their photographers to include an OLT in every capture.
Universal Test Target (UTT) is a generic term which can refer to both DLT and OLT.
Software such as provided by Image Engineering and Image Science Associates enables objective analysis of DLT and OLT captures. Alternatively you may upload the file to outsource the analysis. Phase One offers their free NimbusQA service. It analyses an uploaded file within minutes. The detailed report not only gives a score, but also tells you where the capture may fall short.
As outlined above, FADGI, METAMORFOZE and ISO 19264-1 help us to quantify most of the parameters of the digitization process. It also pays attention to Best Practices. Although less measurable, these are equally important. In general there’s a lot of knowledge exchange between people working in this industry, which makes Best Practice more than just a hollow phrase. It’s very well possible to create FADGI compliant images without adhering to technical recommendations and best practices. However, it may become a lot easier to maintain an efficient and repeatable workflow when you do. Products like our RPS copy stands and film stage provide the necessary stable platforms. A stand like the MST can mean the same in the digitization proces of works of art that are too large for flat lays.
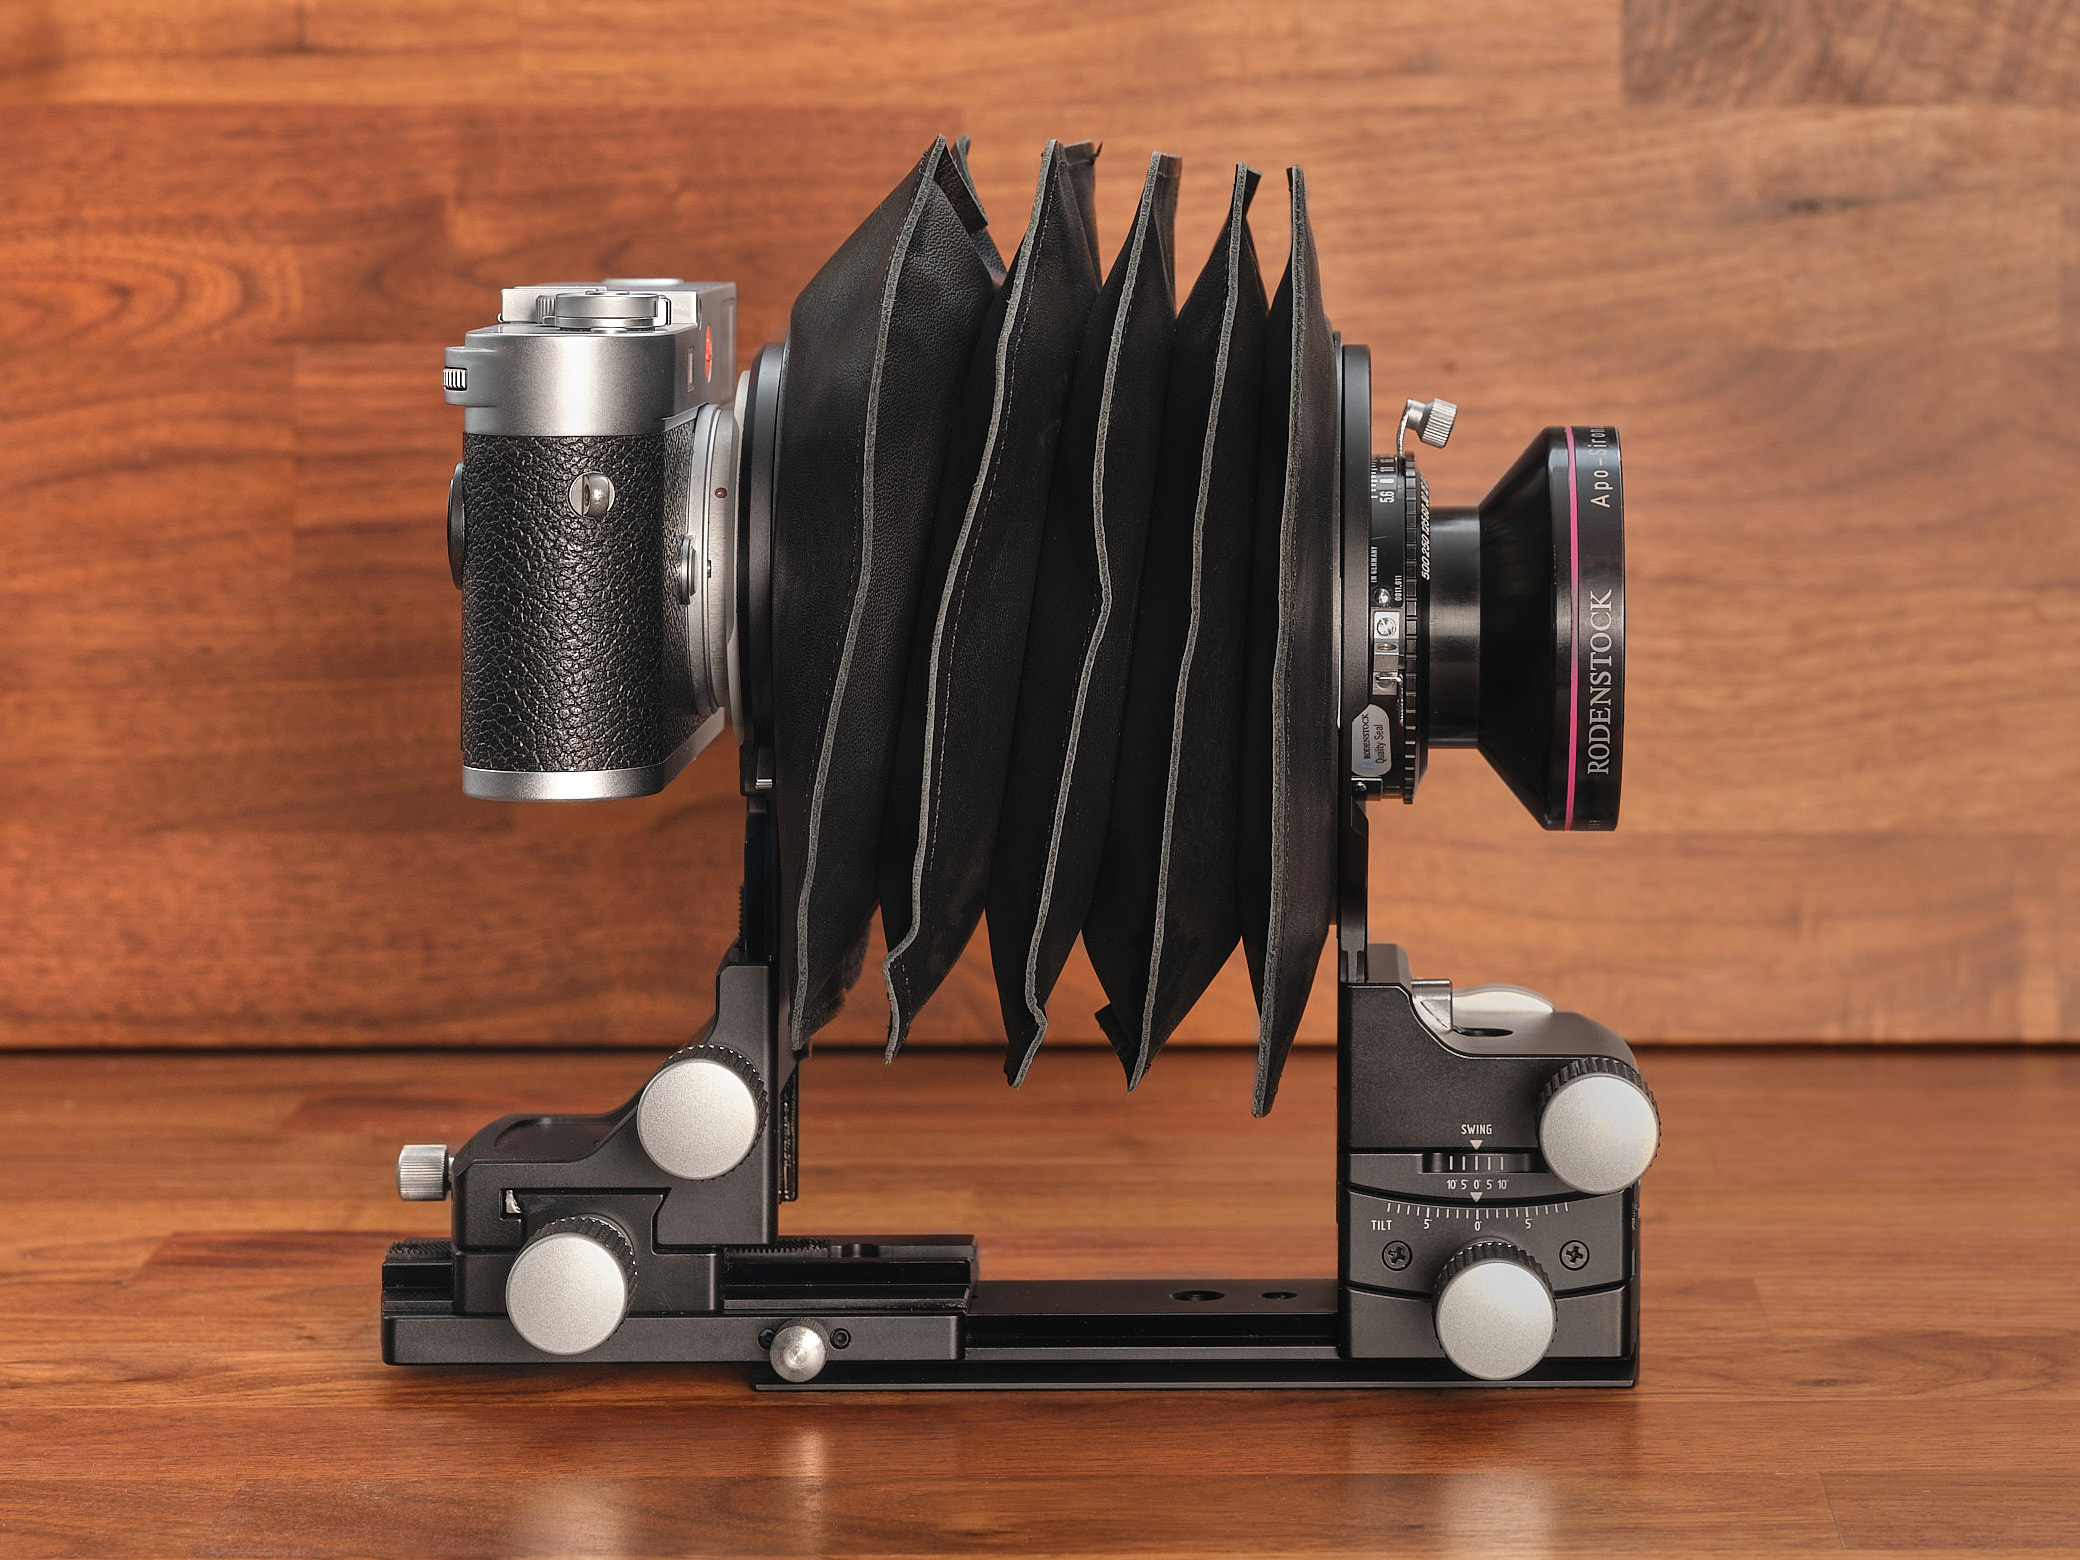
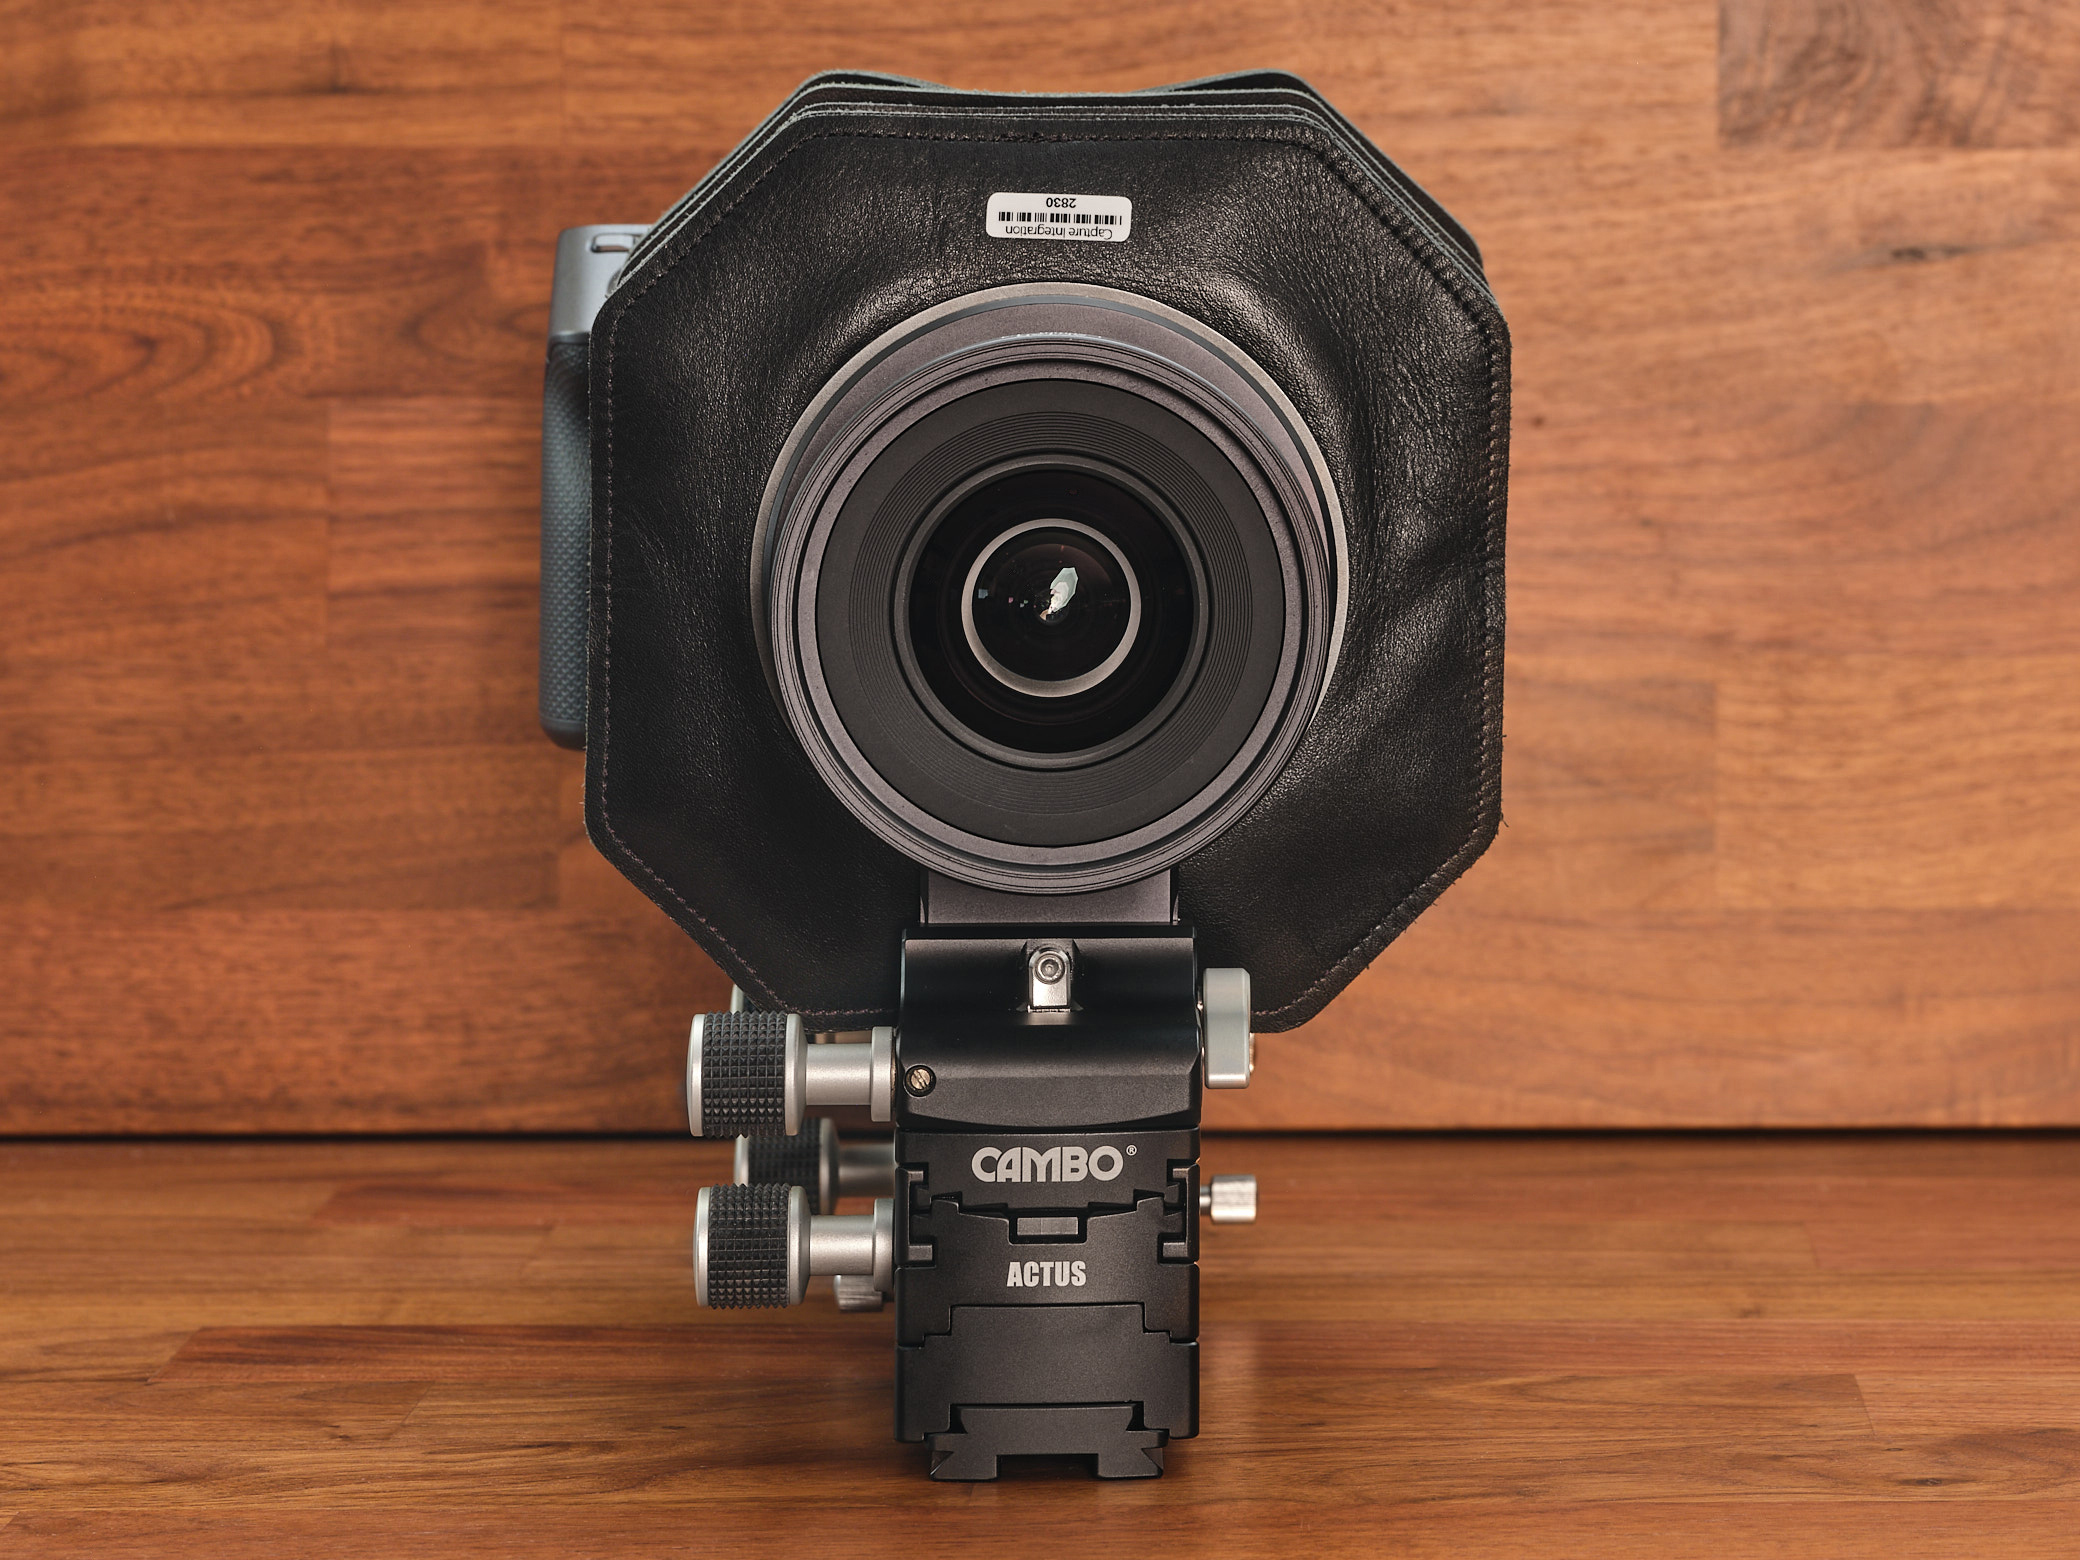
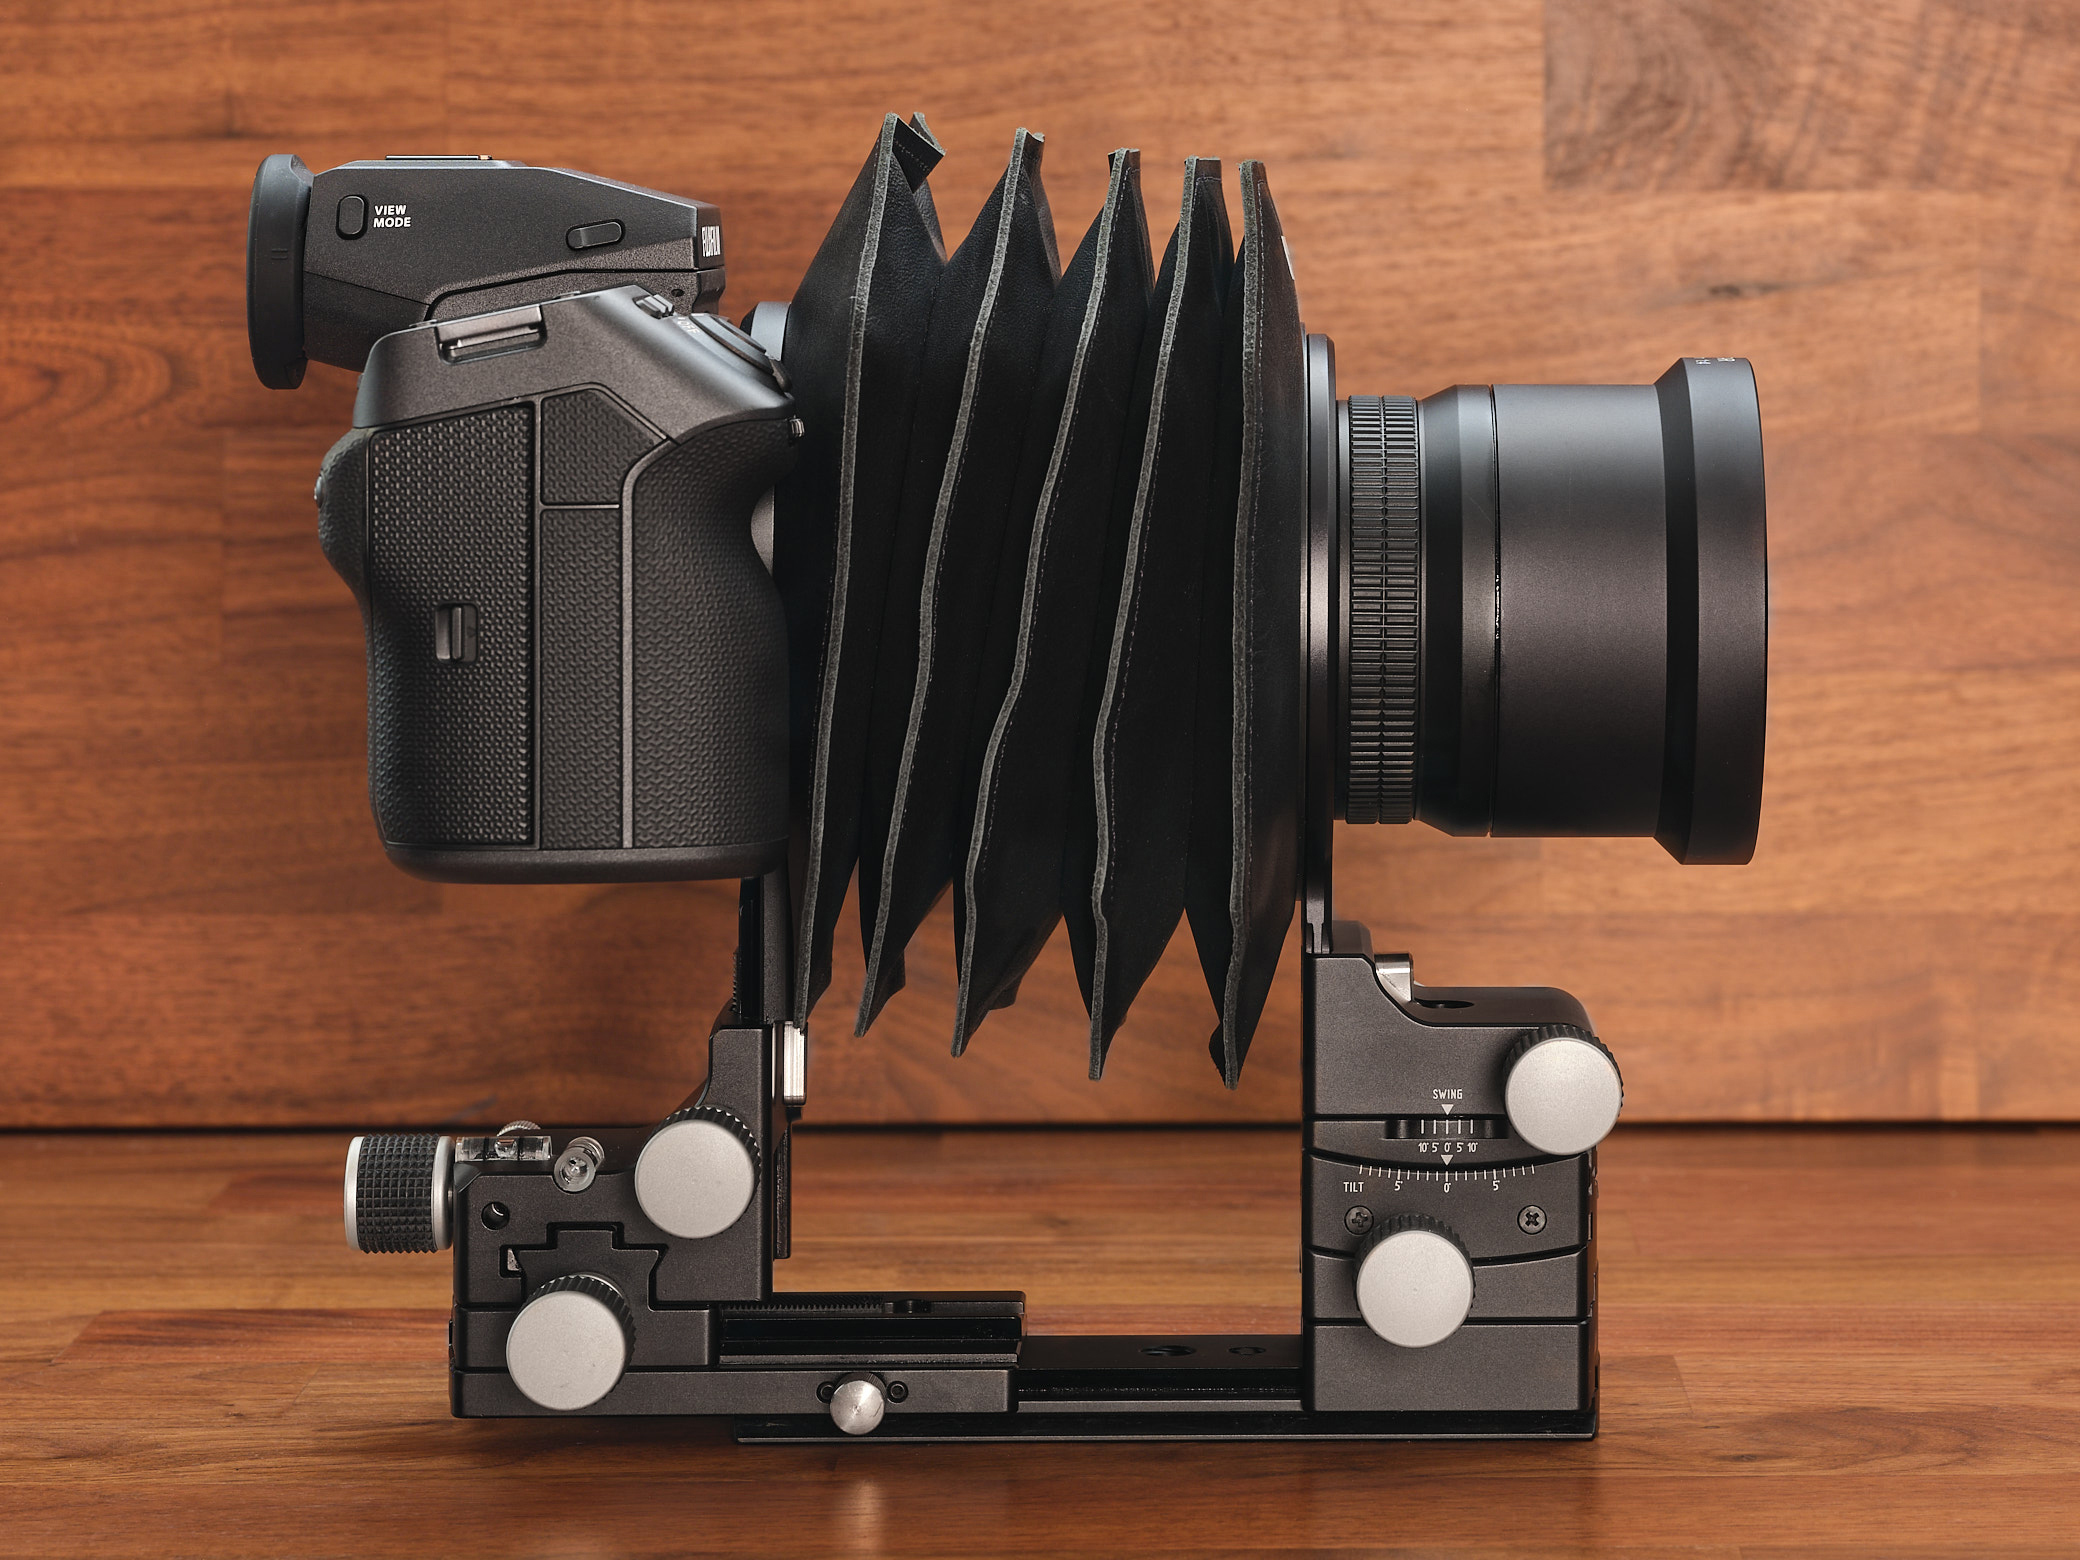
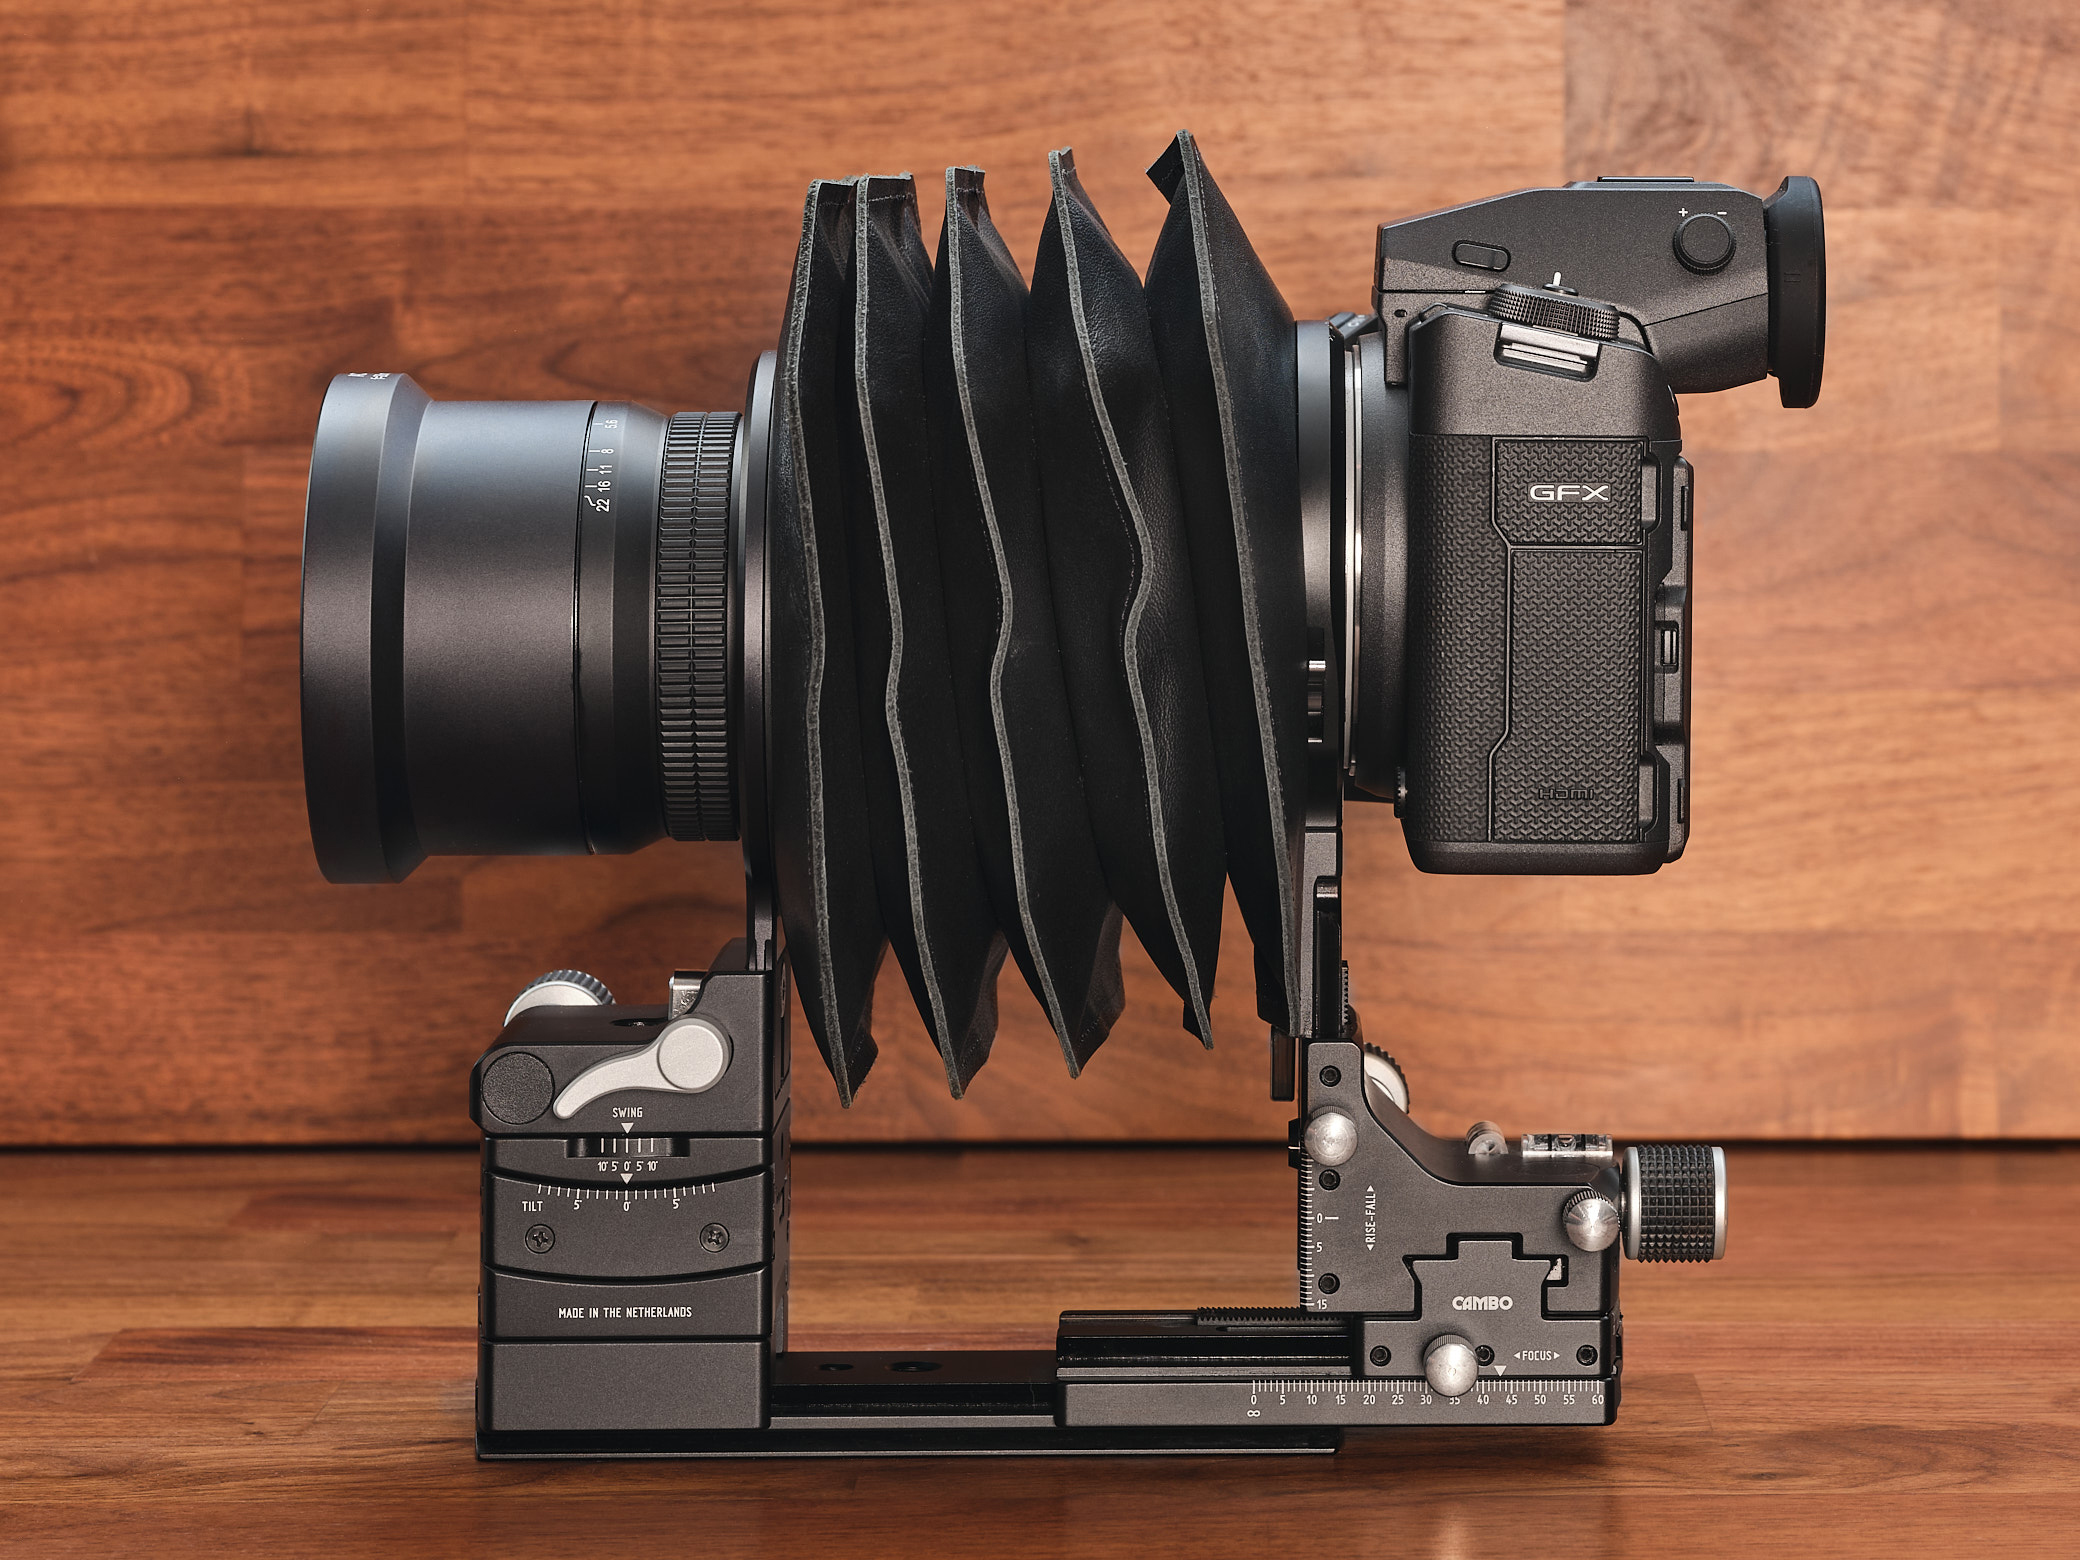
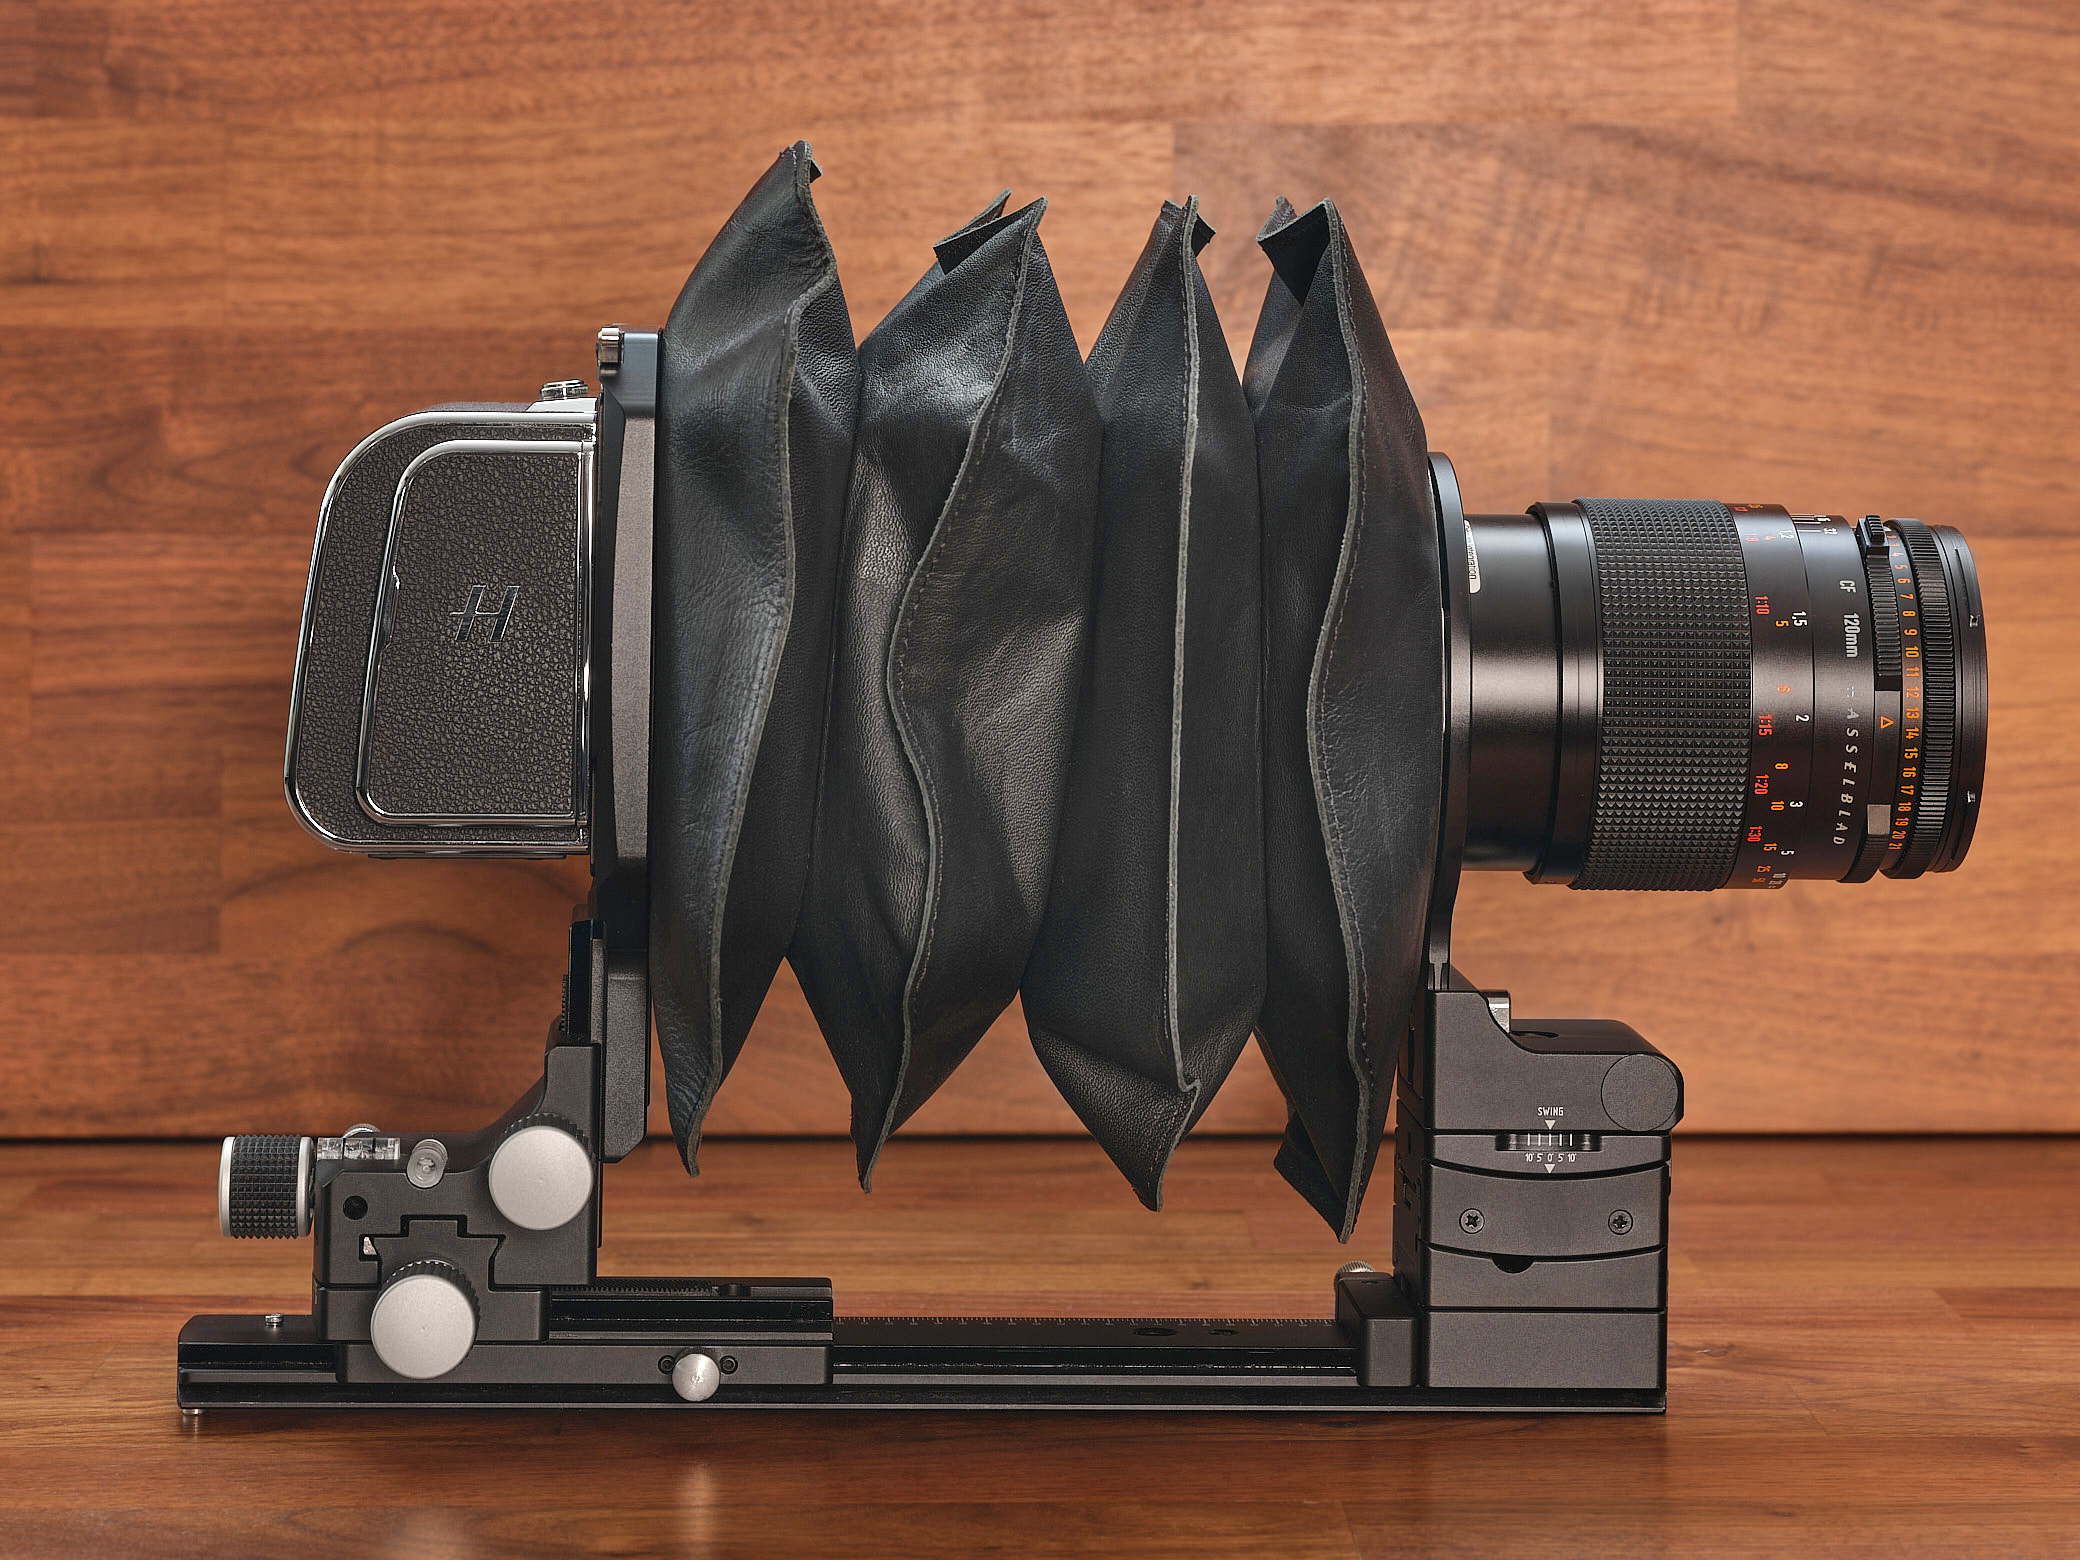
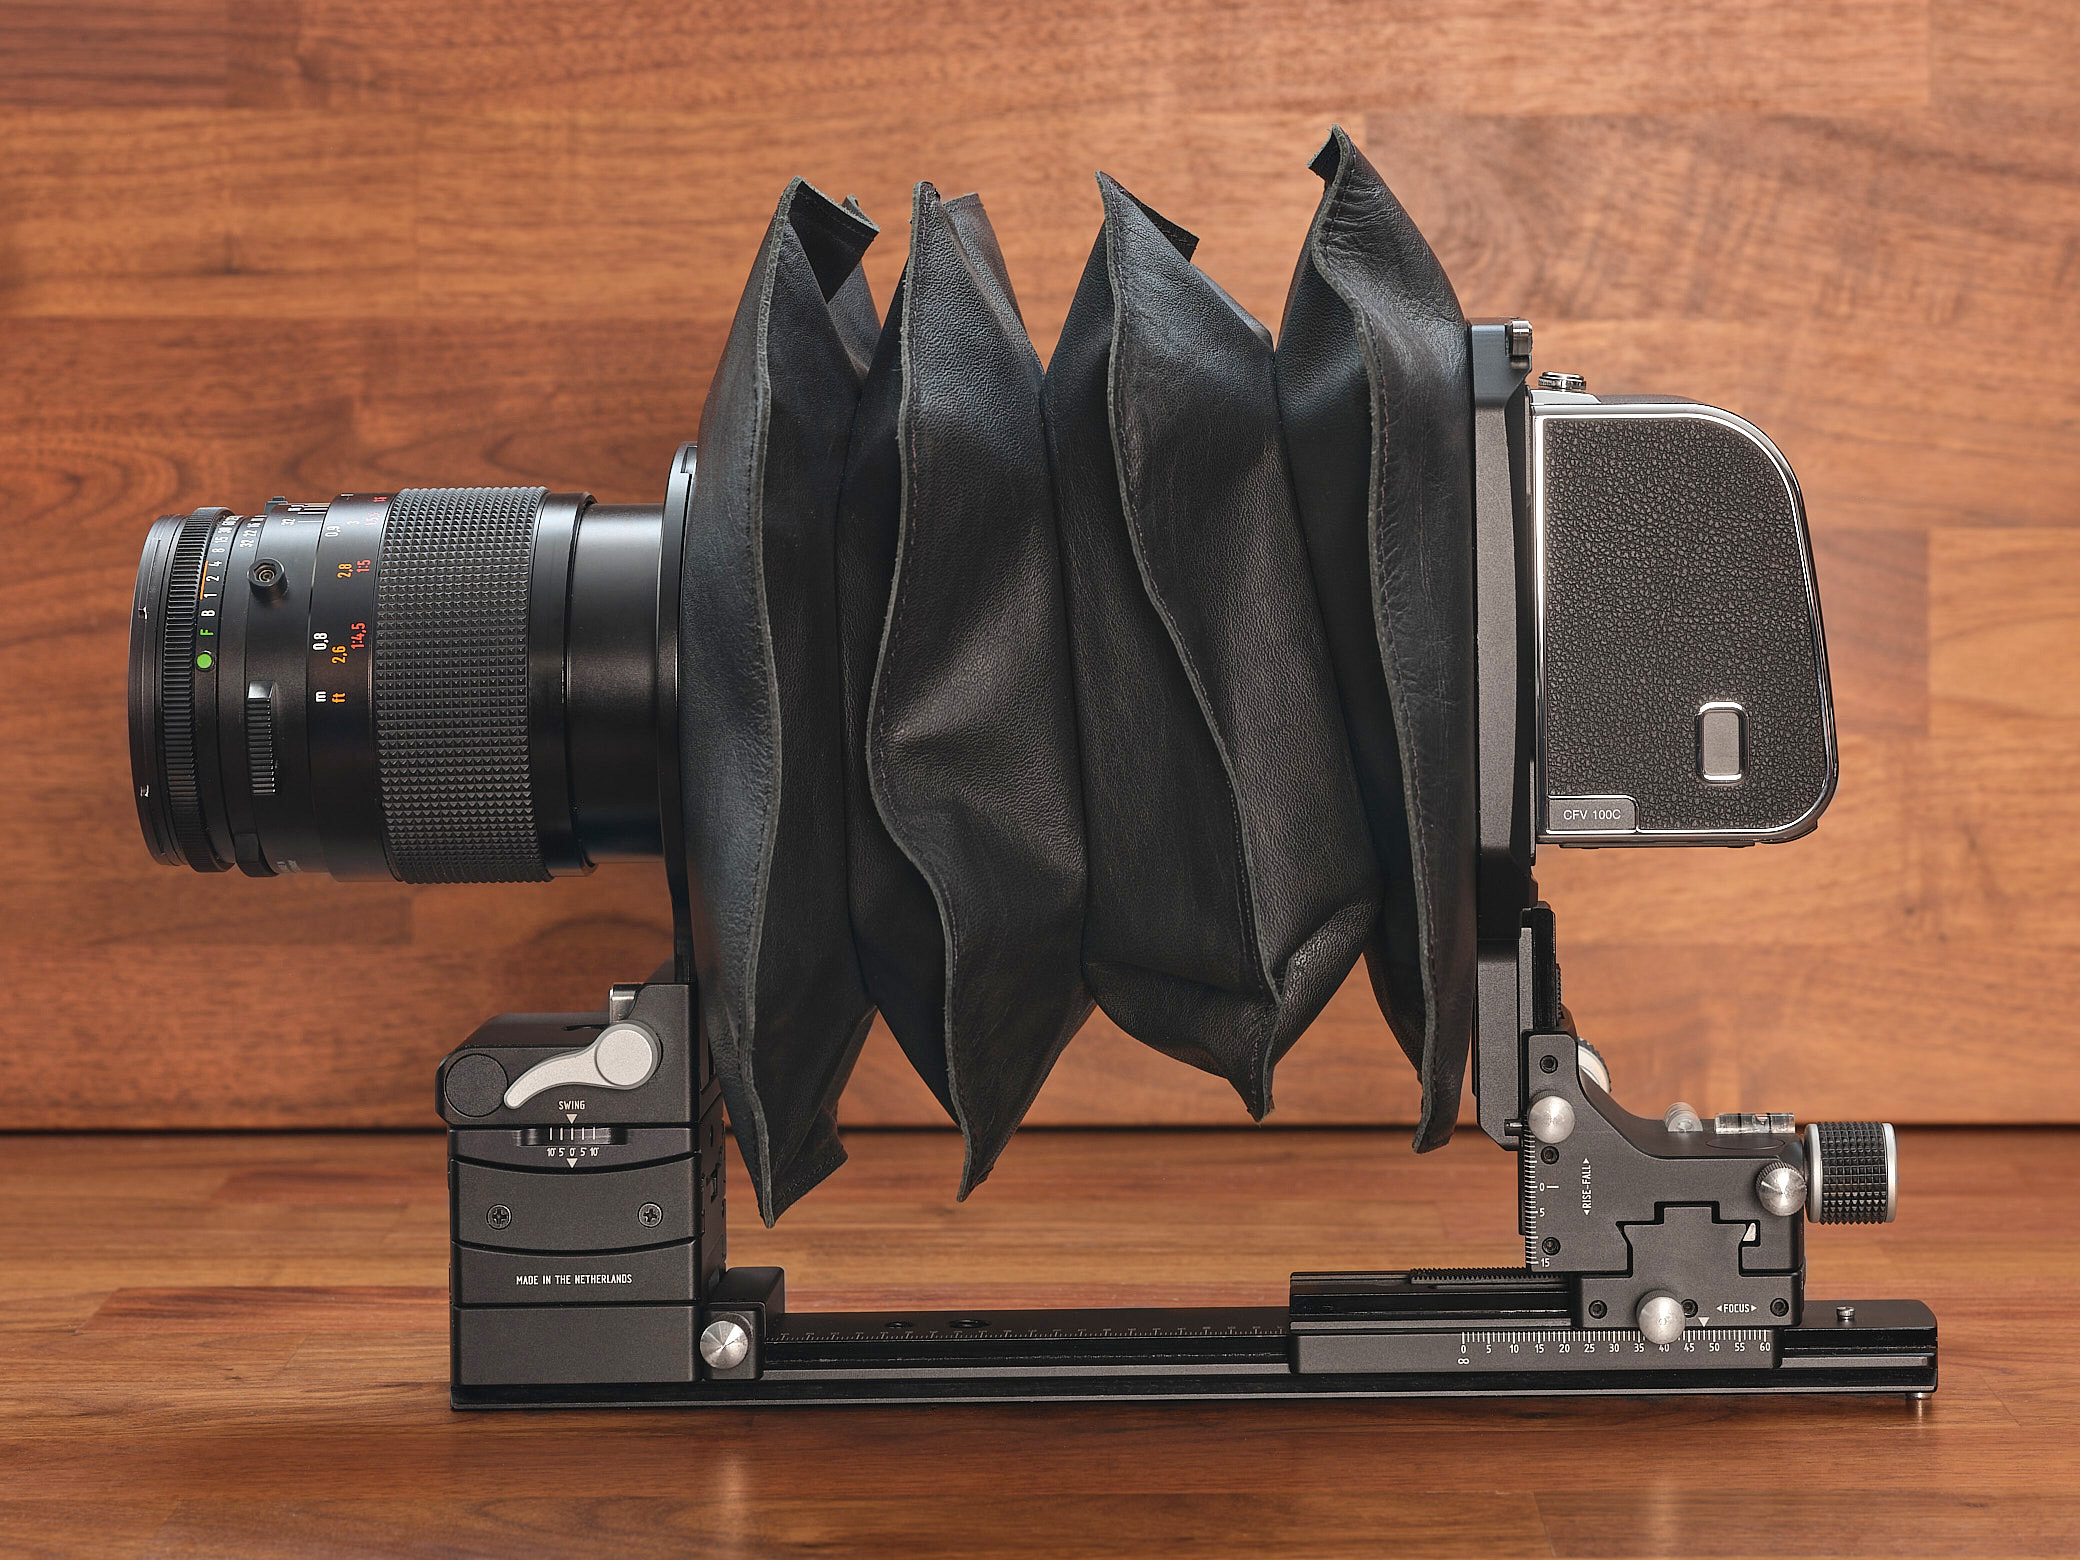
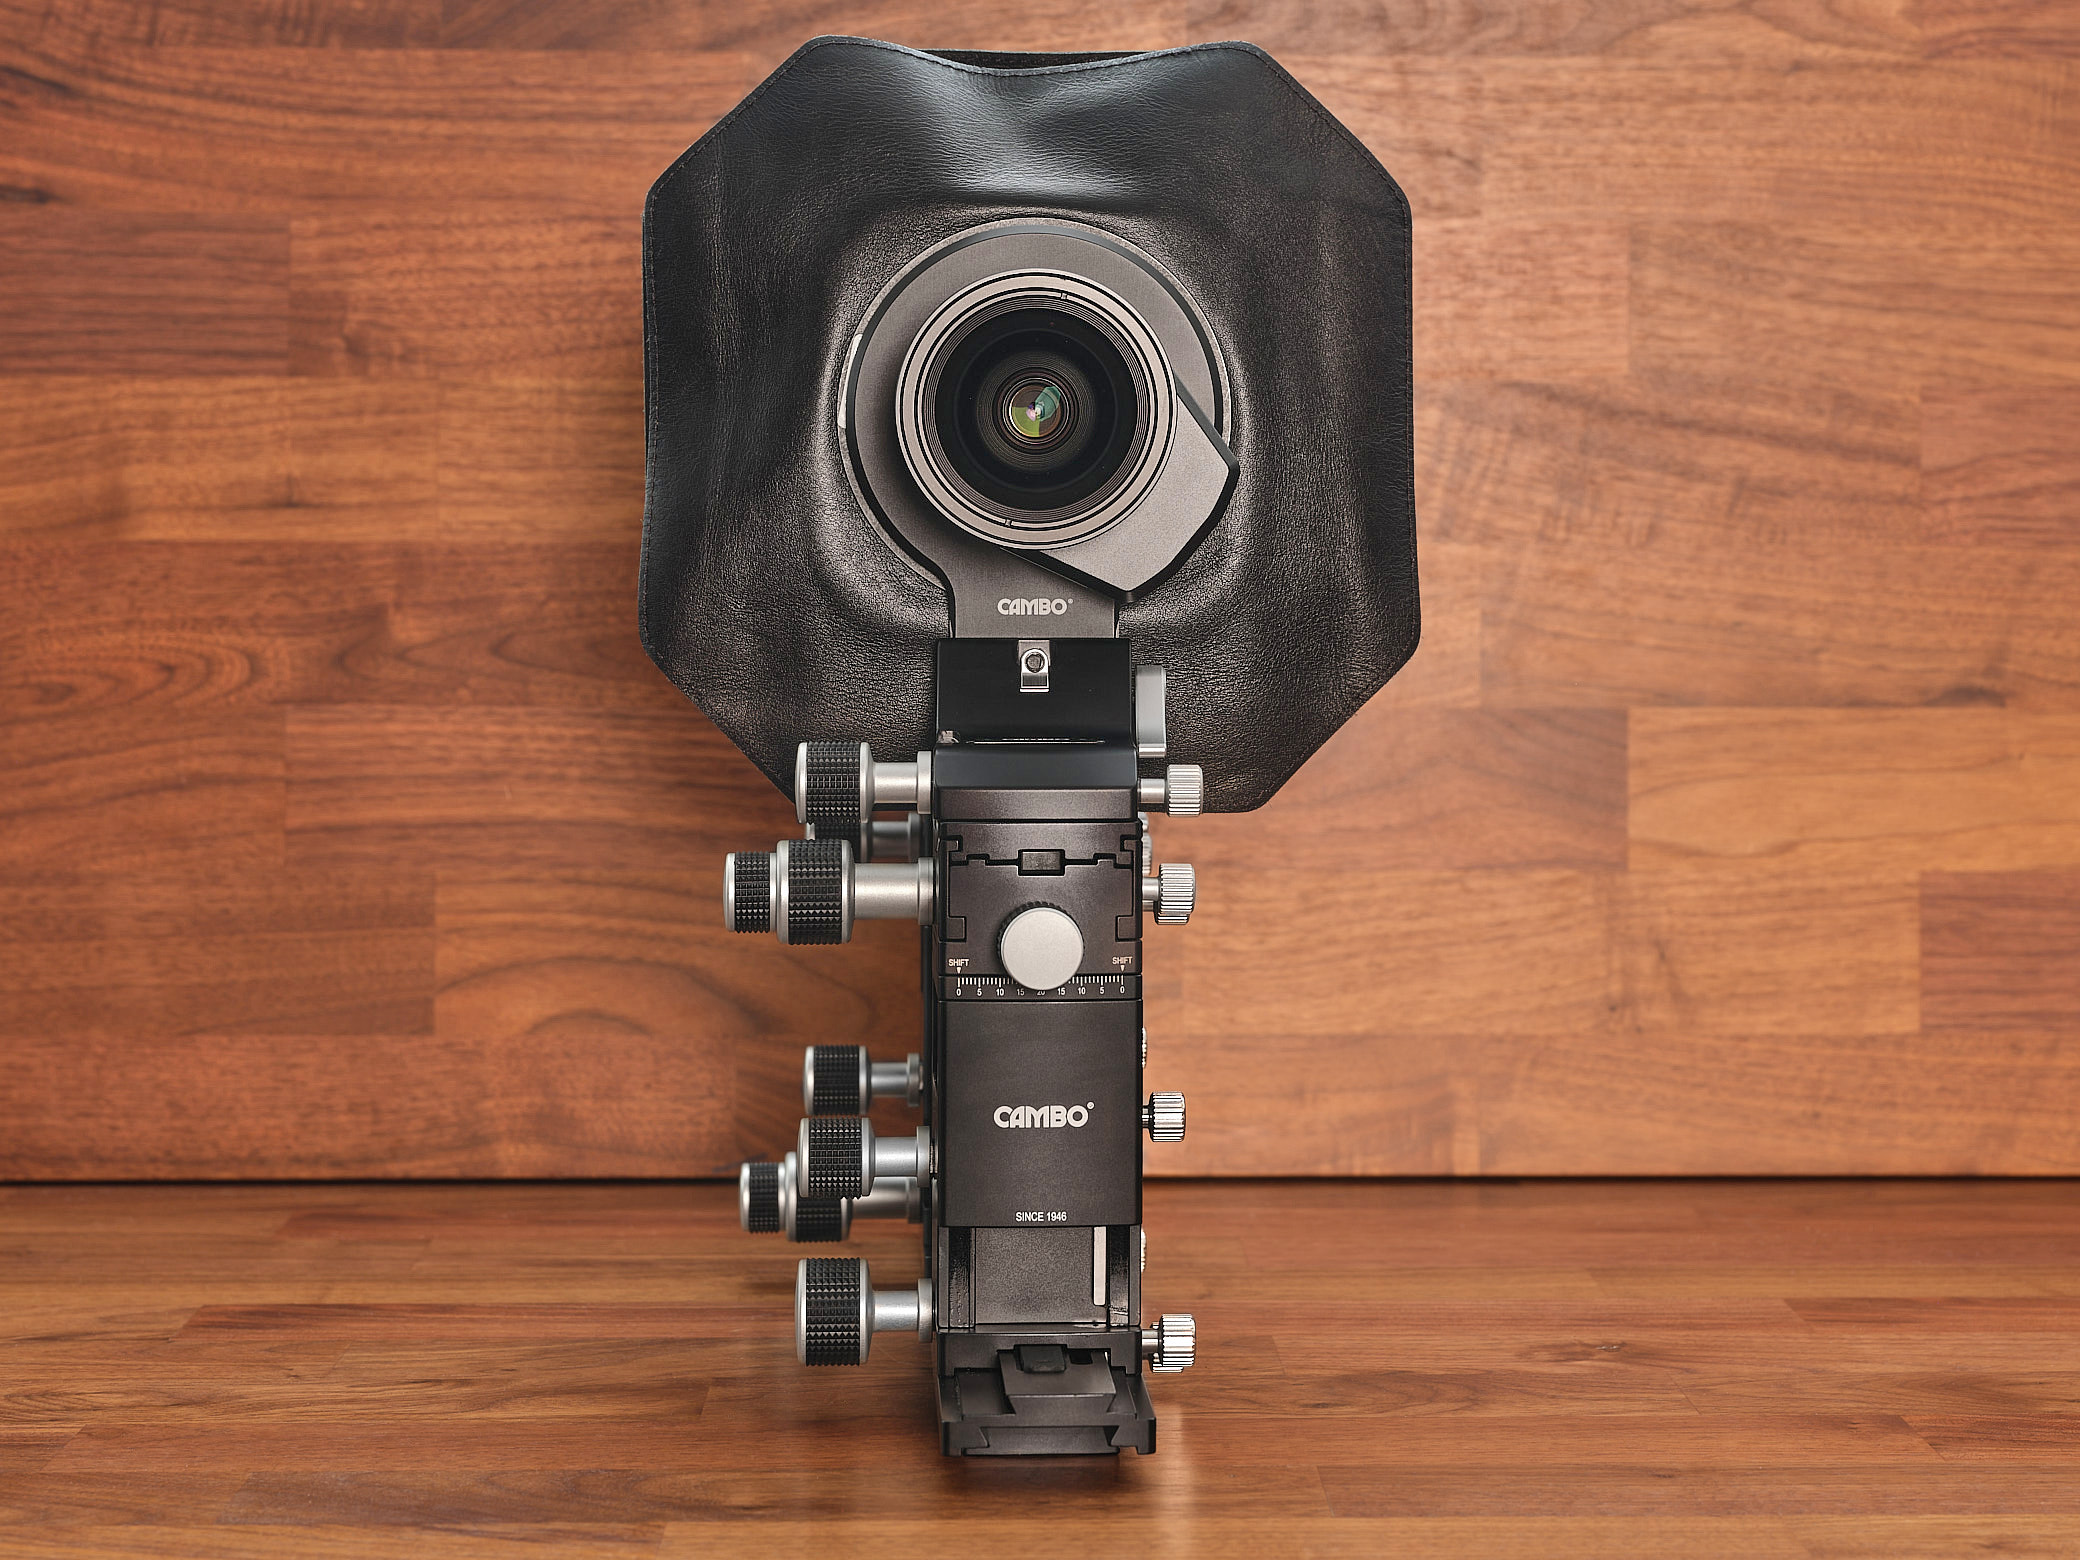
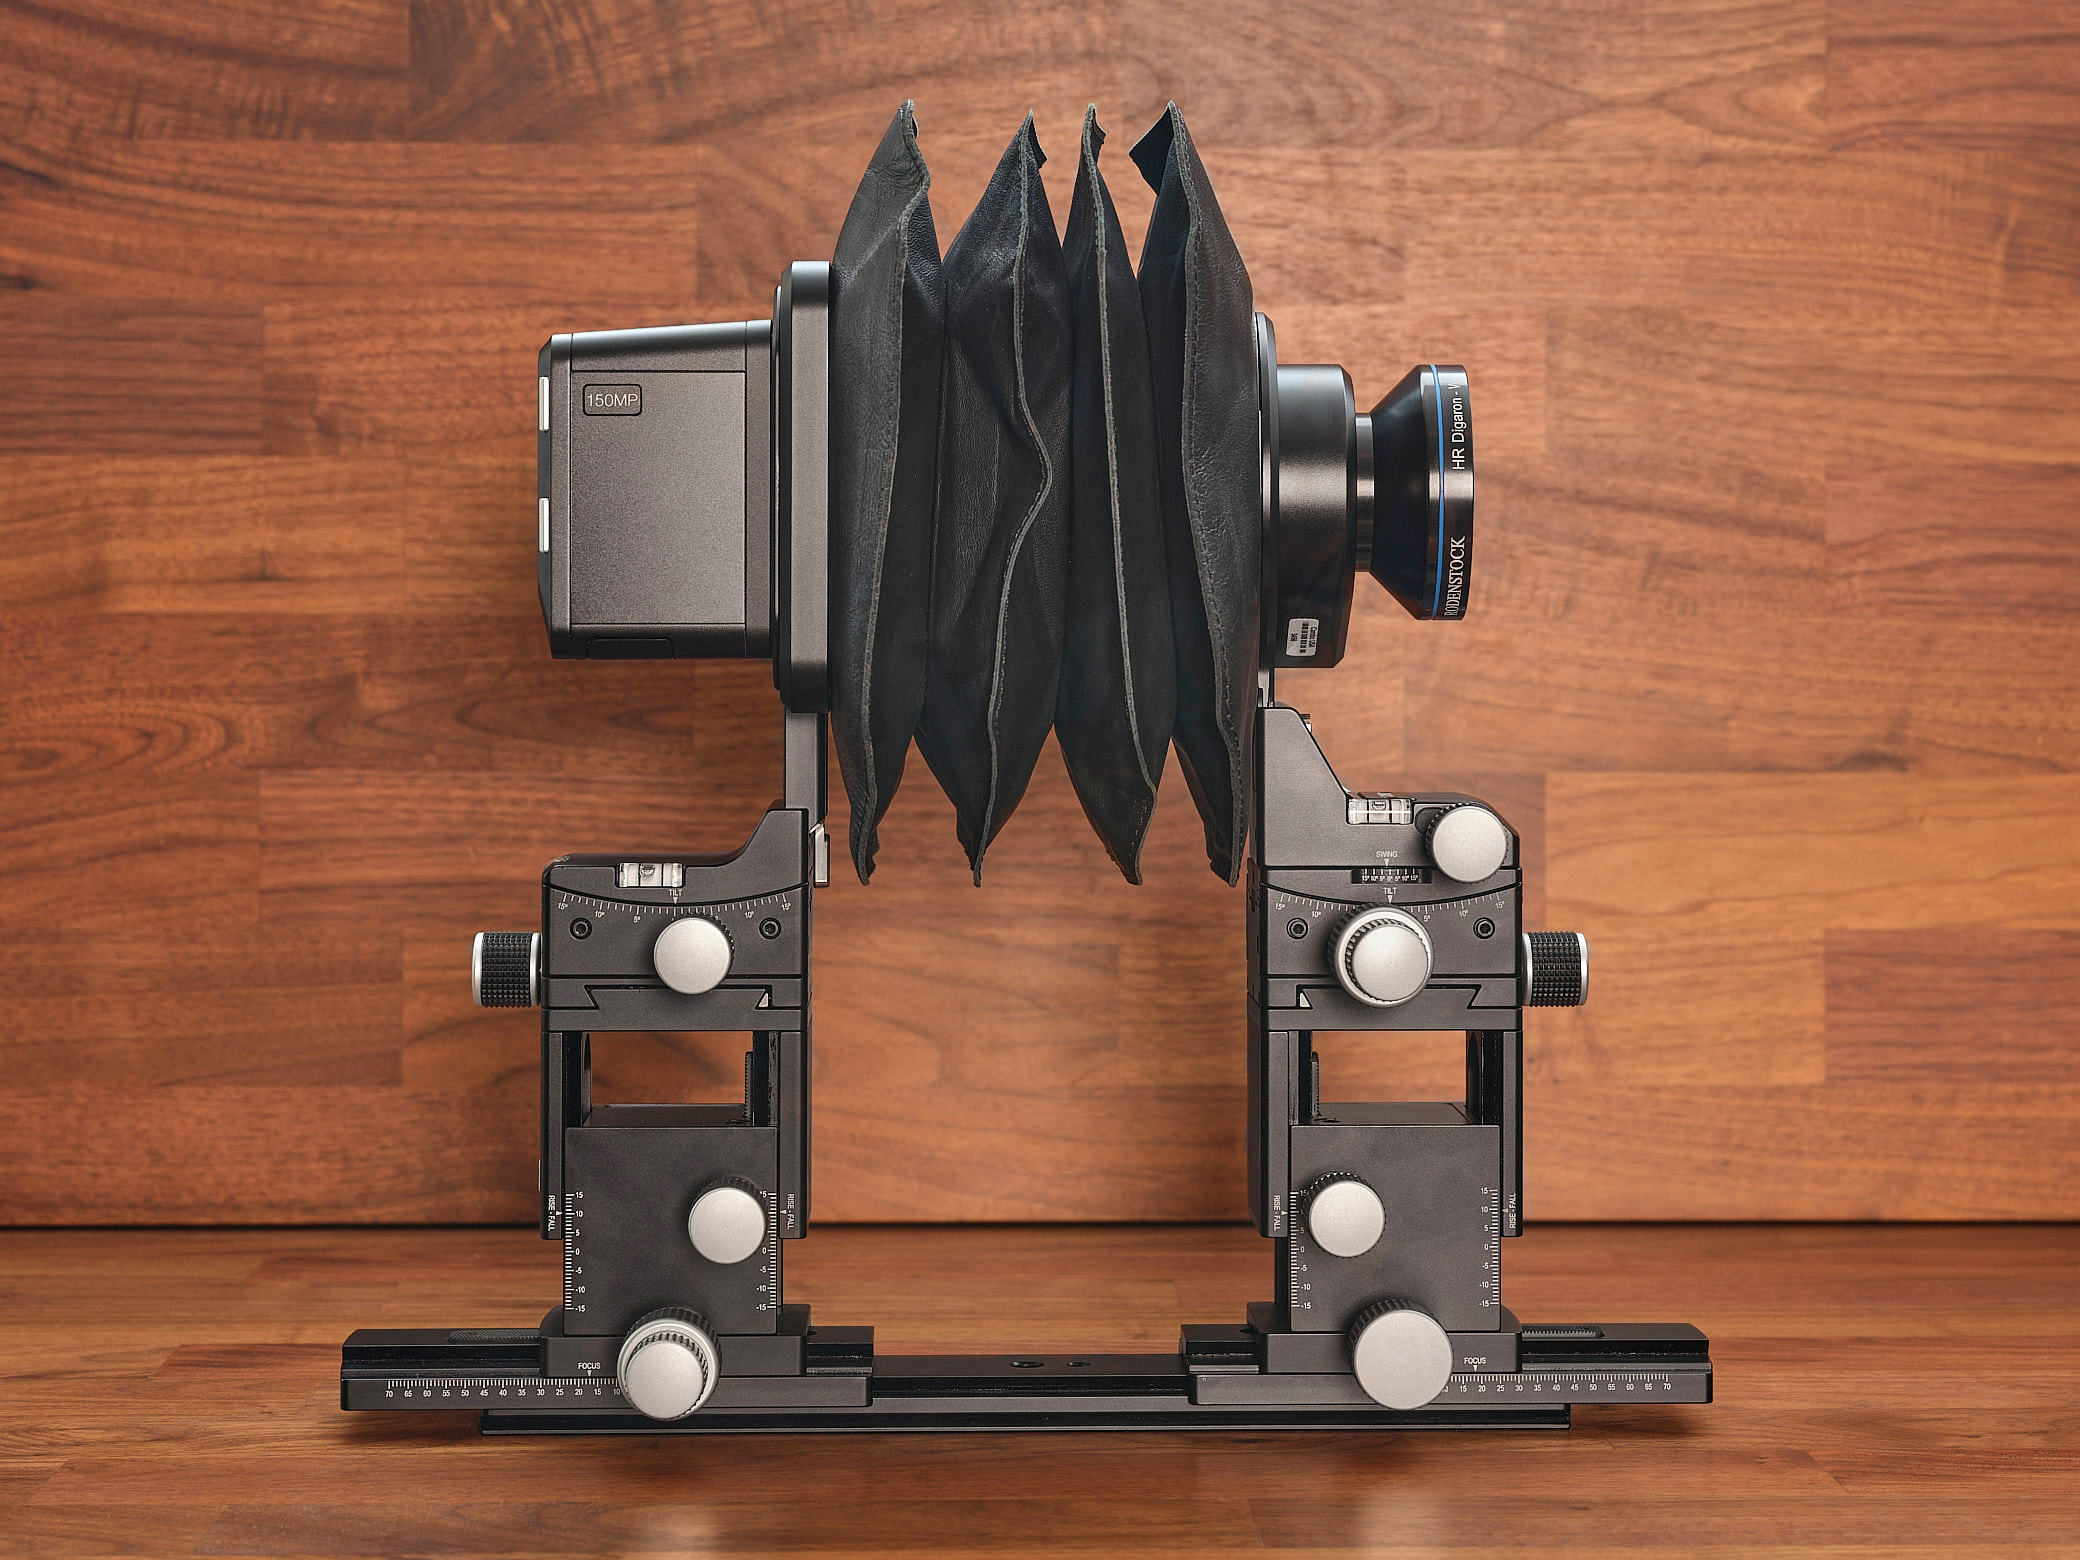
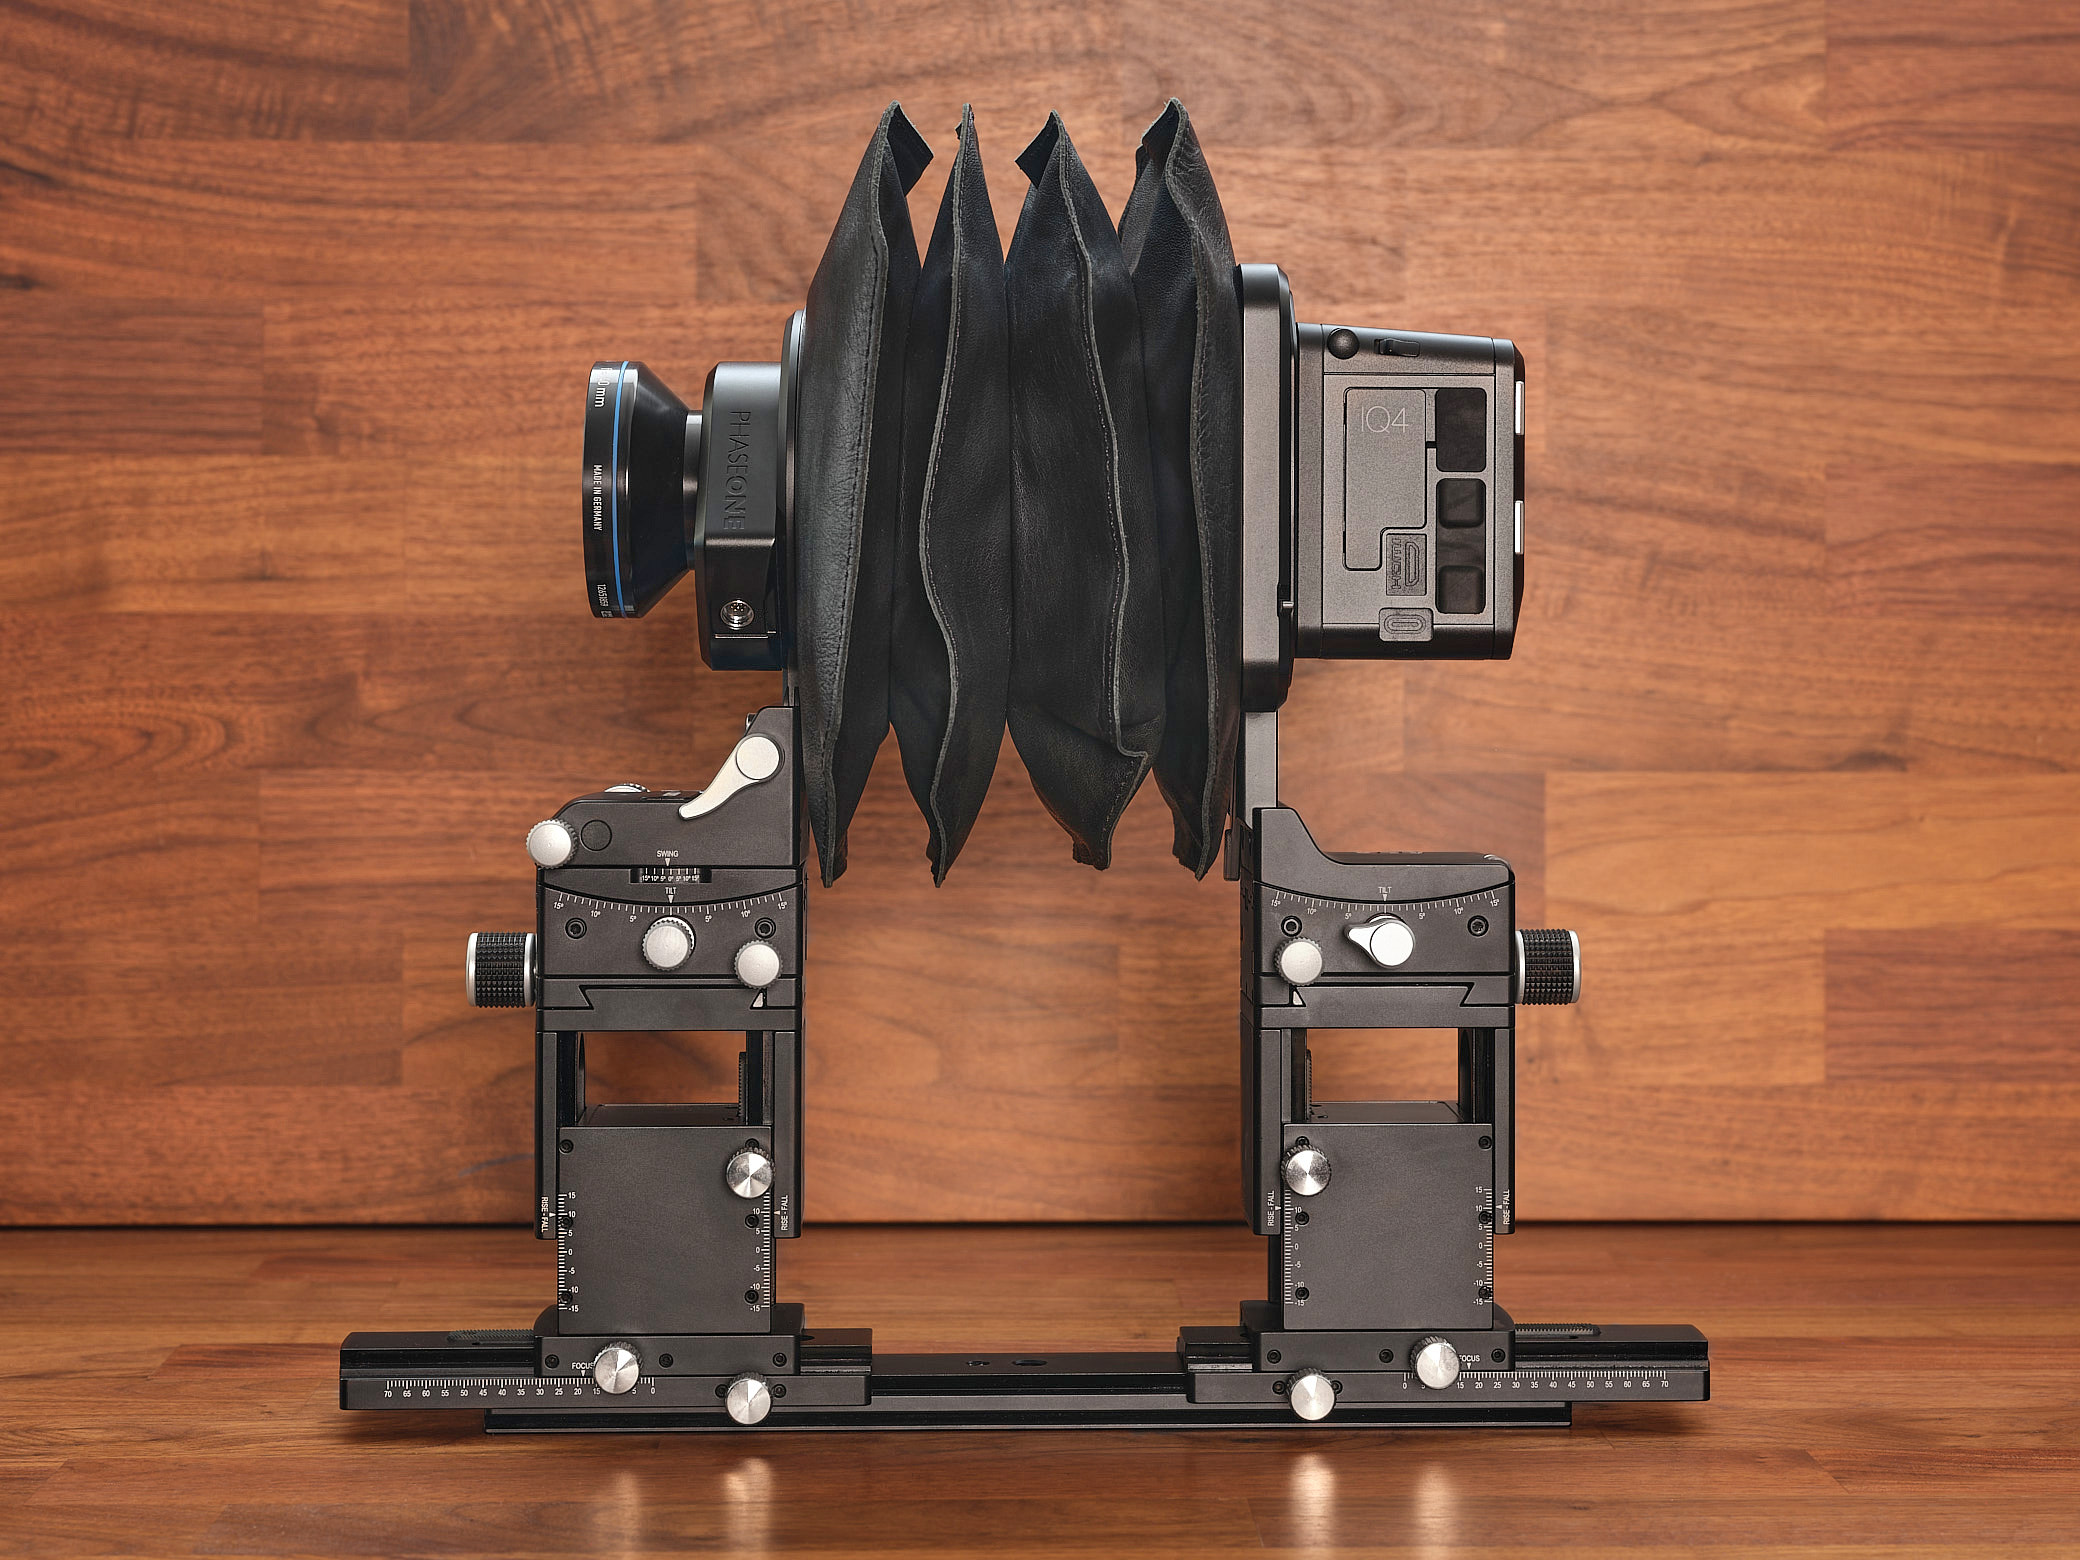
A few weeks ago we introduced a new camera for the archival industry, the Cambo RBC. It combines the stability of a pancake camera with the kind of flexibility only a bellows can offer. No matter which lens you’d like to use or how much extension the magnification requires, the RBC is the stable platform for it.
The beauty of a camera like this is its modularity. The front standard’s V-Groove accepts all kinds of lens adapters. High quality art reproduction and film digitisation require dedicated lenses. Some of these lenses only deliver their optimum performance in a limited range. In that range however, they are excellent. Let’s look into this.
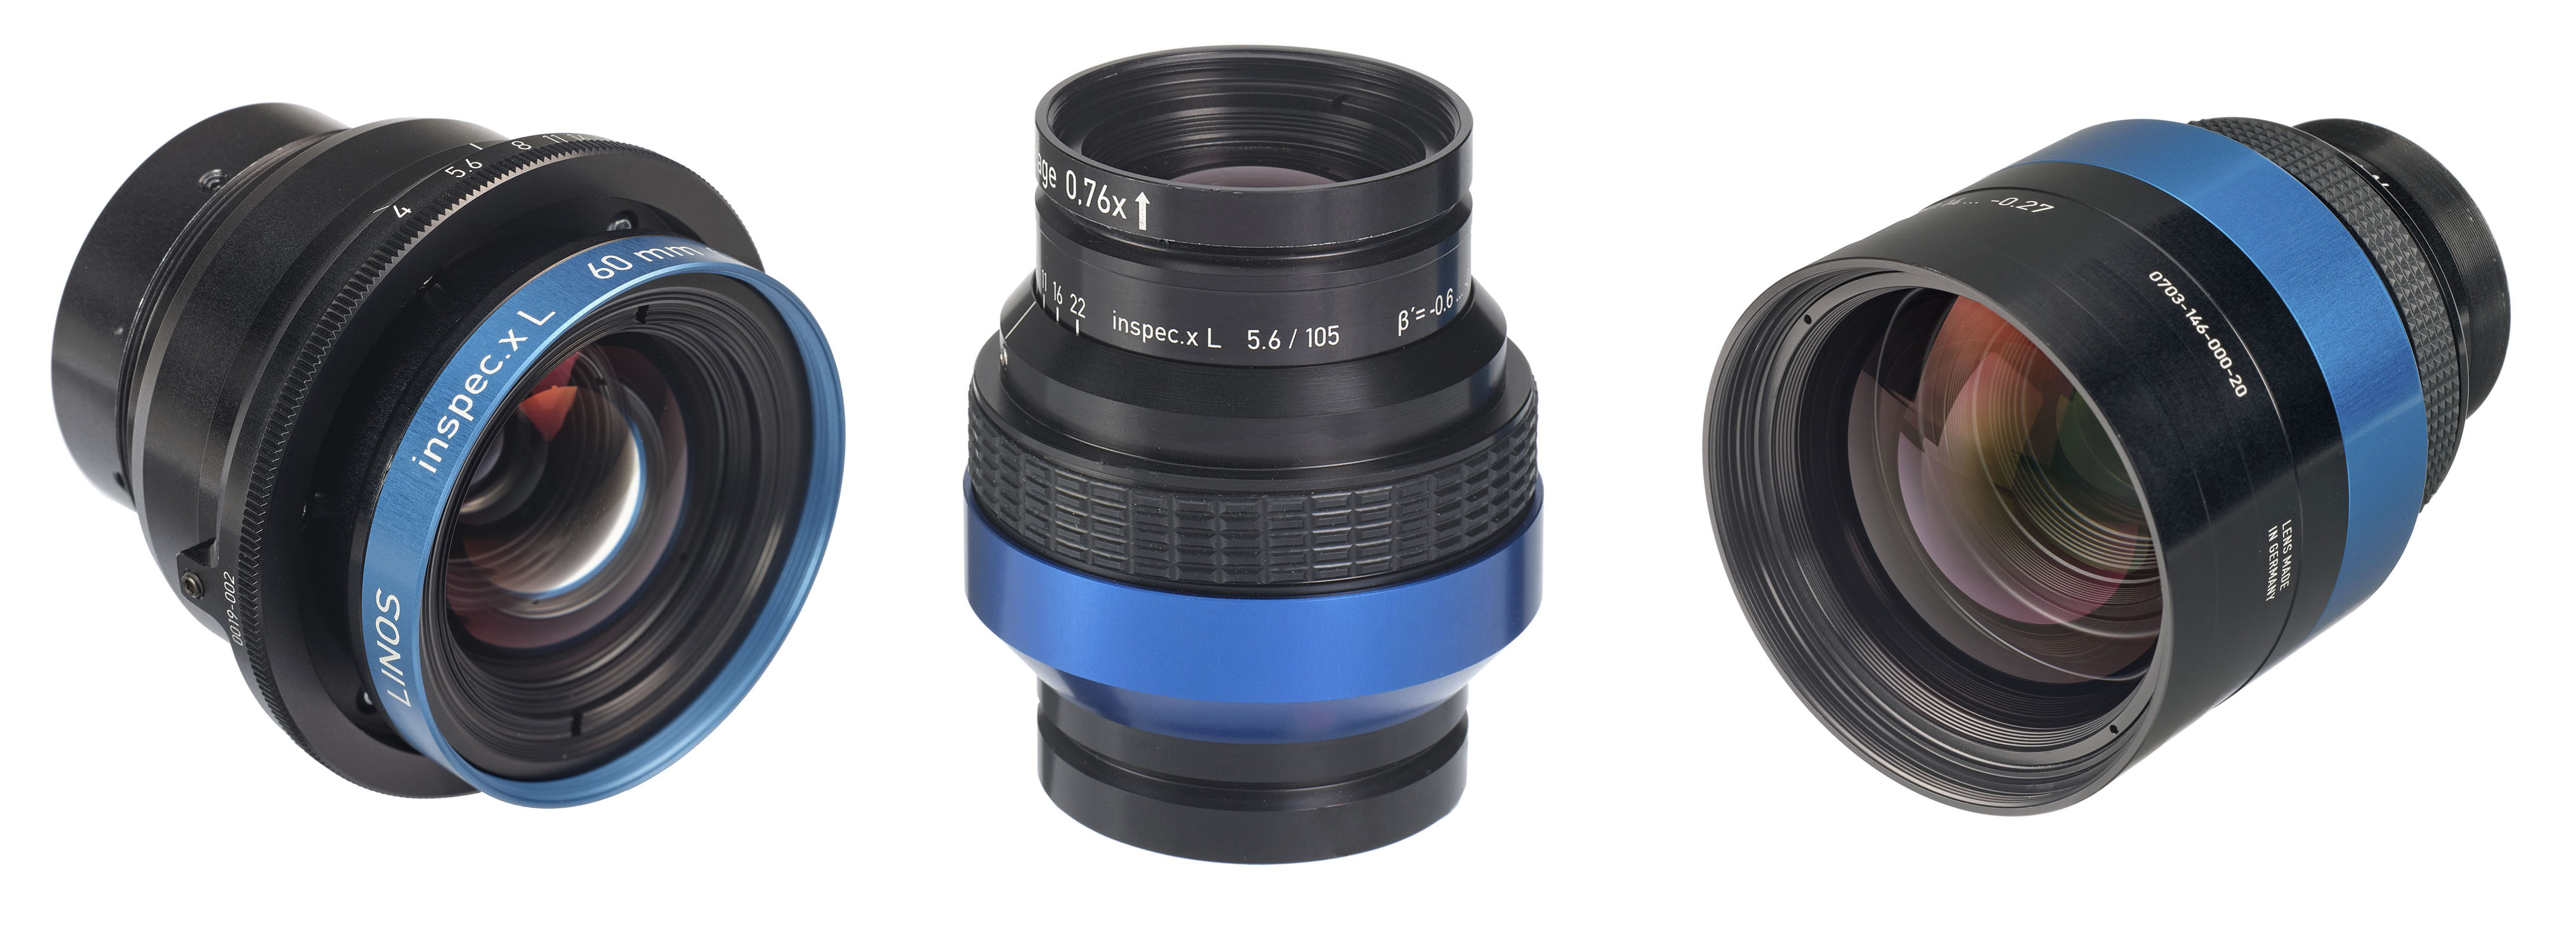
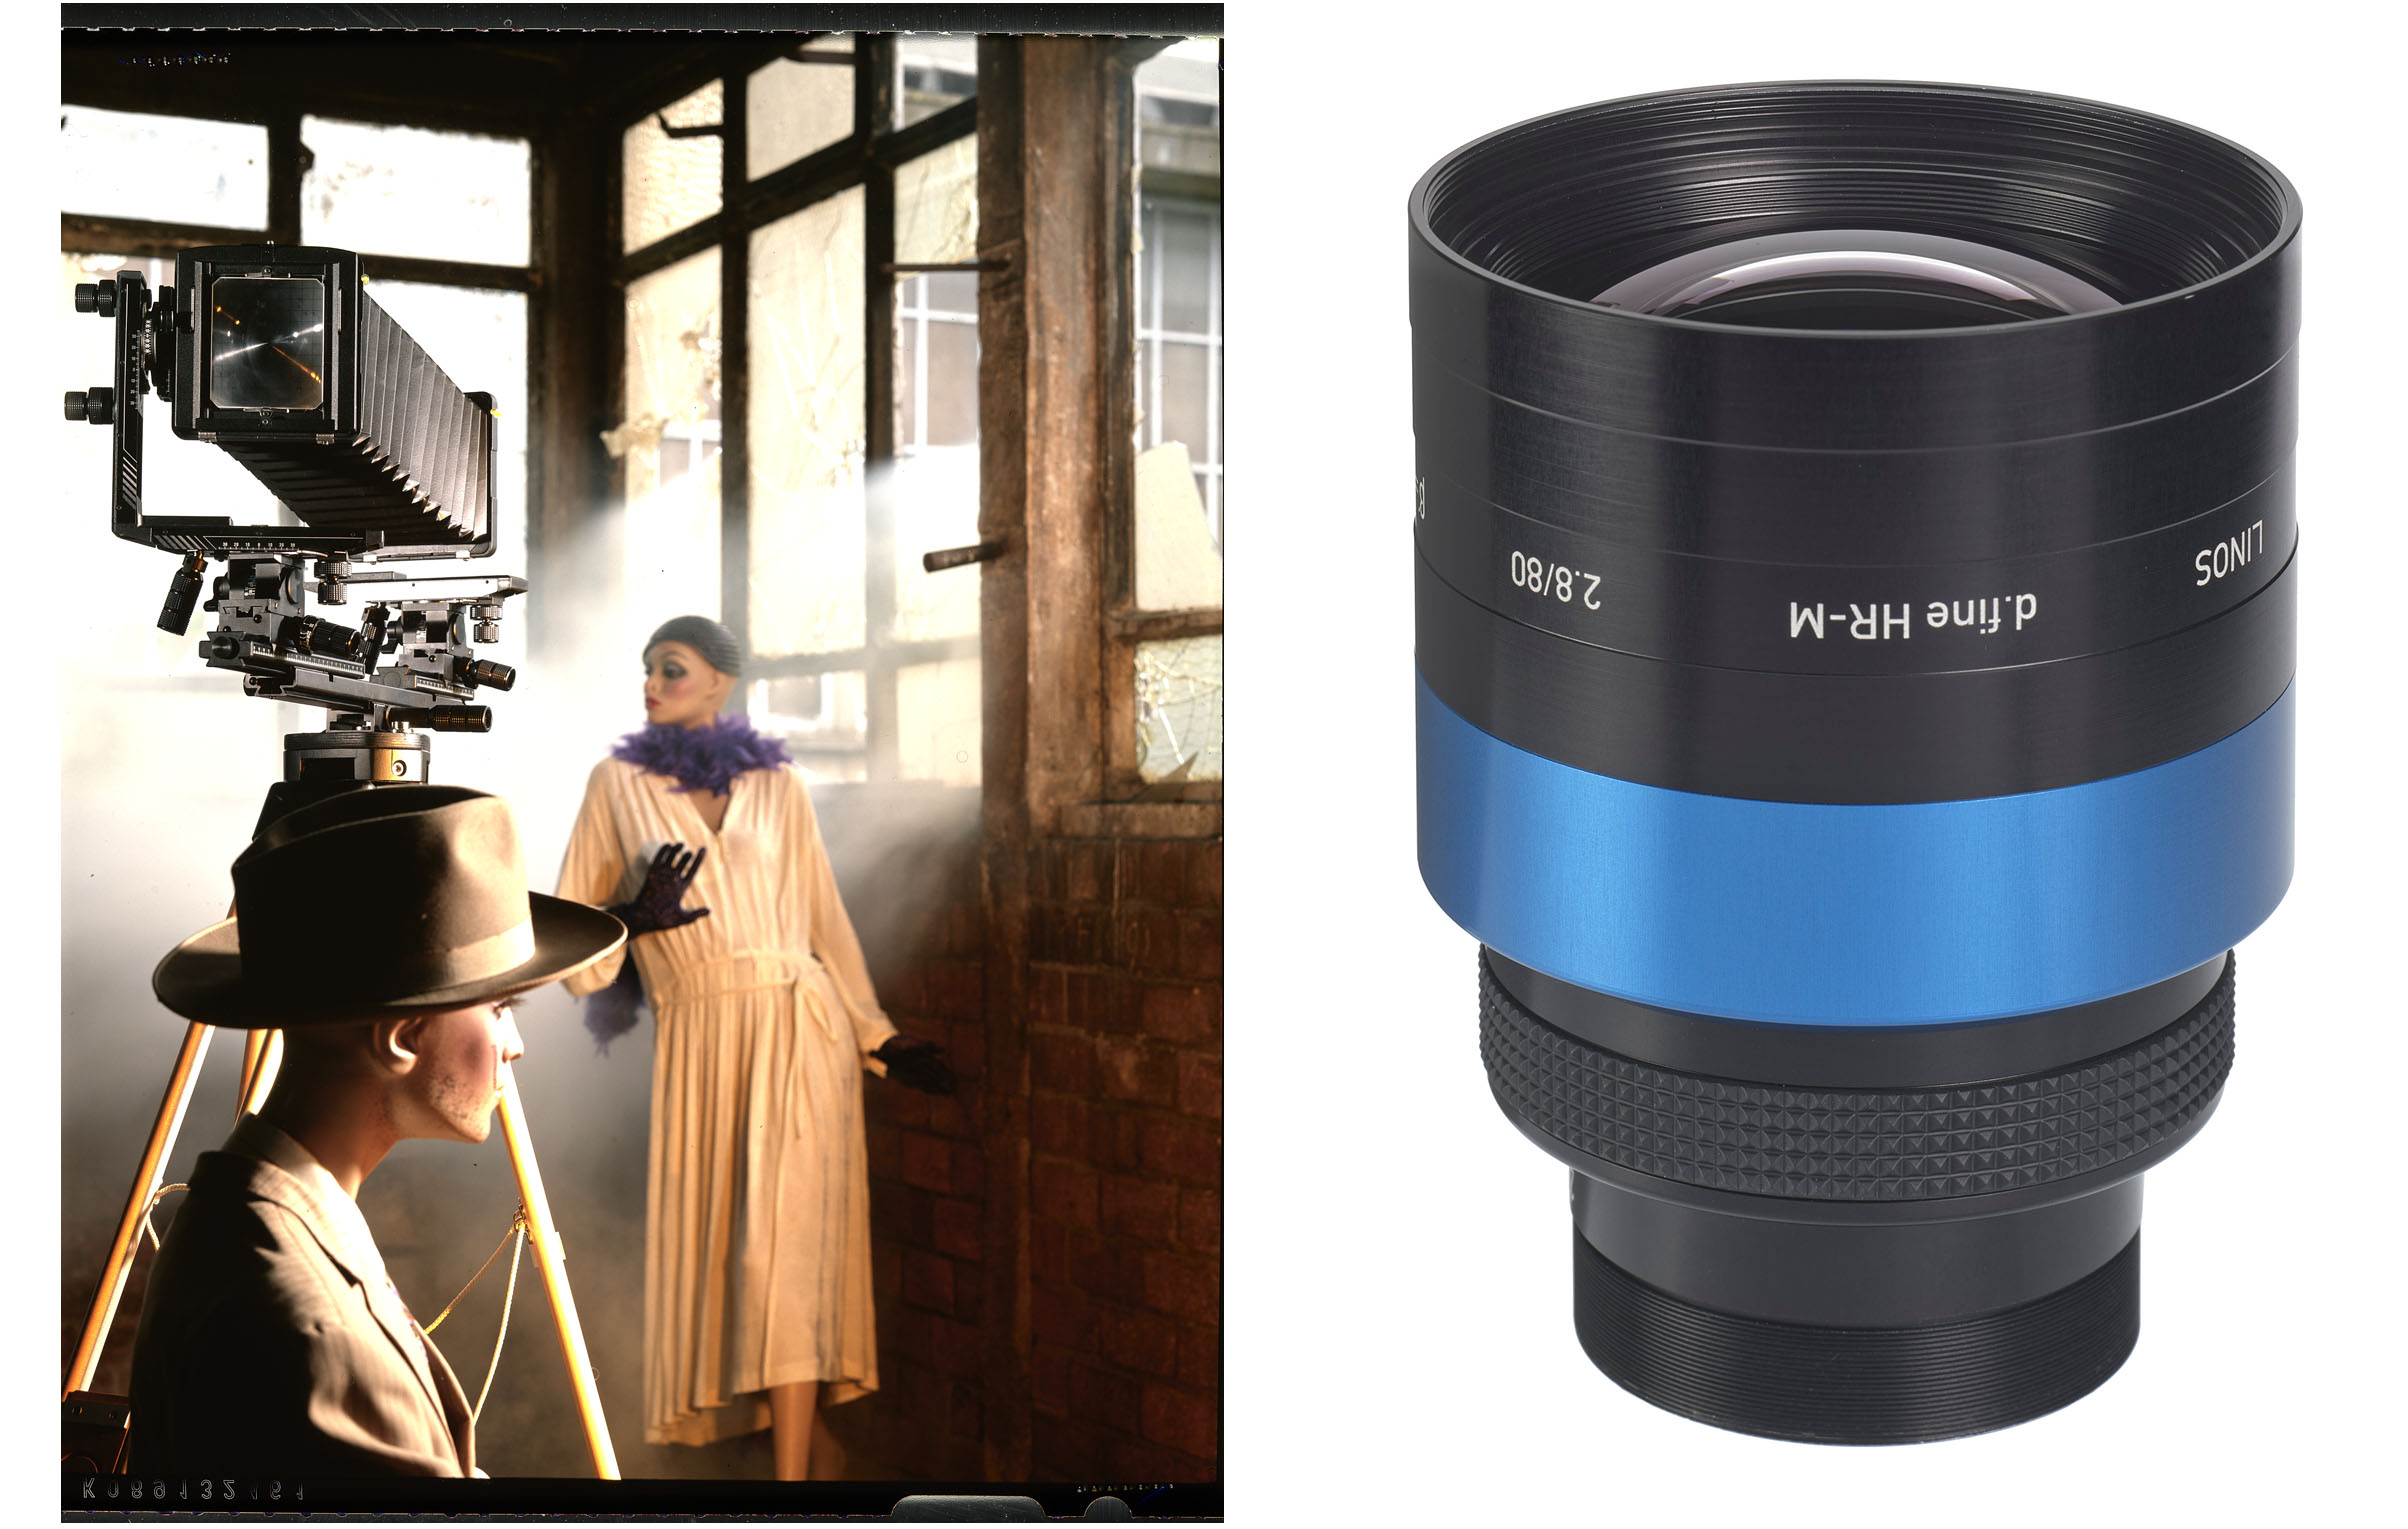
Until recently Rodenstock* supplied their HR-Digaron 5.6/105 Macro. A lens with a manually adjustable floating element to optimise it for the desired magnification ratio. In this leaflet is some more information about it. At first we were pretty disappointed to hear about its discontinuation. Testing some alternatives was very reassuring though. We assessed the following lenses: Linos* Inspec.x L 4.0/60, Linos dFine HR-M 2.8/80 0.09 and 0.2x and the Linos Inspec.x L 5.6/105 in its various incarnations. The latter’s design is related to the aforementioned HR-Digaron 105 Macro. Without the floating element.
*This well-known brand name is still used for the line of Digaron lenses. The manufacturer’s name is Excelitas. Their lenses for industrial applications bear the Linos designation.
A choice of Linos lenses
First of all, it’s not on us to advise the latest and greatest lenses for every application. An older Schneider Macro-Symmar may yield very good results. The Apo-Rodagon 90 is a capable lens for film digitisation and still available brand new at a moderate price. That’s why we also offer M39 lens plates for our RPM helical focusing mounts and RBC repro cameras.
However, to meet the highest quality levels as outlined in the Fadgi, Metamorfoze and ISO 19264 guidelines good glass is a necessity. Arthur Stauder, product manager at Excelitas, explains: “The Apo-Rodagon line has been designed for pixelsizes of 5-7µm. It’s a reliable choice for many applications. The more recent Inspec.x L series can handle pixel sizes of 3.5-5µm. The dFine HR lenses are future proof, meeting the requirements of sensors with pixel sizes as small as 2.5µm”.
A Golden Thread Object Level Target (OLT)
Quality is measurable. After all that’s the reason we have the aforementioned guidelines. Test targets of various sizes can be captured at the PPI needed according the standard. To analyse the files you may get your own software. Phase One made it more accessible by offering their cloud-based analysis service called NimbusQA. Create an account, simply upload the file and within minutes it generates a report.
Back to the lenses. The dFine HR-M 2.8/80 is available in 0.09 and 0.2x versions. To distinguish them you’ve got to look twice at the engraving.
There are distinctions in the results though. A 600PPI file captured with the 0.09 version gets a Fadgi**** score. Repeating the same test with the lens’ 0.2x counter part and we lose a star. As was to be expected. The 0.2 version was optimised for higher magnification ratios, not for art work or documents with a diagonal between 160 and 50cm but rather for larger film sizes, like 4×5″ – 8×10″. And indeed, repeating the test at 1500PPI gives the 0.2x version a Fadgi**** score.
The data sheet specifies the dFine’s image circle as 62,2mm. That’s rather small for use with a Phase One back, but Linos seems to err on the conservative side here. Even at infinity the lens only shows minimal light fall-off wide open. Stopped down to f5.6 the image is completely clean. Although it remains good practice to use a Flat Field Calibration. This Blog by Brad Kaye describes how to.
The dFine HR-M 2.8/80-0.2x is the lens of choice when it comes to 4×5, 5×7 and 8×10″ digitisation
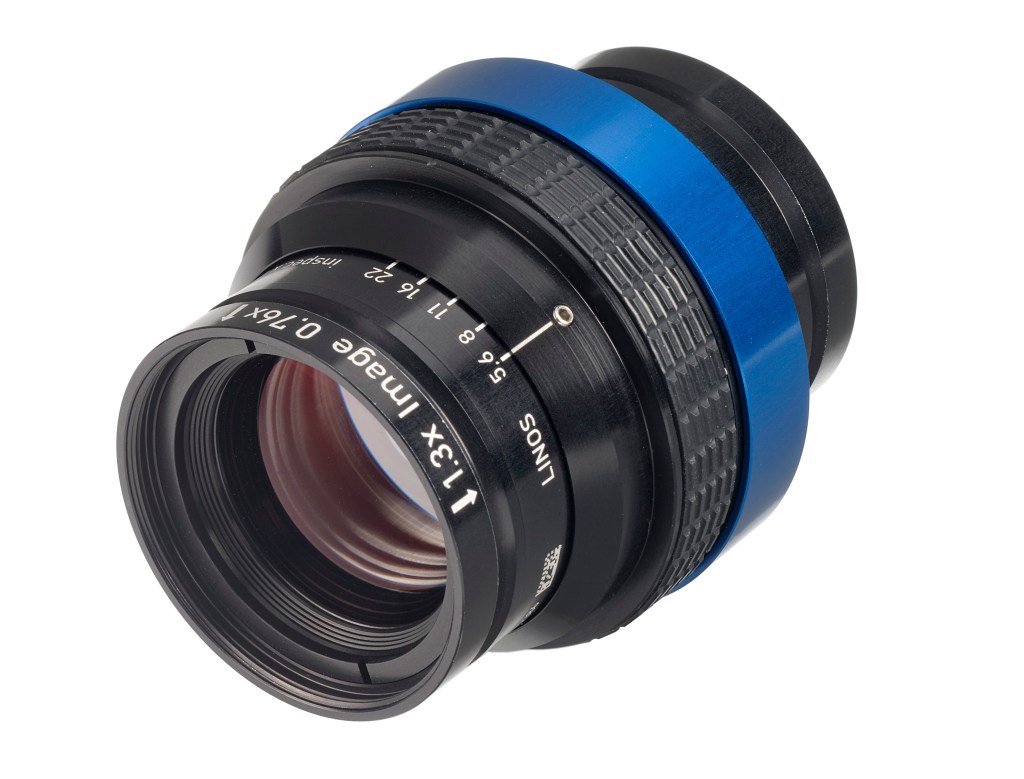
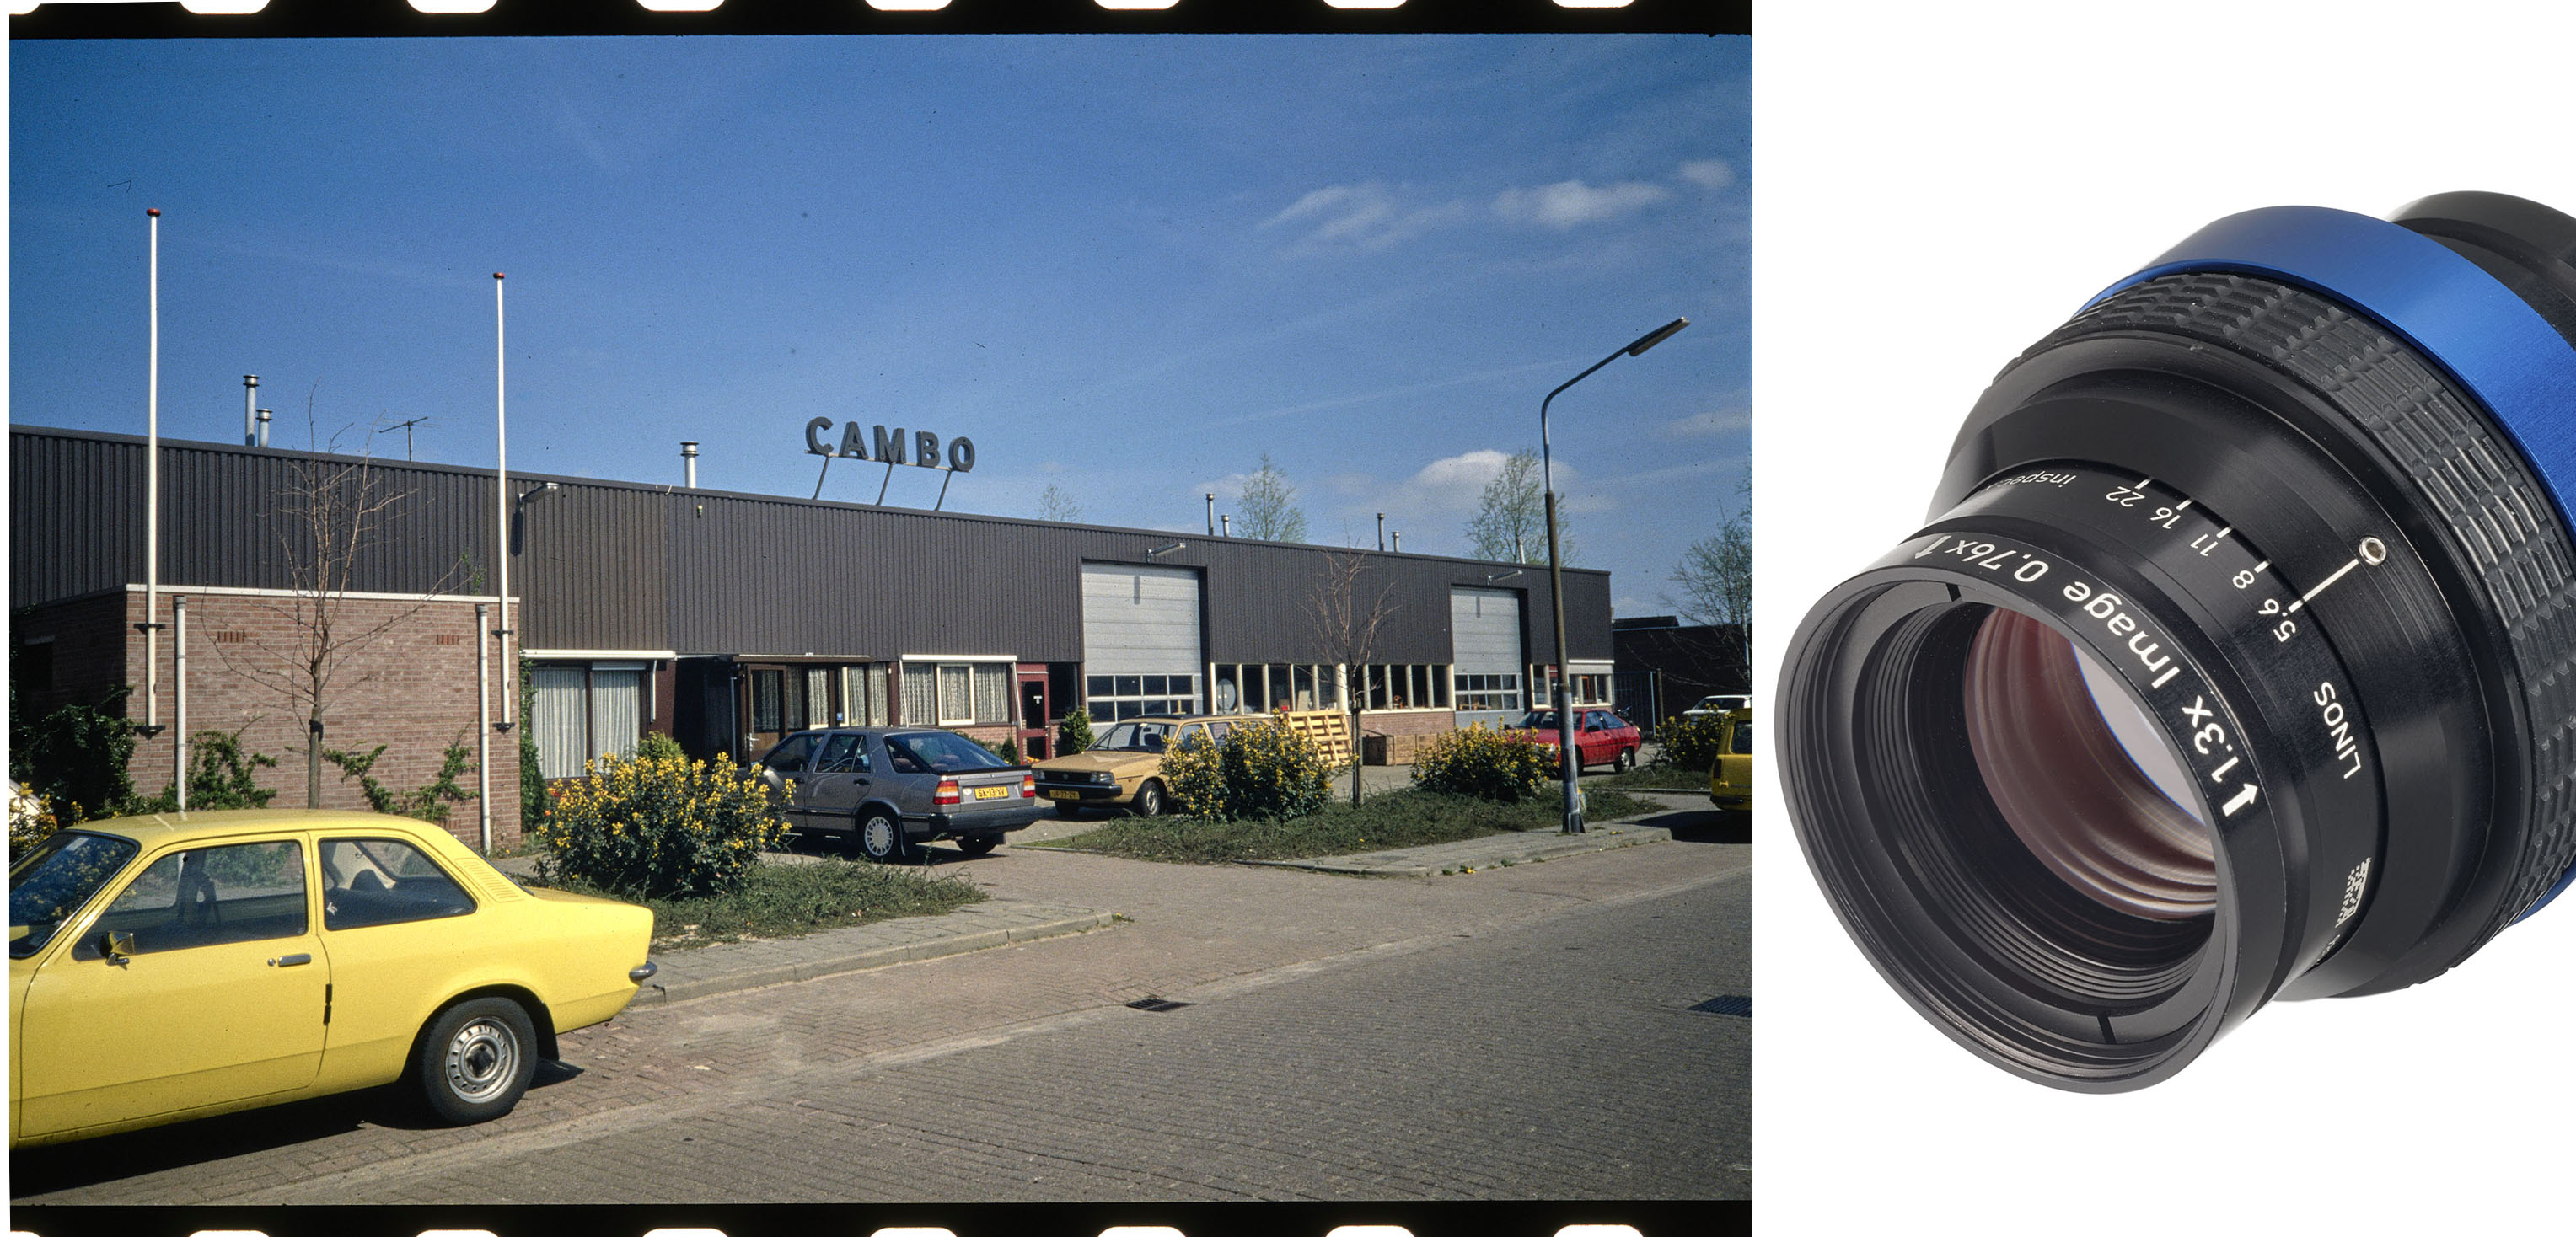
The Linos Inspec.x L 5.6/105 comes in no less than four versions. And there’s another unique feature to these lenses as well: The mount enables you to reverse the lens, which effectively reverses the optimum magnification ratio of the design as well. There are two arrows engraved at the barrel, each with an indicated magnification ratio.
Arrow marked 1.3x pointing towards sensor means best results around that ratio. Reverse it and it’s at its best around 0.76x.
The 0.76x version of the 105 turned out to be an excellent lens to digitise 35mm film. Using a Phase One IQ4 150 megapixel back results in a 9000PPI capture. The lens actually covers a broader range than expected. It still gives superb results for 120 film and handles 4×5″ film well. For larger film sizes the dFine HR-M 80 0.2 is the better choice.
Our recommendations:
Inspec.x L 4.0/60 for documents and art work – diagonals 60cm and larger
dFine HR-M 2.8/80 0.2x for smaller documents and art work and film sizes of 4×5″ and larger
Inspec.x L 5.6/105 0.76x for 35mm – 4×5″ film sizes
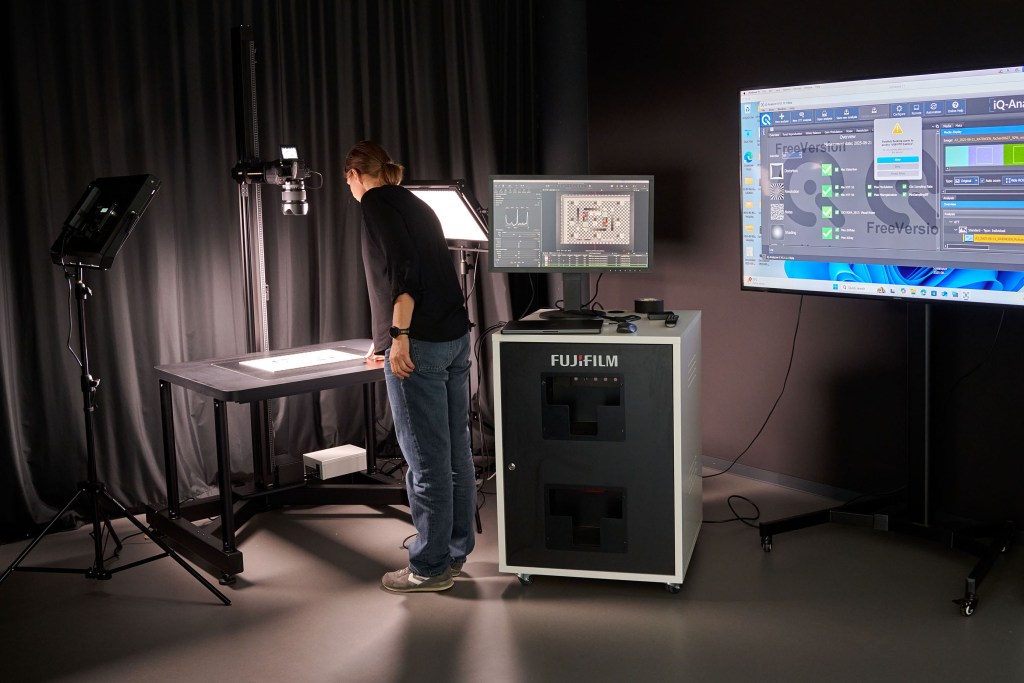
At Fujifilm’s European HQ in Ratingen, Germany. The “Tech Raum” is equipped with a Cambo RPS-255 motorised copy stand and Akurat D8 LEDs. Not shown in the picture is the Cambo RPS-500 film stage. For testing they rely on Image Engineering charts and software. It enables them to do a full analysis to see which ISO-19264 (the European standard) levels a certain solution can achieve.
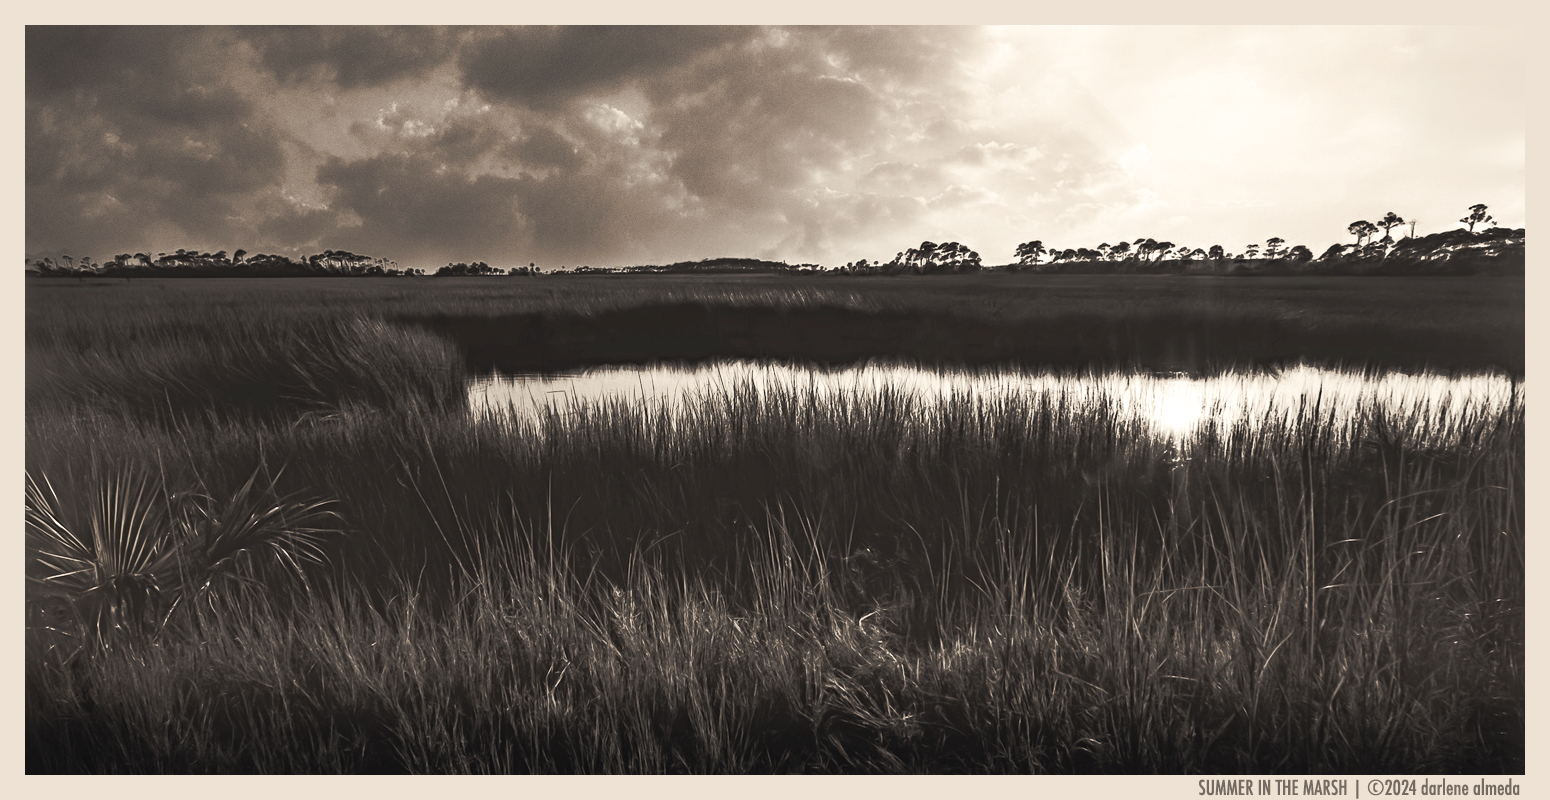
Darlene Almeda loves to share her passion for photography. Her own words and certainly true. When you’re a regular follower of a forum like GetDPI, you’ve probably come across her posts. Her contributions are always knowledgeable and to the point, without being marred by an inflated ego. The latter can make reading through forums pretty tiresome after all.
Replying to a client’s email about early pancake cameras, I noticed Darlene’s write-up about the Cambo Wide system. A camera from the film era, initially designed to offer large format photographers a compact tool to shoot wide-angle. A thorough article blending factual information about the Wide with Darlene’s personal experiences. Detailed enough to make my replies pretty redundant. With her kind permission, I quote the article from Darlene’s website here. After that, a few words about the photographer herself.
Words and photos by Darlene Almeda
My first 4×5 film setup was a Calumet 45N (made by Cambo), paired with a Schneider 210mm f/5.6 – a student kit from my early days studying product photography in advertising art school. That camera was my introduction to large format, and while it wasn’t glamorous, it got the job done and taught me the fundamentals. As I gained more experience with monorail cameras in the studio, I moved on to Linhof, Sinar, and Arca Swiss systems – mostly because I stumbled across good second-hand deals from local sellers. Still, I always had a soft spot for that early Cambo. I would lust after their Master model in the Calumet catalog and if the chance had come up to own one back then, I wouldn’t have hesitated.
Today, I’ve come full circle in a way. My current 6×12 panoramic film kit features the Cambo Wide 650- a camera I’ve grown to love for its simplicity and quality build. No bellows, no fuss – just a beautifully made tool that lets me shoot both 4×5 and 120 film. And if I feel like going digital, I can even stitch a panoramic image using my digital back.
This page is about my experiences with the Cambo Wide 650 – how I carry it, how I use it, and why it’s earned a permanent place in my kit. Funny how some cameras just find their way back into your hands, and this time, I’m not letting go.
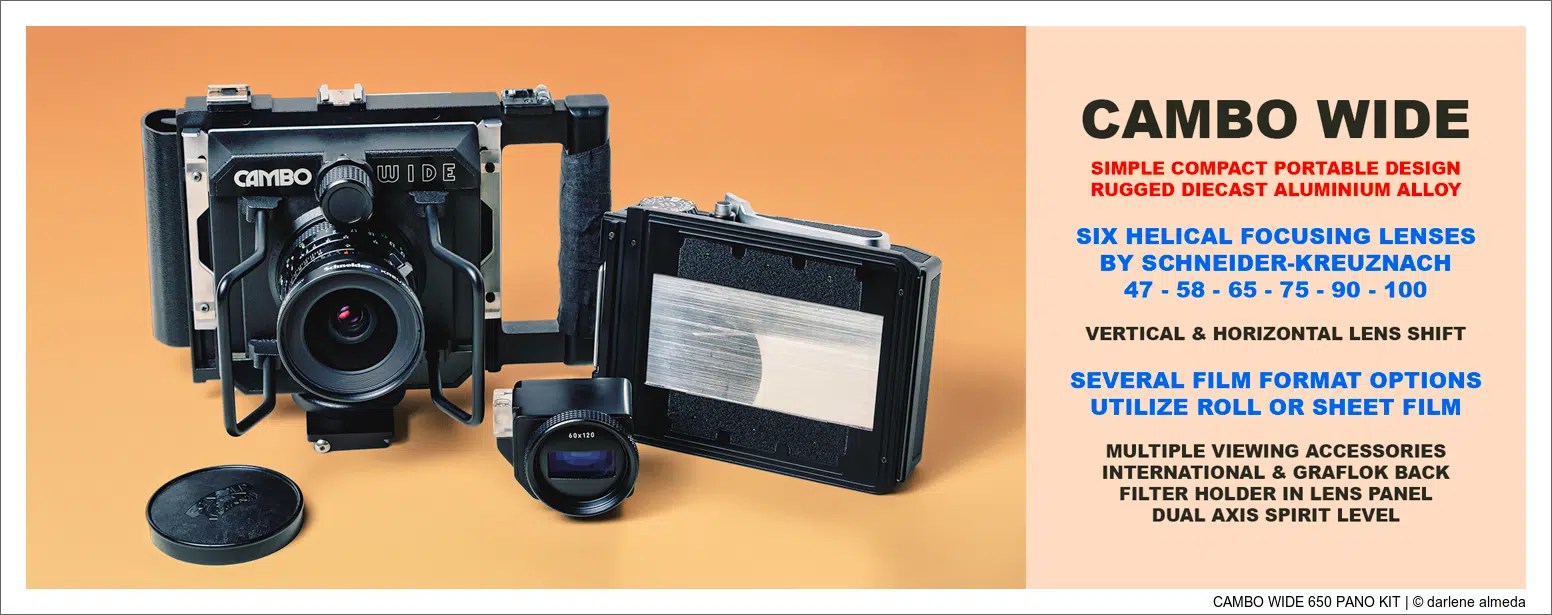
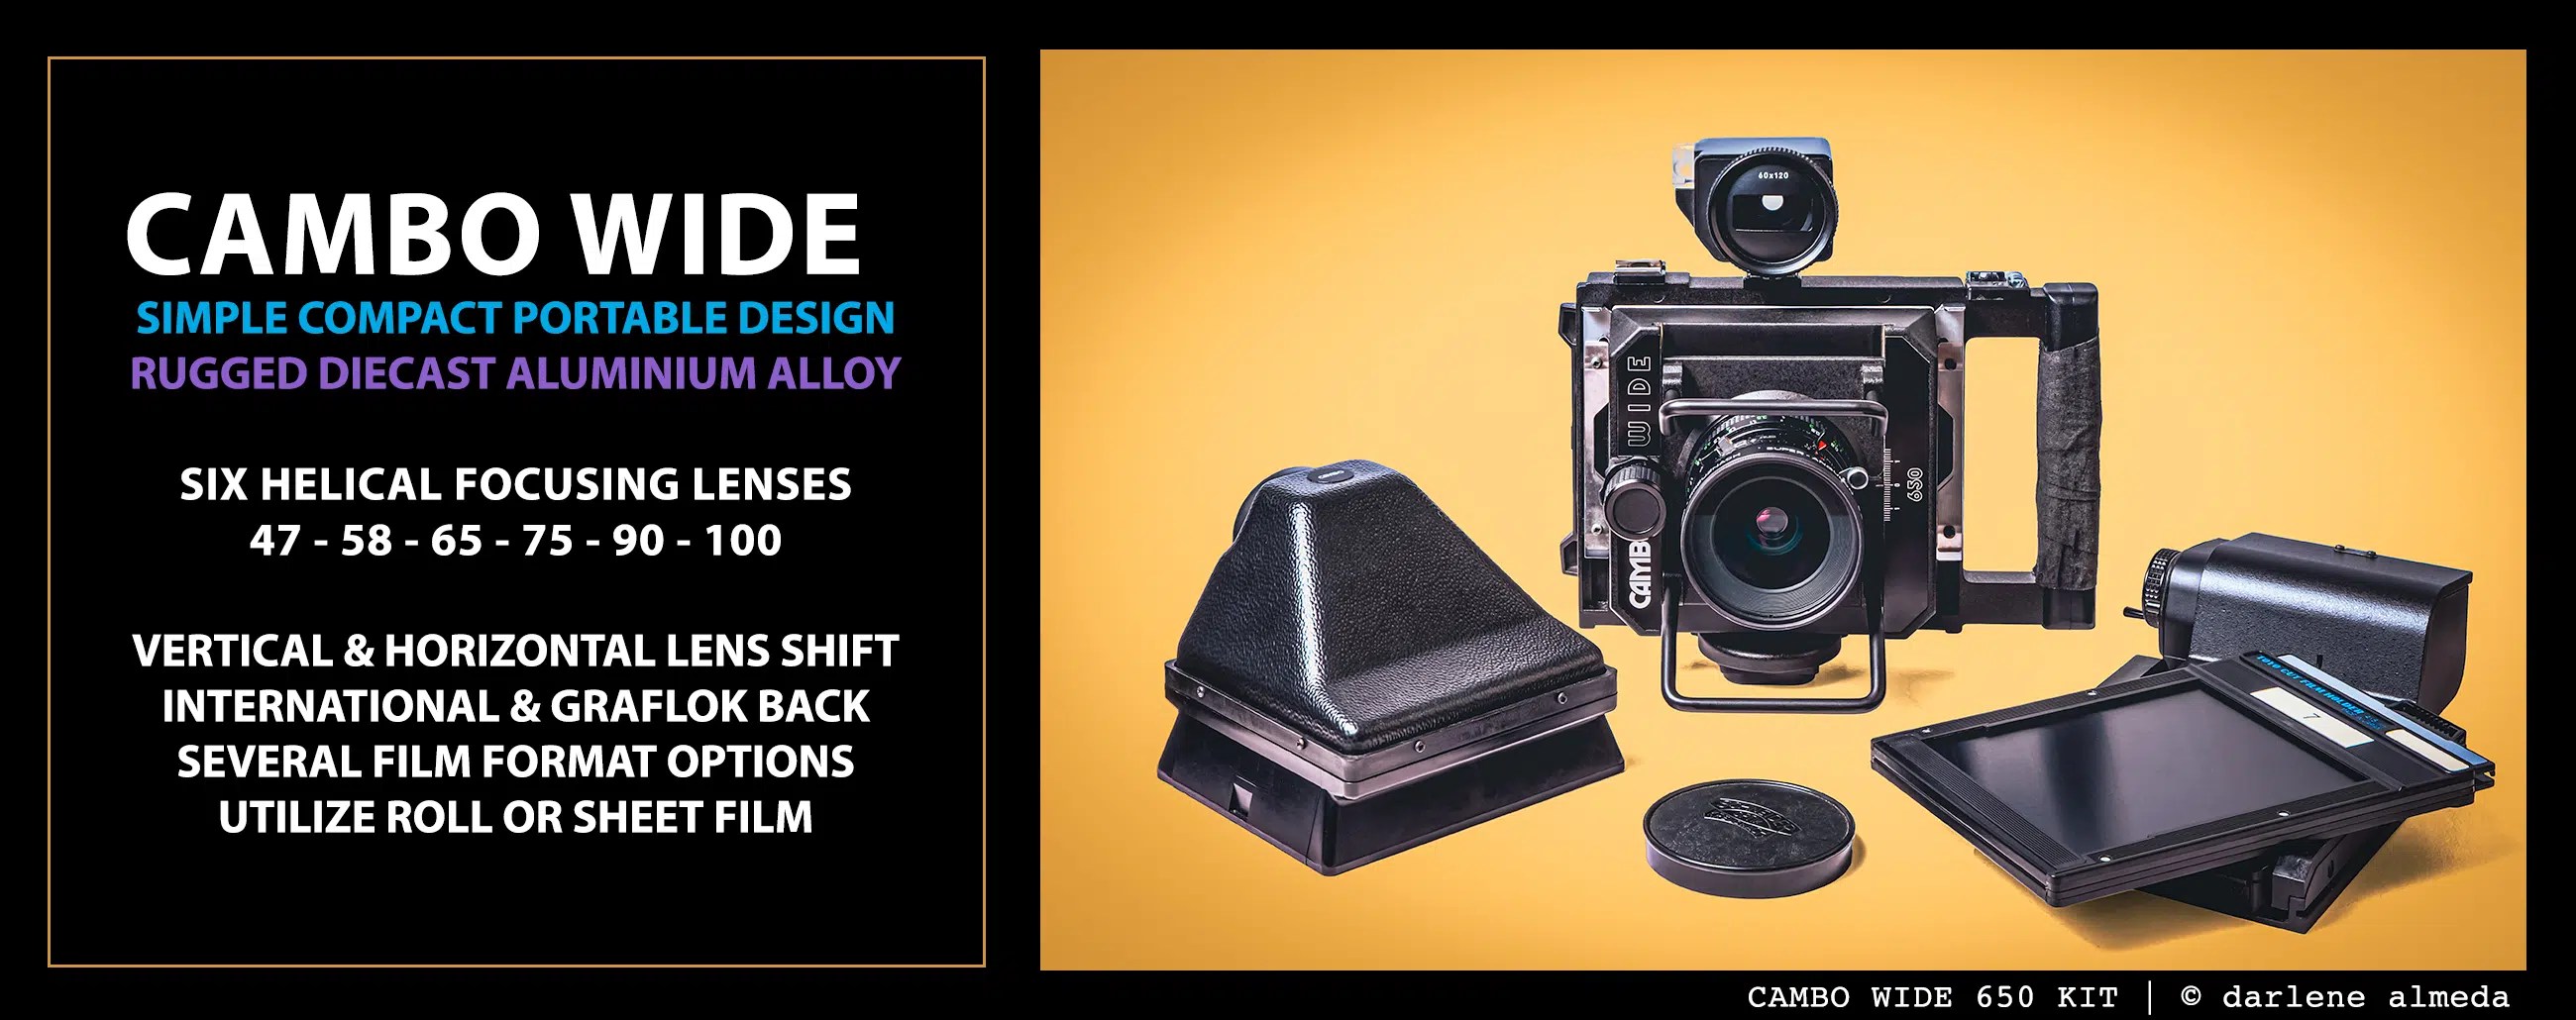
The Cambo Wide 650
When I began exploring cameras for panoramic film photography, the Linhof 6×12 and 6×17 models caught my eye. However, they were too expensive for such a niche format. While I sometimes use my Ebony 4×5 for 6×12 shooting, I wanted a dedicated 6×12 camera with rise and fall that I could customize to my specific needs.
After some research, I discovered the older version of the Cambo Wide before it evolved into a digital model. It piqued my interest enough to start looking for one in great shape, and after a few months, I found the model I decided on: the 650 with its Schneider Super Angulon 65/5.6 lens. You can read many of the Cambo Wide’s specs in the above graphic.
Suppose you are familiar with and enjoy pancake-style digital cameras such as Alpa, Arca Swiss and Cambo. In that case, the Cambo Wide line of 4×5 cameras might interest you for shooting 4×5 and 120 films.
An Early Pancake Style 4×5 Camera
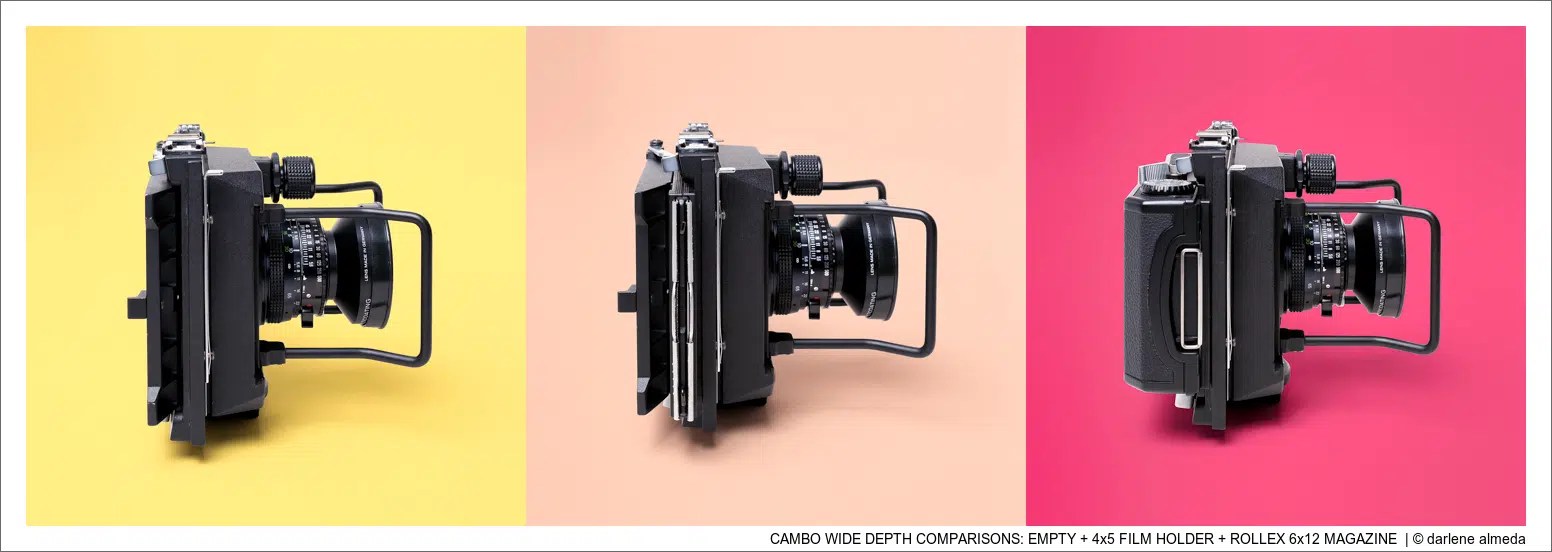
The graphic above shows side profiles of my Cambo Wide 650 (CW 650) in the various shooting configurations I’ve used. You can see how the camera’s depth changes with each setup. Image #1 shows the camera with the ground glass attached – minus the protective cover – to illustrate its minimal depth. Image #2 displays the camera with a standard 4×5 film holder, while image #3 features the Cambo C-243 6×12 magazine.
With the 6×12 magazine, that final configuration is now my go-to setup for shooting panoramics with the CW 650.
[Note: The Schneider Super-Angulon 65mm is a fine lens that still holds its own with any modern digital back. In this blog it’s featured with a Phase One IQ4-150.]
My Journey With The Cambo Wide 650
Camera Movements: Know Before You Buy
The CW 650 I shoot with offers 15mm of shift left and right, and 15mm of rise and fall -when the lens is rotated 90 degrees. It’s essential to check the specs and photos of any Cambo Wide you’re considering, because not all models are built the same. For example, the brochure for my version claims all models have 20mm movements… but that’s simply not true. Some do. Mine doesn’t. So if camera movements matter to you, double-check before clicking “buy now.”
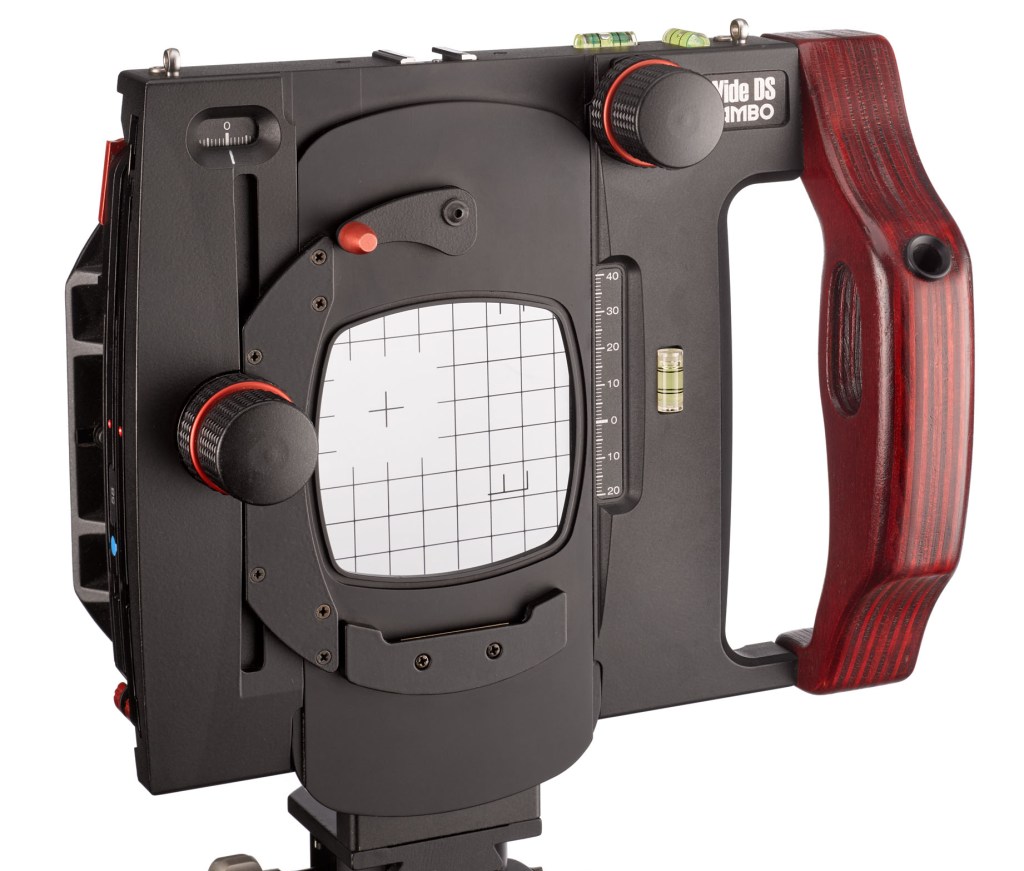
[Note: The Wide was succeeded by the WDS – Double Shift – which offers rise/fall and shift. The 4×5″ version is shown here]
Why Rise and Fall Matter
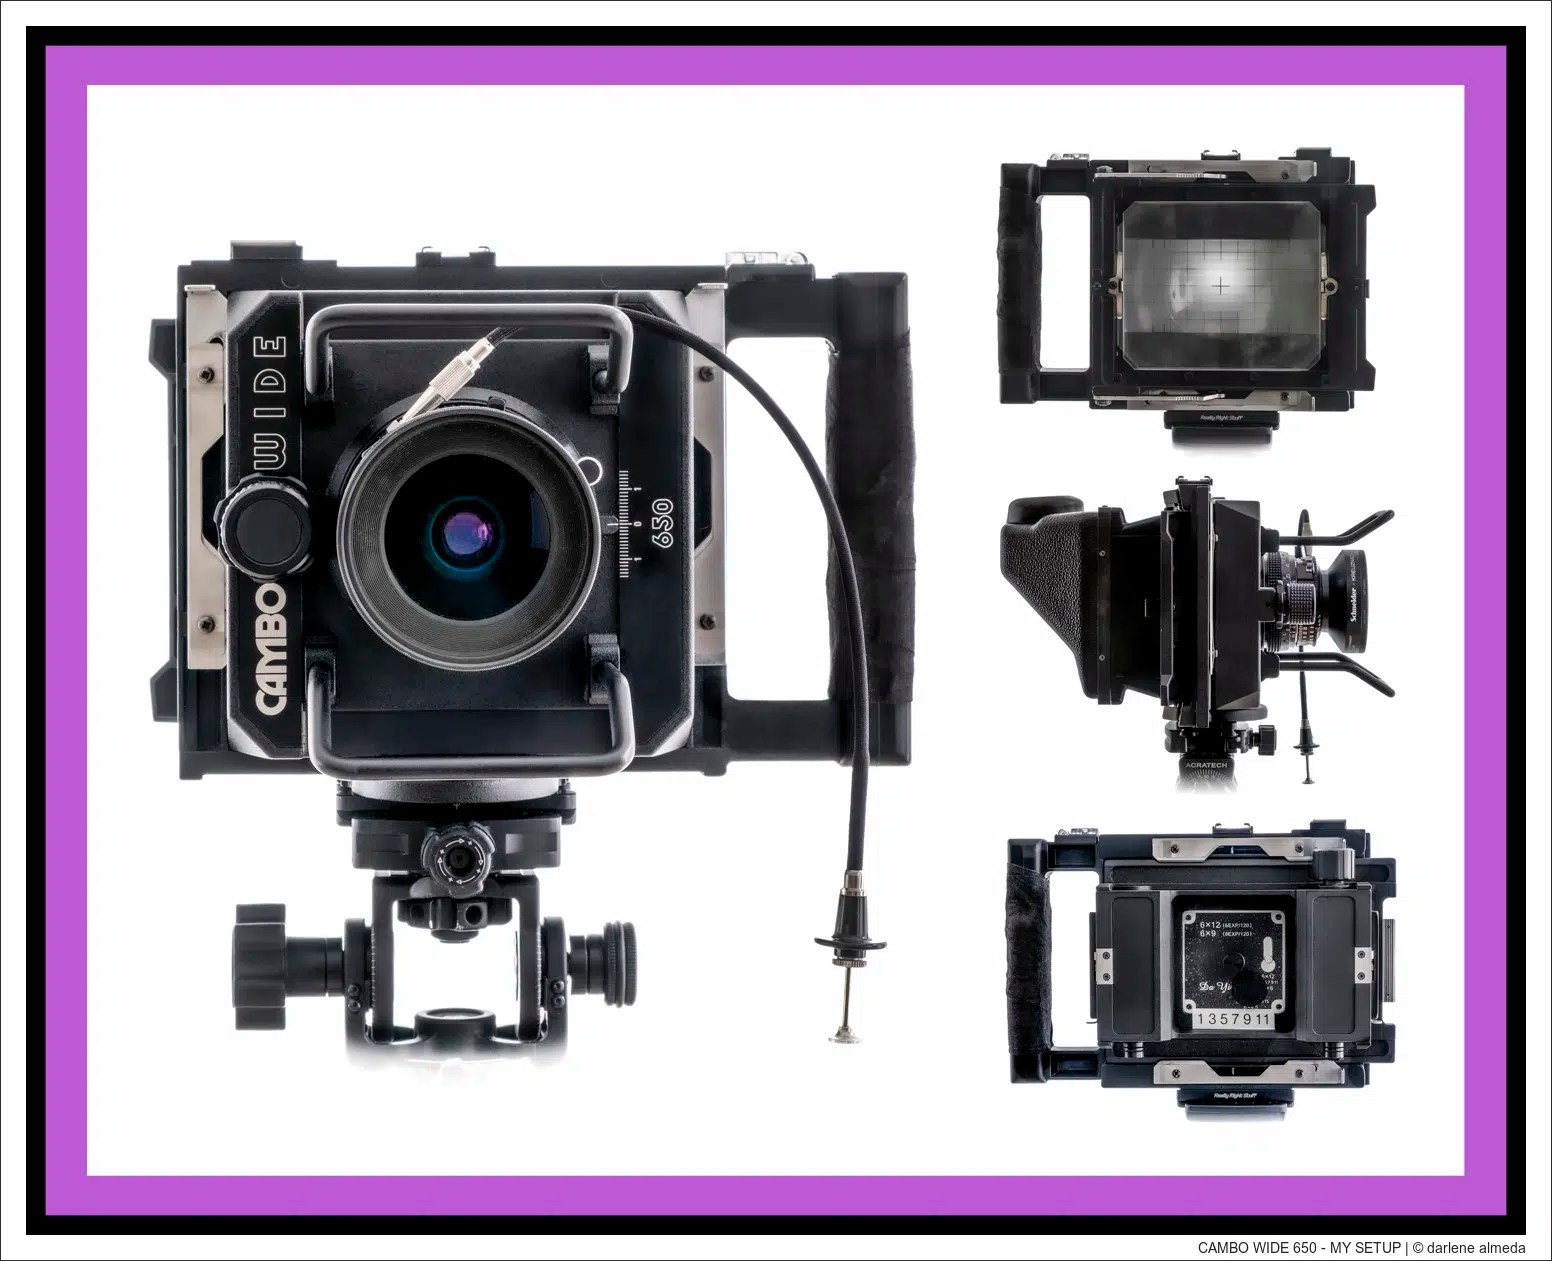
I regularly use the rise and fall controls in my compositions, and it’s one of the reasons I’ve come to love the CW 650 for 6×12 panoramic work. You’ll notice in the image above that I keep the lens rotated to allow rise and fall – it’s my default setup. As a shorter photographer, I especially appreciate the large round turn knob. It makes adjusting the horizon from the ground glass quick and painless, no step stool required.
Service & Support: Precision Matters
After a few years of regular use, I sent my CW 650 to Precision Camera Works (PCW) for a CLA and tune-up – tightening the rails, checking the flash sync, and giving everything a good once-over. I made that investment because I genuinely enjoy using the camera and plan to keep it in my lineup. If your Cambo Wide ever needs servicing, look up Bob Watkins at PCW. He knows these cameras inside and out.
DIY Ground Glass Masking
I’ve used blue painter’s tape for years to mark off the 6×12 frame lines. It peels off clean, though the poor grid lines above and below the frame have long since vanished—casualties of my enthusiastic taping. Doesn’t bother me one bit when I’m shooting 4×5; I like having a clean window to frame the world. But 6×12, I need a little structure, and a few strips of blue tape do the trick.
The Perfect Focal Length
The 65mm lens hits the sweet spot for me. It delivers wide, dramatic views without the distorted “look-at-me” effect some ultra-wide lenses can produce. Back when I shot 6×12 on my 4×5, my go-to was the Rodenstock 65mm f/4.5. So, it’s no surprise the CW 650, paired with the same focal length, felt like home.
Performance in the Field
How well a camera performs outdoors is crucial. I use several systems for landscape photography – my 4×5 takes the longest to set up, while my Fotoman 617 is the quickest. If a camera slows me down or needs constant babying in the wild, I let it go. But after more than five years with the CW 650, I can say this one’s a keeper. Its simplicity, precision, and panoramic functionality make it a joy to use in the field.
Refining the Workflow
Over time, I’ve fine-tuned my setup for speed and ease. The combo of the custom 6×12 masking on the ground glass and the Linhof 6×12 viewfinder makes pre-visualization a breeze. It cuts down on setup time and helps me work faster when the light is fleeting.
Oh—and yes, that’s sports tape on the side handle. It’s one of my favorite little hacks. It gives me a solid grip for pulling the camera out of its case, with the 65mm lens already mounted and ready to roll.
My shooting flow now feels seamless: Mount the camera → focus (ground glass or hyperfocal—I’ve tested mine for accuracy and recommend you do the same) → close the shutter → load the film back → cock the shutter → take the shot.
Simple. Reliable. Quick. Exactly what I want when I’m standing in a field with the wind in my face and the light about to change.
Although the Wide was never intended for studio still live shooting – we offer other tools for those tasks – Darlene’s article about shooting tulips with here Wide-650 is highly recommendable. A simple Canon close-up lens gave the Schneider the requested close-up capabilities. Obviously not a solution for ‘pixel peepers’ but in this case we’re not talking pixels anyway and besides that Darlene decided to hand color the image. As mentioned, very interesting to read how she achieved this stunning result. Being Dutch, we have a soft spot for tulips I reckon.
A few words about the owner of the Wide 650 camera portrayed above: Darlene Almeda was a commercial photographer for over 25 years. As one of her most memorable photo sessions she mentions one with Ray Charles. You can only envy her for that.
Darlene has never limited herself to commercial work. She’s a visual artist and has taught art and photography for many years at schools and during one-on-one workshops. Although she greatly enjoyed her part-time teaching vocation, she decided to retire from teaching a few years ago. It simply became impossible to combine it with art projects, travels, many other interests, and – last but not least – a private life.
As an artist who has not only studied Advertising Photography, but also Graphic Design, Creative Writing, and Illustration, Darlene has a broad knowledge of the technical side of photography and the art form, its history, and its context. Her website, photoscapes.com, bears testimony to this. It provides insightful articles about gear, techniques, and experiments, supplemented with book reviews and personal observations. Whether you’d like to know more about Infrared Photography, how to venture into Large Format Analogue, or the great American icons, this place is definitely worth a visit.
When asked which photographers have inspired here, Darlene mentions Alfred Stieglitz as an all-time favourite of hers. An American icon indeed. “It changes over time as I discover more. One photographer whose work has stayed with me since I first discovered it over forty years ago is William Clift. His 8×10 black and white images continue to inspire me today. I’m also drawn to those whose work reflects a genuine love for the art itself; that kind of joy always finds its way into the image. Two photographers I have been admiring for the past few years are Marco Ristuccia for his creative use of light, form, and color, especially with architectural elements, and Michael Jackson, who creates beautiful abstract images with “cameraless photography”.
Thank you for sharing your knowledge and images with us, Darlene.
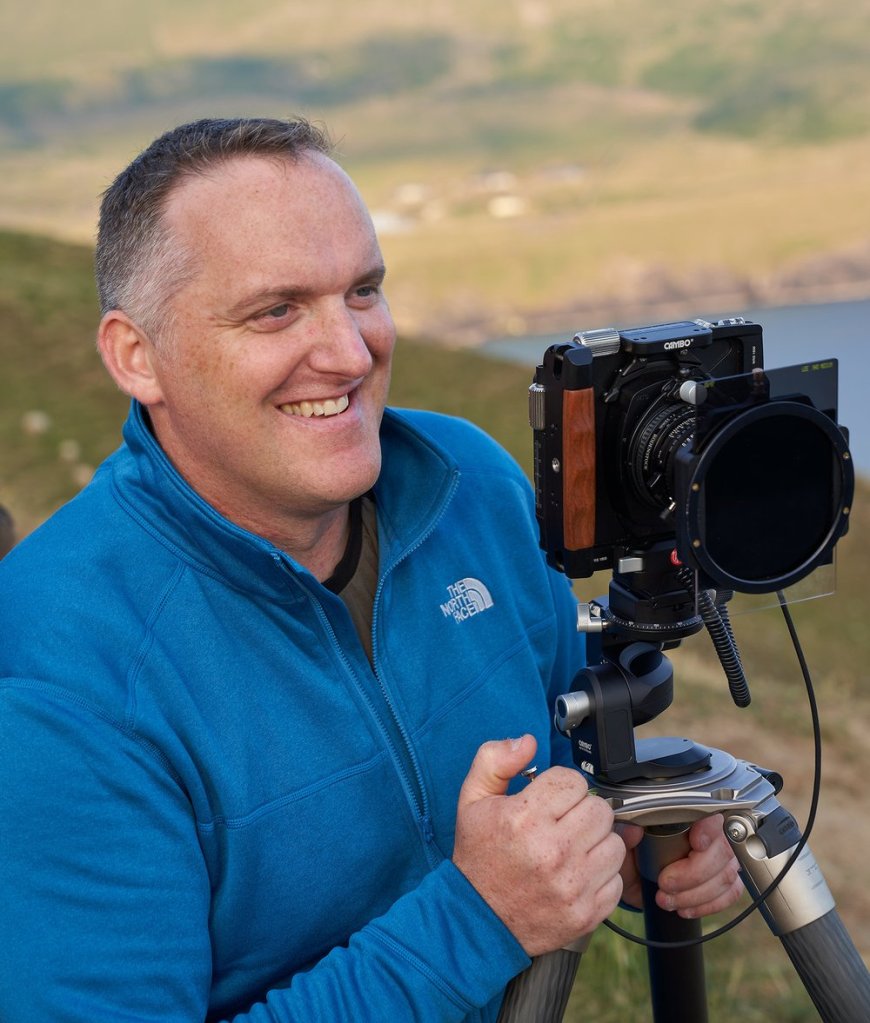
For good reasons Ireland is one of the favorite destinations for photographic workshops and masterclasses. The country offers magnificent scenery and stunning locations in abundance. David Hogan was born in Dublin and moved to the County of Kerry at a young age. He’s always had a passion for the natural world surrounding him and loved to explore the wide-open spaces and rugged coastlines under everchanging skies. The will to share that passion with others was his first incentive to pick up a camera.
As so many, David started with a simple camera (a Canon Rebel for that matter), learnt by trial and error and gradually honed his skills. He never had a formal education as a photographer. However, by the age of 25 he could call himself a professional. Making a living shooting architecture, landscape – like used as backplates in the automotive industry – and many other things.
David has always admired the work of Joe Cornish. A major source of inspiration, next to the Irish landscape itself. As a photographer he developed a deep appreciation for the patience and persistence landscape photography requires. Whether it’s the long hours waiting for the perfect light or braving harsh conditions for a fleeting moment of magic, every shot has a story behind it and requires dedication. At some point David decided to set on a new course. Rather a semi-pro making the photographs he’s passionate about than losing that passion due to a lack of time.
That’s how David Hogan Landscape Photography started. Concentrating completely on landscape gives him the freedom to slow down. To David, one of the fascinating things about landscape photography is to watch the scene transform under different conditions. A familiar place may look completely different, depending on the season, weather or time of day.
Over the past two and a half decades David’s photography has evolved. Not just in a technical way, but also in vision, learning to see beyond what’s in front of the lens and to capture the atmosphere, mood and emotion of the scene. Just like the will to share his passion for the outdoors was an incentive to pick up a camera, David considers sharing his knowledge about landscape photography as one of the most rewarding parts of his work. He was a long-time contributor to Outdoor Photography Magazine and offers workshops to photographers of all levels. During these workshops, David guides participants through some of his favourite locations, teaching them how to read and make use of natural light and to improve their compositional skills. Daivid’s goal is not so much to help others improve their technique – although making the most of one’s camera settings can very well be part of the workshop – but rather to encourage a deeper appreciation for the art of landscape photography.
“Through David Hogan Landscape Photography I hope to inspire others to see theworld differently, to seek out the extraordinary in the ordinary, and to develop a deeperconnection with the landscape around them.”
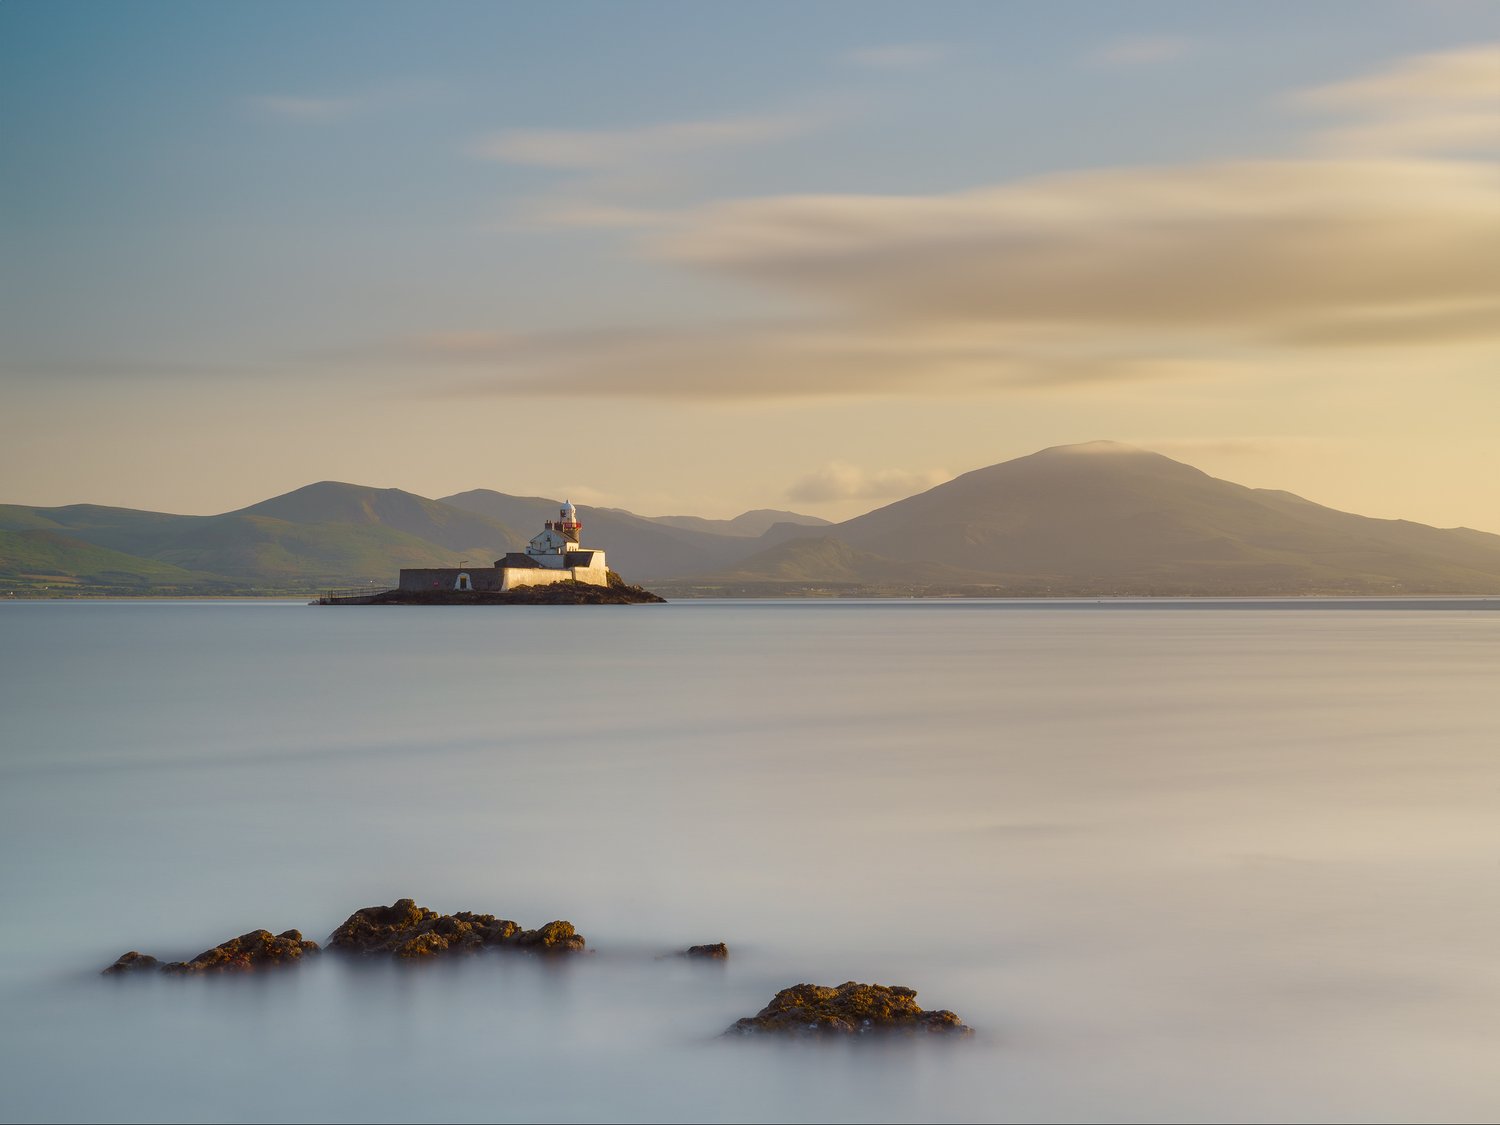
David’s workflow involves a combination of in-camera technique combined with subtle post-processing. Not to alter but to enhance the beauty of the scene. Careful planning, understanding weather patterns and scouting locations are invaluable to landscape photography. However, one shouldn’t be afraid to embrace the unexpected either. “Some of my favorite images have come from moments where nature surprises me, forcing me to adapt and see the scene in a new way.”
Filters are an equally import part of the process. ND filters are frequently used to enable long exposures, smoothening water or creating movement in clouds. Graduals may be needed to balance the exposure for landscape and sky. Polarizers reduce glare and enhance contrast.
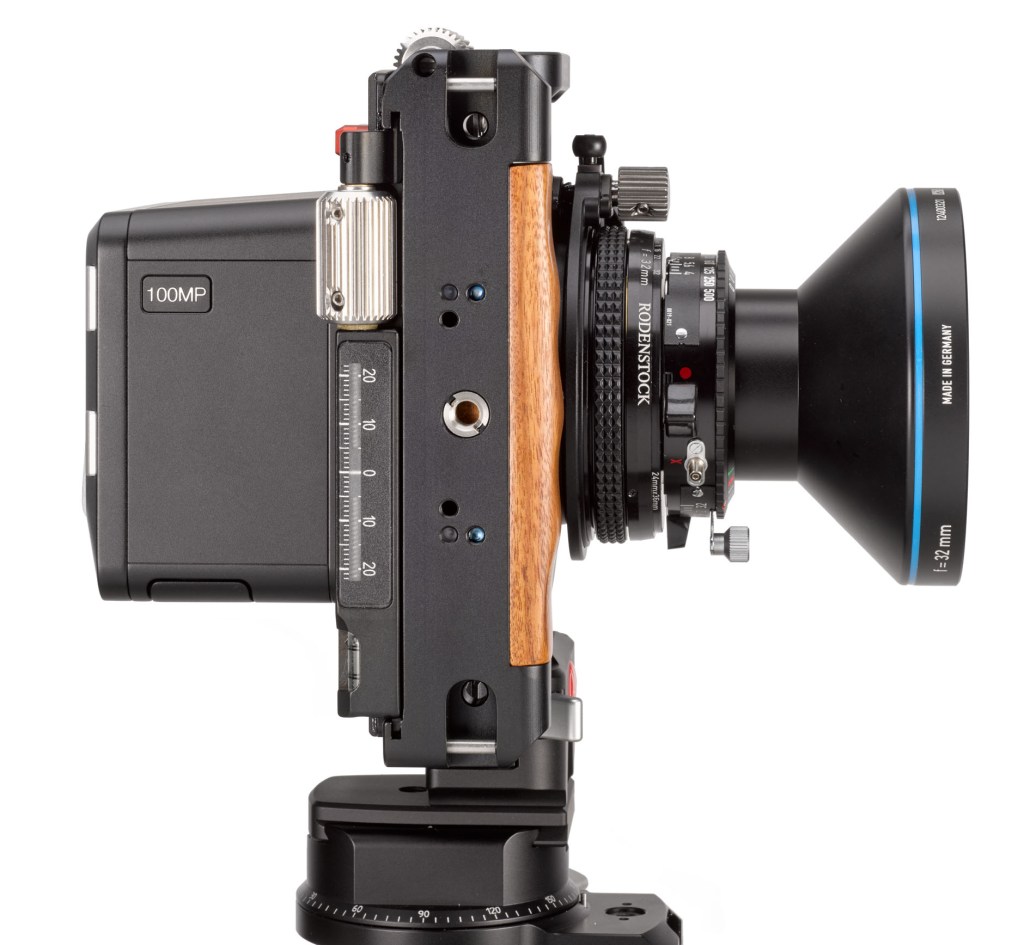
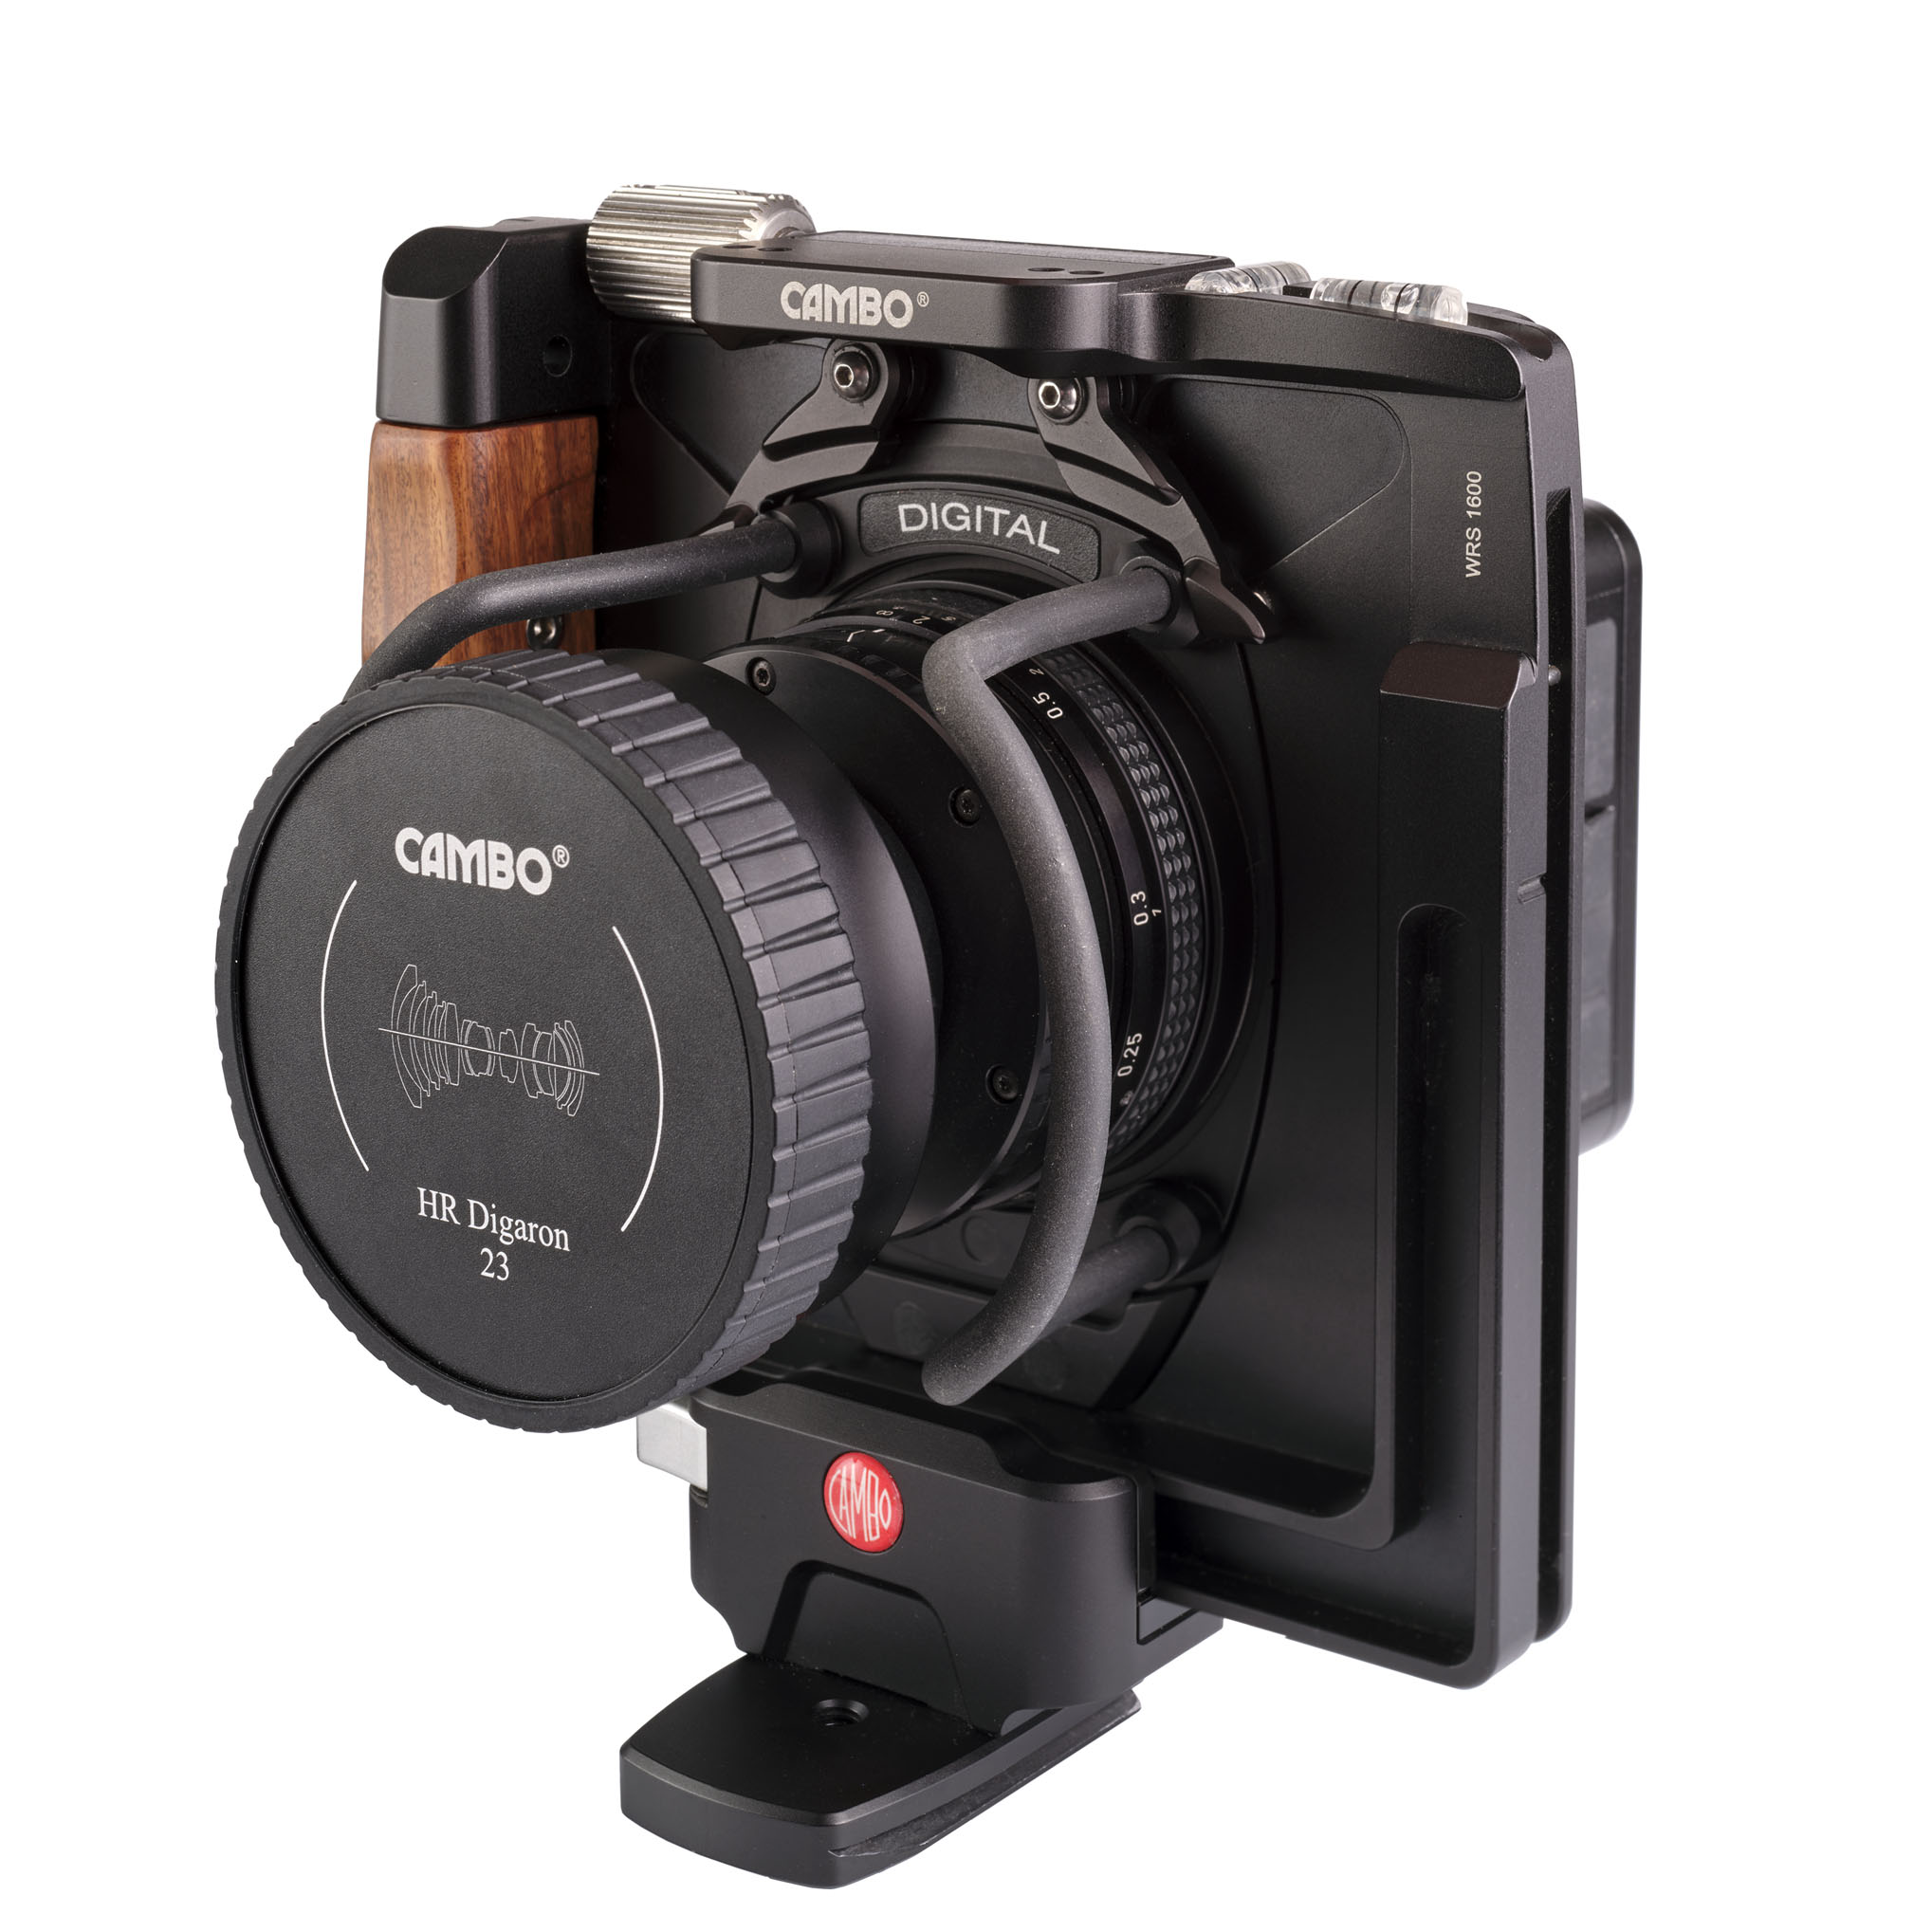
The Canon Rebel has already been mentioned. David remained faithful to the Canon system for a long time. Patience has also come along. At some point David acquired a Phase One digital back, Cambo WRS-1600 technical camera and Rodenstock lenses.
“This setup forces me to slow down, that’s honestly one of the things I love most about it. There’s no autofocus, no auto-exposure. Everything is done manually. I have to carefully meter the light and really think about the scene in front of me. Because I’m making micro-adjustments with the tilt and shift movements, I find myself paying way more attention to composition. I’m deliberately positioning elements in the frame, thinking about balance, depth and leading lines”.
The Rodenstock lenses are, as David says “in a league of their own.” Perfect for landscapes, where every detail matters. “Not a chance I’d ever trade in this system”.
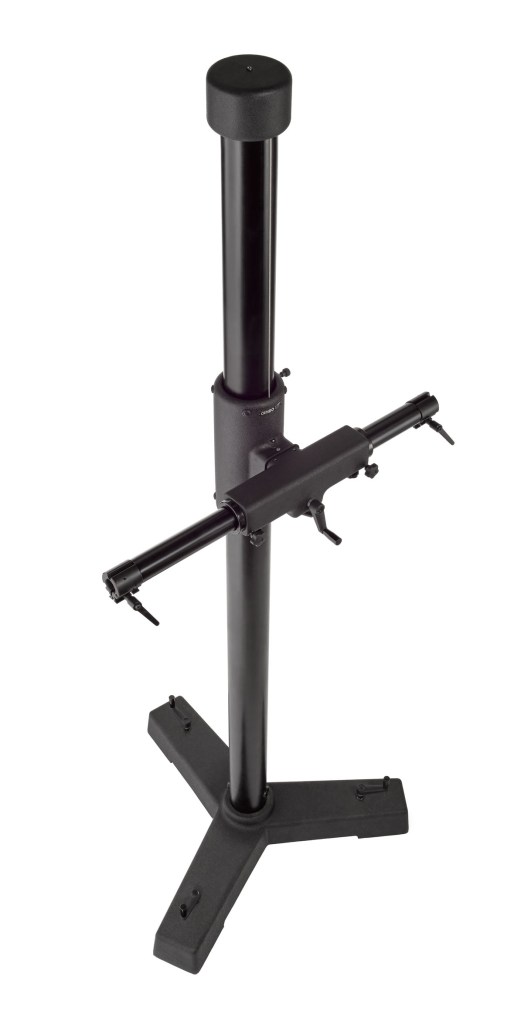
In 1992 the papers brought the news to you. At that time our UBS studio stand was fancy and new. It’s actually still a fancy stand.
A good studio stand is a once-in-a-lifetime investment. It will outlast many cameras, requires virtually no maintenance and when retiring you may pass it on to the next generation. When the UBS was introduced the average commercial studio was equiped with – at least – a 4×5″ view camera and a medium format system. For practical reasons those cameras simply remained attached to the stand’s cross arm, one at each end. To balance this weight, the column contained a hefty piece of counter weight. This guaranteed a smooth and effortless up and down movement.
The UBS is in the same weight and height category as the well-known UST studio stand. Available in three sizes (7, 9 or 12 feet) and to be completed with the cross arm and base of your choice.The UST really is an iconic Cambo product; to us it’s what the model 240 is to Volvo.
A UST is an indestructable piece of studio gear. After decades of use, the brake may become less effective. First thing to try, is readjusting it. If that doesn’t solve the issue, it’s probably time to change the brake fork. We’ve published a short video showing how to. The required part can be ordered at your Cambo partner.
The distinction of the UBS over the UST is the rotation of the cross arm around the column. This has a separate mechanism and brake. In other words: If you only want to change the height, the rotation won’t change. And repositioning the cross arm – smoothly on ball bearings – won’t change the height. If you’ve been working meticulously at your set, this feature makes life easier.
As mentioned, the UBS has a big chunk of counter weight inside its column. Nowadays many photographers use (much) lighter cameras than common in the 1990’s. Let’s also not forget e-commerce studios, where the Mirrorless is the camera of choice. A UBS or UST stand can still render good services in those environments, but basically it is unnecessary hefty.
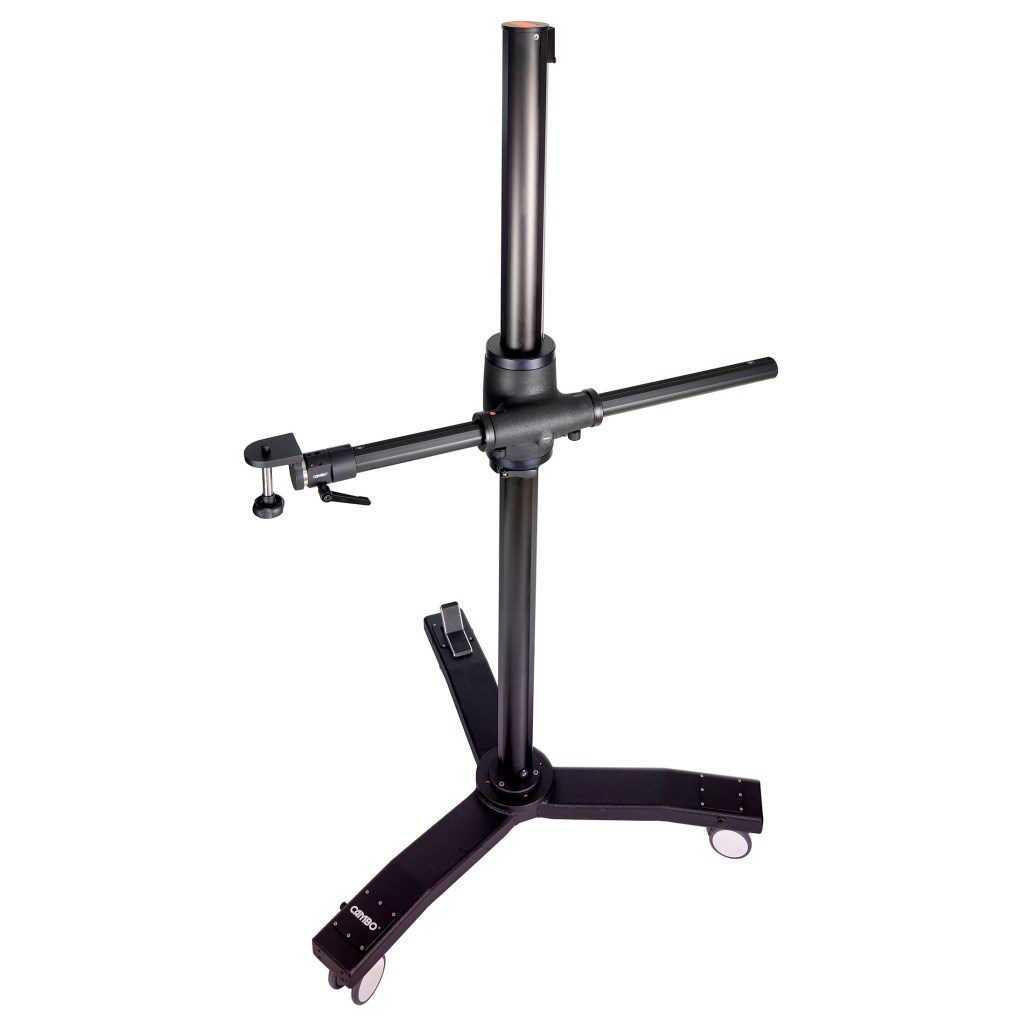
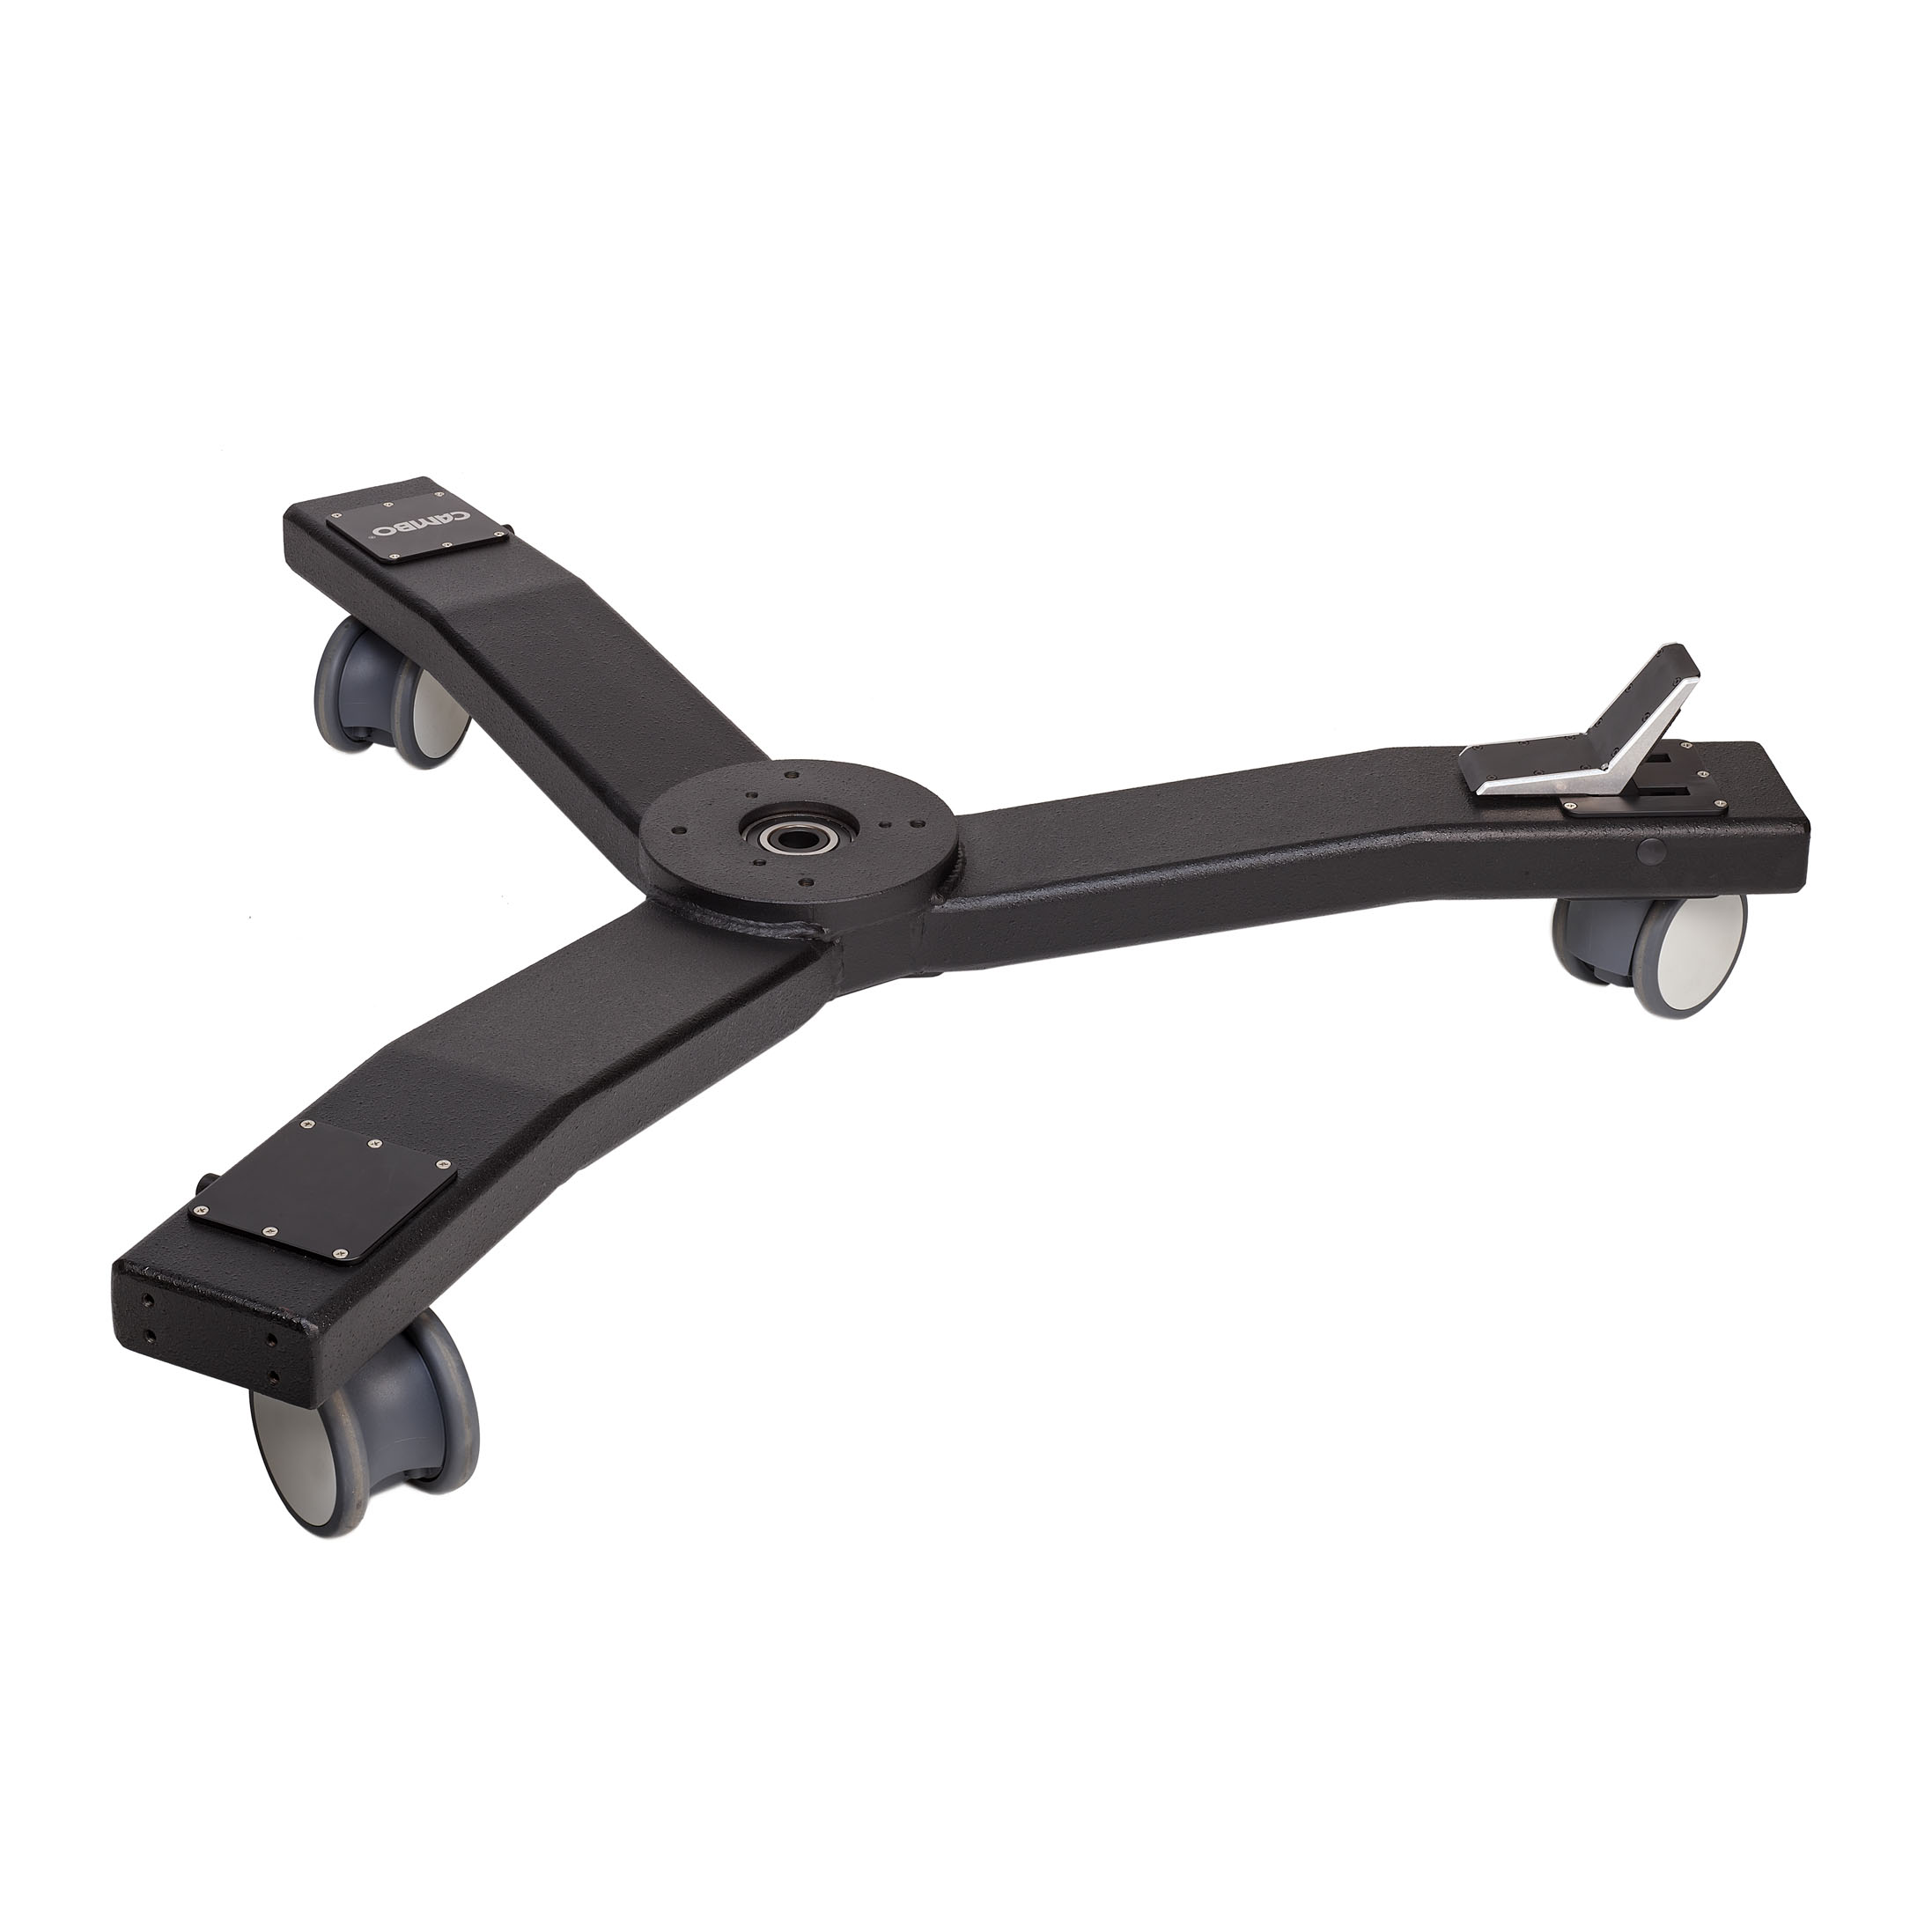
Still it can’t be overestimated what a good studio stand can do to the efficiency of an e-commerce studio. That’s where our column stands with the M designation come in. To begin with the Mono stands. For those who are looking for the UBS’s amenities in a lighter package, we’d like to suggest our MBX and MBU stands. The latter comes with a cross arm on ball bearings and a new base with central locking pedal and large wheels to make it easier to manoeuvre.
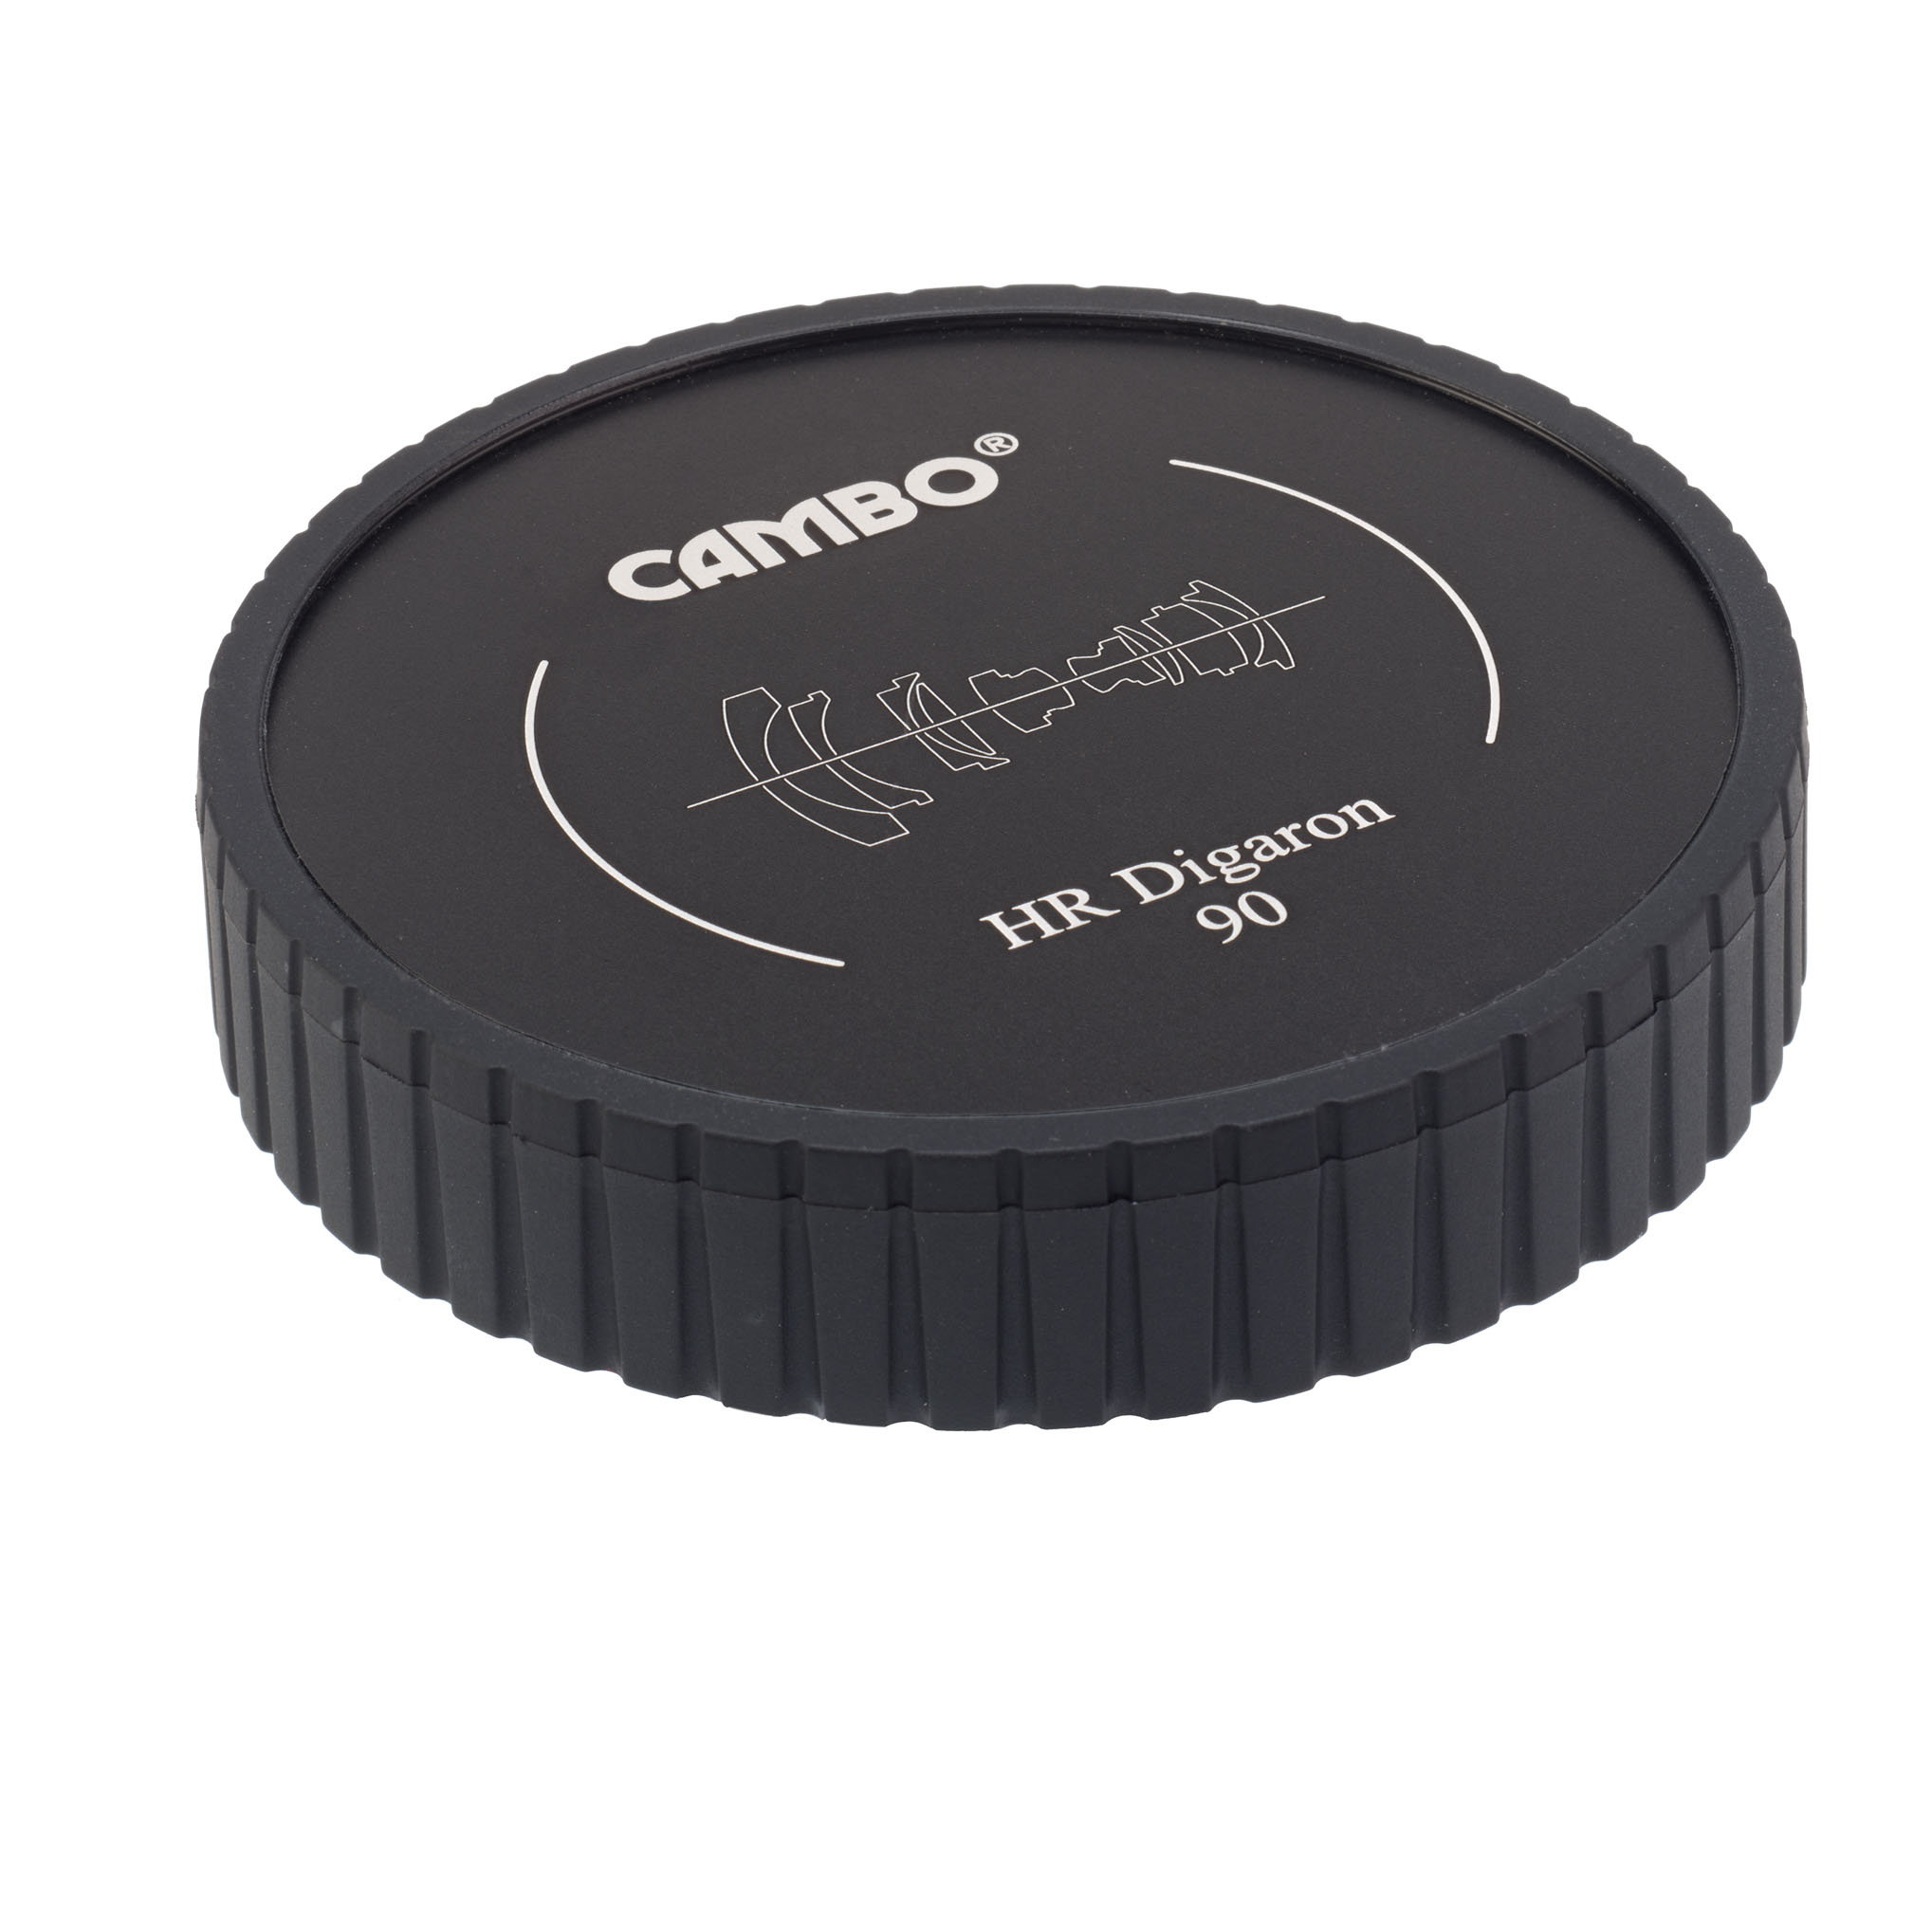
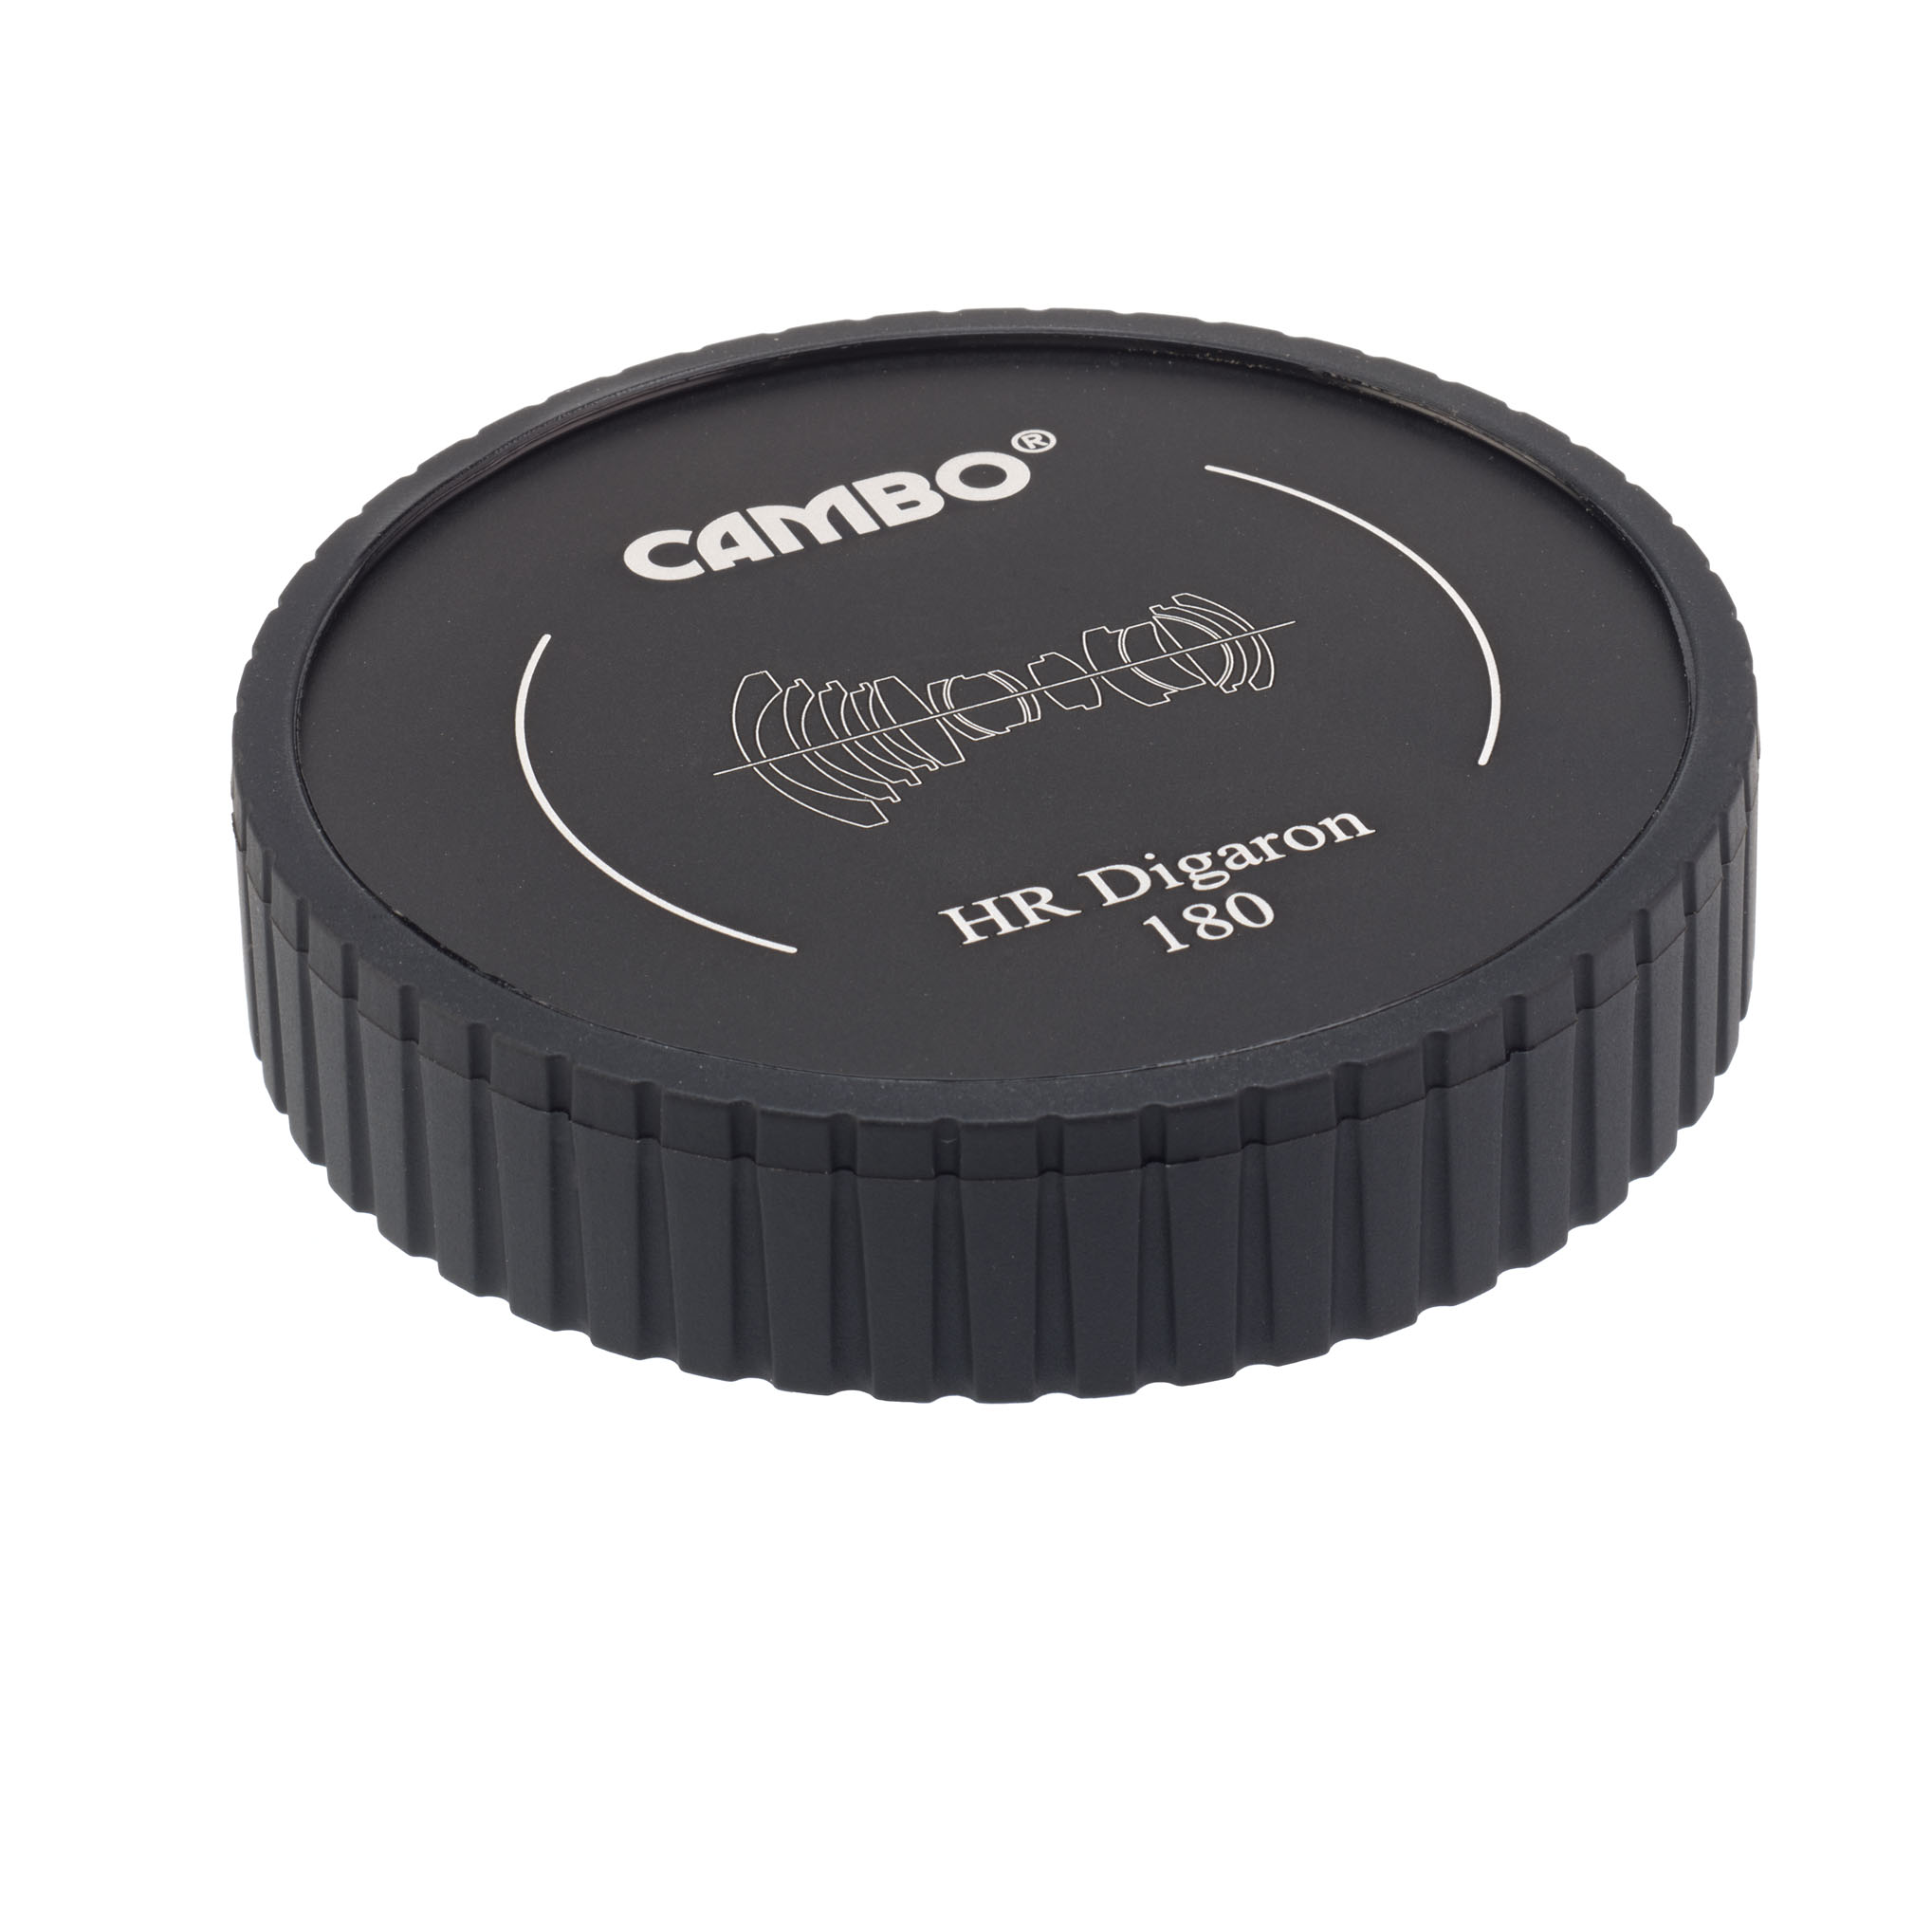
Rodenstock manufactures some of the finest lenses in the industry. For some reason or another, lens caps were never high on their priority list.We’ve decided to manufacture our own. A full set of lens caps that do justice to the quality of Rodenstock’s HR-Digaron lenses.
The lens caps come in 60, 70, 75 and 90mm diameters which covers the complete line of Digaron lenses. The edge and inside are rubberized. The engraving of the metal front plate makes it easy to pick the right lens at a glance.
The metal front is not just aesthetics. A flexible lens cap may accidentally touch the front lens when pushed too hard. Especially the HR-Digaron 32’s large front lens could do with better protection.
For Cambo WRS lenses we offer rear cover WRS-1100. Stronger than the original rear lens caps that come with Schneider and Rodenstock lenses. Also a lot easier to access when the lens is in a helical focusing mount.
Steve Hendrix produced a fine write up about the various Actus models. We gratefully published it at our new website. It’s certainly not our intention to start a sequel. However, with a new Actus version available it is time for an addition.
The Actus-DB2. has always been the dedicated Actus model for use with Digital Backs. And if you prefer to use one at the same platform as your Mirrorless or DSLR, a digital back frame like this ACDB-989 fits onto the Actus-G. The Actus-DB2 remained the Actus of choice for Hasselblad en Phase One shooters though, since the Actus-G is misaligned when a Back is attached to it. Inevitable due to the latter’s form factor. Use with bayonets has priority here, use with a Back is an afterthought.
With the larger Actus-MV we also introduced these nifty rotating back adapters, the ACDB-990 for Phase One and the ACDB-990 for Hasselblad V. Tempting to have this amenity with your Actus-G as well. If it weren’t for this pesky misalignment.
There’s an Actus which can do it all and do it all right. The Actus-G990D (for Phase One) or Actus-G991D (for Hasselblad) come with the rotating back adapters as shown above. Digital back and lens are aligned. Now wouldn’t the Mirrorless camera you’d also like to use on this platform sit too low? The solution for this is using the bayonets designed for the Actus-MV view camera.
Here the Actus-G990D is shown with an IQ4-150 digital back. The Rodenstock lens has a Phase One X-Shutter. The rear frame is detachable and can be replaced by a bayonet holder if needed. Cambo offers one for virtually any camera. This version of the Actus is the platform that accepts every sensor, from M43 to Phase One IQ4.
A short video showing the distinctions between the various Actus models is on our Youtube channel.
The Cambo Company – for those of you who do not know – is based in the Netherlands and has been in business since 1946 (that is nearly 80 years, folks!). Cambo is a dedicated and successful manufacturer of excellent photographic solutions, including 7-12′ Studio Stands, Reproduction Copy Stands, Video Support Devices, Technical Cameras and of course, View Cameras. All designed and manufactured in-house at Cambo Netherlands. The Actus View Cameras are known for their user friendly approach, compact size and light weight, and their ability to work with many, many digital cameras and lenses of all kinds (see comprehensive list at bottom of the article).
For a company with such a rich history of photographic products, continuing in the digital age is anything but a certainty, but Cambo has thrived by focusing on innovation and responding to modern market demands.
Since the Cambo Actus B Mini View Camera re-energized the view camera sector of the photographic industry in 2014 and (re) introduced view cameras to the masses in the digital age, they have been very busy with the Actus product line. New digital camera mounts have been added, new lens mounts have been added, the Actar lineup of lenses has expanded, and the various models of Actus View Cameras has increased.
But which Actus model is the one for you? There are important features and differences for each.So let’s start – and we’ll go small to large.
Cambo Actus-B Mini
Cambo Actus B Mini with Leica M11 and Rodenstock 90 APO Sironar Lens Front View
The Actus-B
The Actus-B Mini is the smallest and lightest Actus model, weighing only a little over 2 pounds. To achieve this compactness, it has segmented movements, with rear vertical and horizontal shift and front tilt and swing. The Actus B Mini is fully geared with the exception of the rear horizontal shift, which is a manual movement. All movements have friction locks except for the front tilt/swing.
The Actus B Mini is one of two Actus’s that have restrictive formats. In the case of the Actus B Mini, only digital cameras with sensor sizes 35mm and smaller are compatible, no medium format cameras or digital backs can be mounted. Some of the newer mirrorless 35mm cameras have too large a bayonet to fit on the Actus B Mini, and those will require the Actus G (see below).
To change from one camera to another, say, from a Sony A7R to a Fujifilm XT5 you just unscrew 4 screws and swap out the bayonet mount. Using digital cameras on the rear of a Cambo Actus B Mini allows the use of many lenses, as most digital cameras have a focal plane shutter that can be used to set exposure. All digital cameras can rotate orientation on the Cambo Actus B Mini with a release lever.
Those who highly value size and weight (on the lesser side)
Those who have a primary single 35mm or smaller camera platform they will use it with
Those who do not mind (horizontal) manual shift
Cambo Actus-G
Cambo Actus G with Fuji GFX 100 II and Cambo Actar 24 Lens Front View
Aha, at first glance, the Actus-G looks similar to the Actus B Mini, and it is. However, there are significant differences. It sits a bit taller, since it is designed to accommodate cameras from various size formats – micro 4/3 to medium format. All movements are geared, even the rear horizontal shift, which is manual on the Actus B Mini. Depending upon which digital camera is mounted to the rear, it may come with a spacer block for the front standard, so the camera is level with the lens at the zero vertical position. This camera can accept all the digital cameras that the Actus B Mini can, but it also can accept Canon R, Nikon Z, Leica SL, Hasselblad X1D/X2D, Fujifilm GFX, and even digital backs.
The Actus G has an interchangeable rear bayonet that locks and can be swapped just by flipping a locking lever. So no need to unscrew anything, unlike the Actus B Mini. The Actus G is a bit larger/heavier than the Actus B Mini, but it is also a much more versatile platform. Using digital cameras on the rear of a Cambo Actus G, like Actus B Mini, also allows the use of many lenses, as most digital cameras have a focal plane shutter. All digital cameras can rotate orientation on the Cambo Actus G with a release lever.
Those who may use a variety of camera platforms, 35mm, medium format, digital backs, etc.
Those who prefer all geared movements
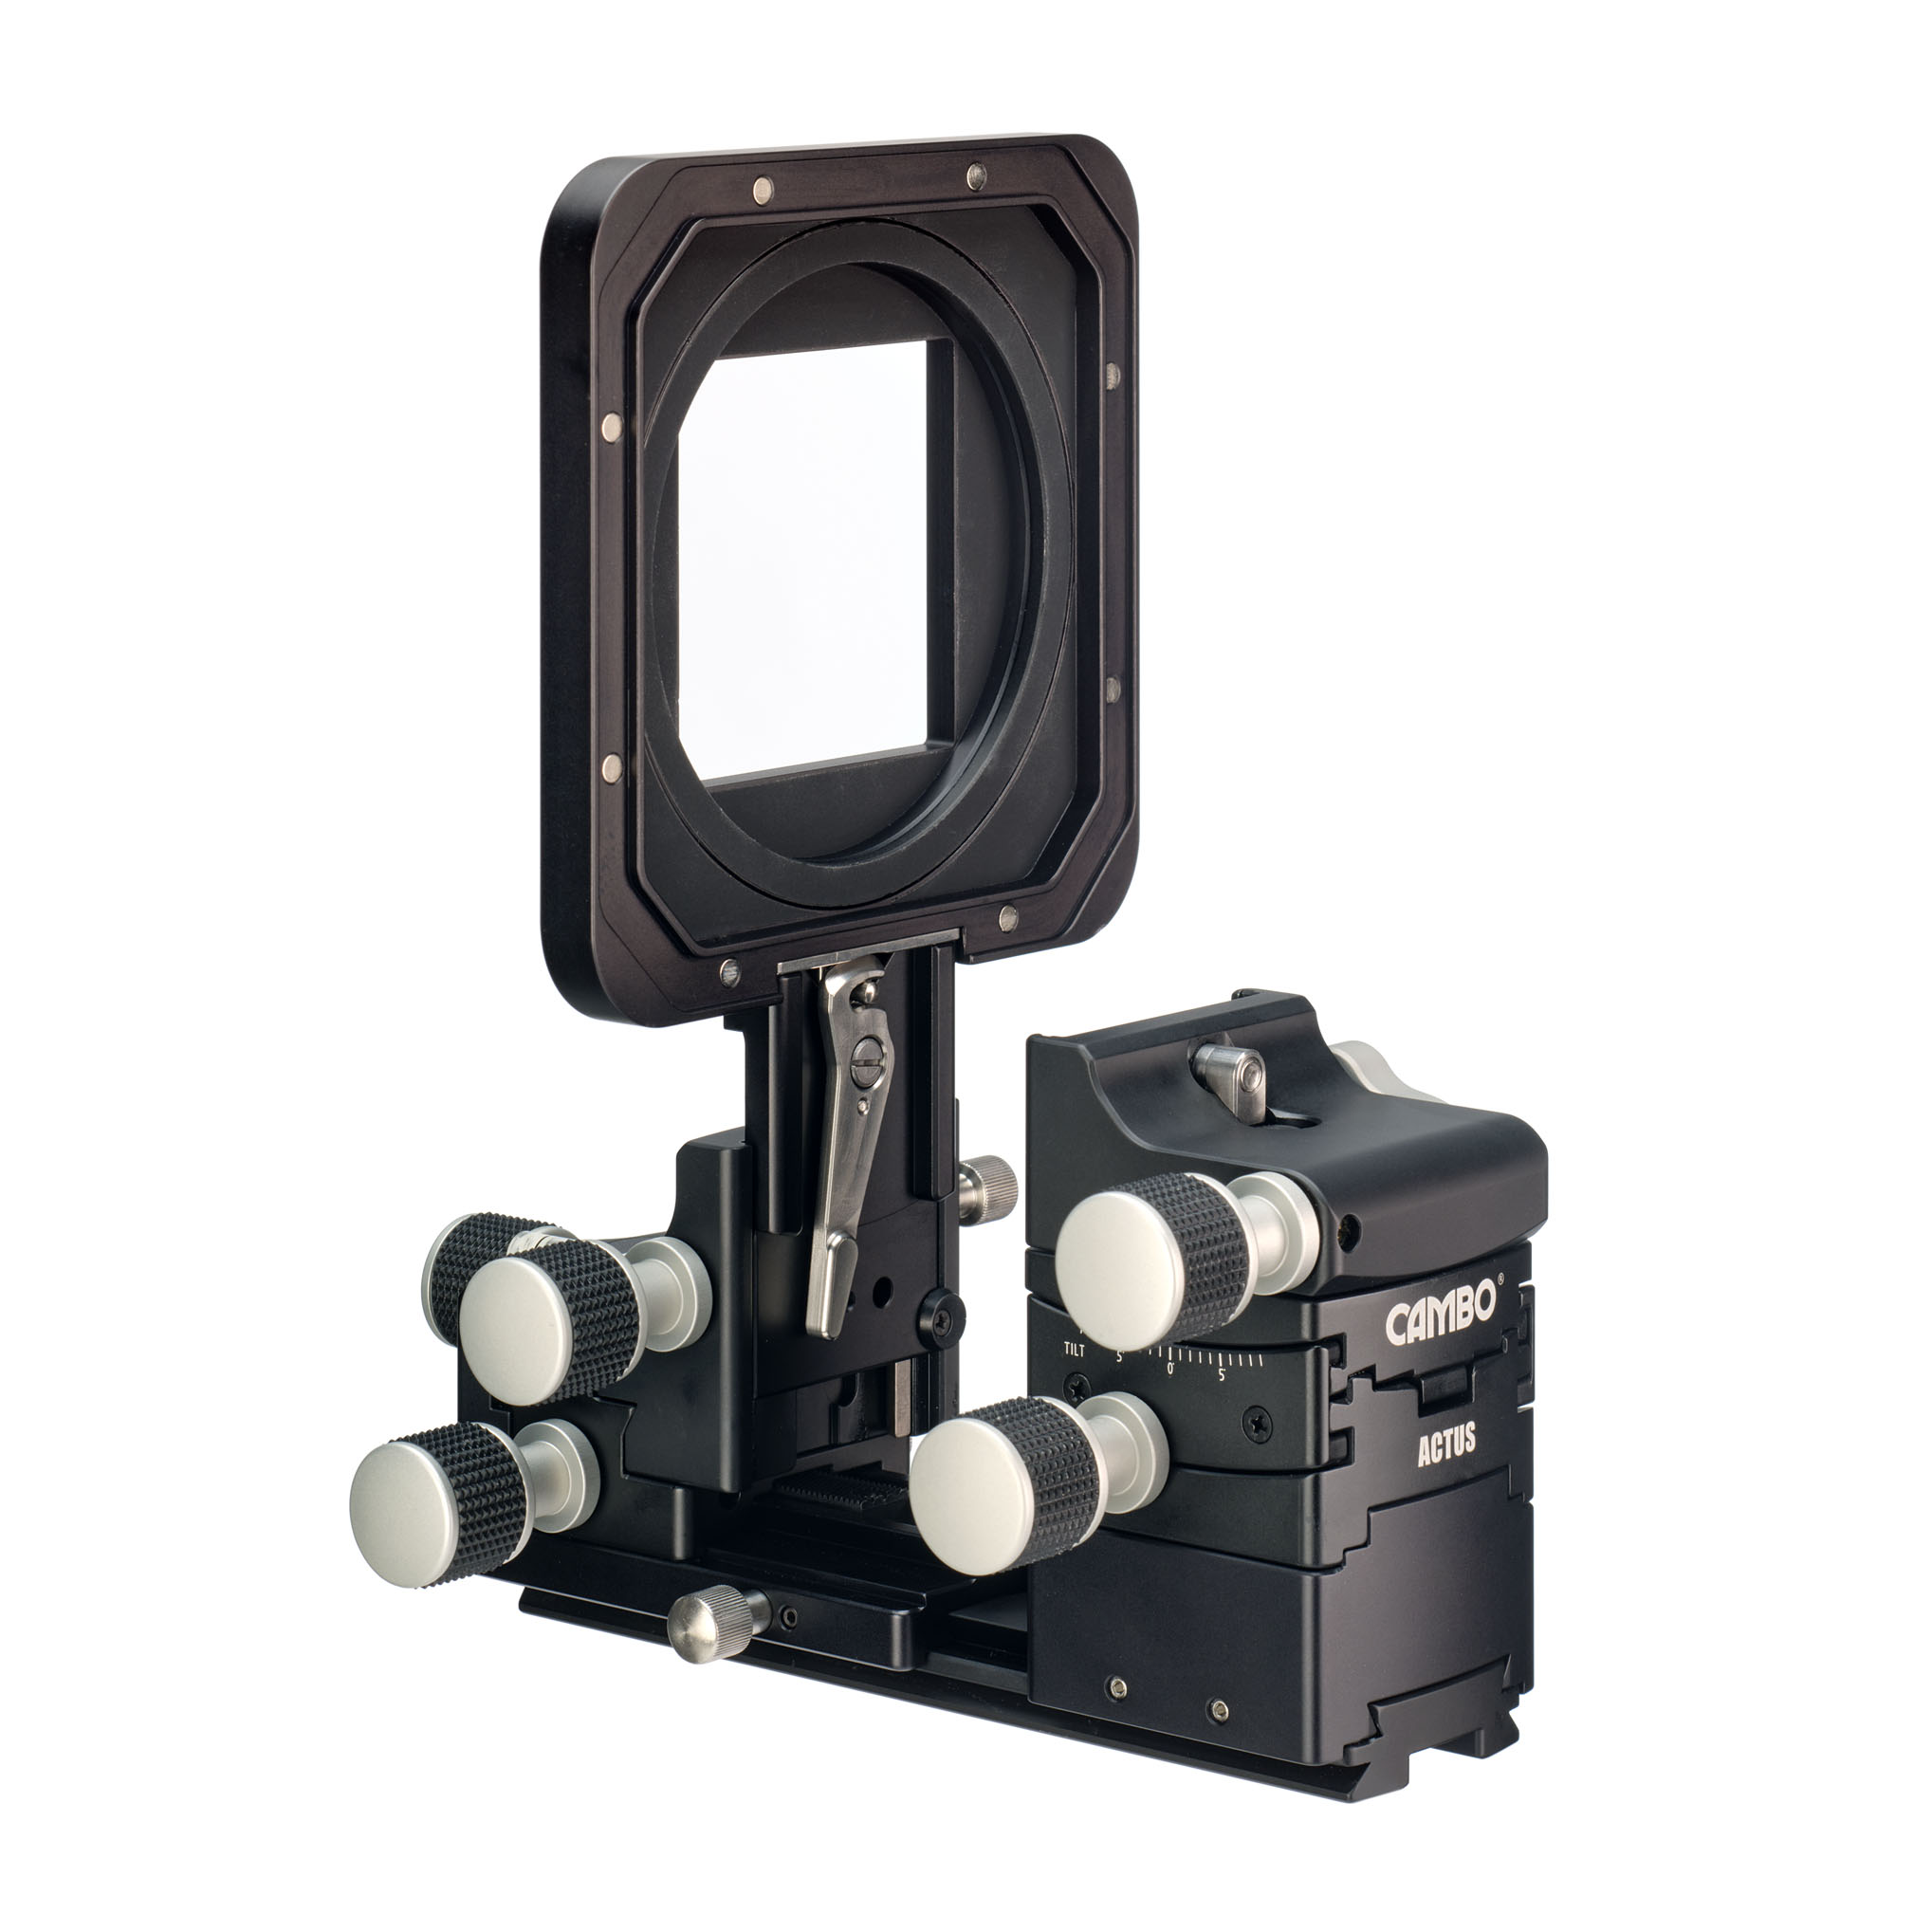
Cambo Actus-DB2
Cambo Actus DB II and Hasselblad 120mm CF Lens Front View
The Cambo Actus-DB2 bears strong resemblance to the Actus G, in terms of size/weight and features. You can see a geared knob at the end of the rail, which means it also has rear geared horizontal shift. Know that longer rails/bellows are an option with all these cameras, we show a longer rail above to illustrate.The Actus DB2 comes with a slightly longer default rail than the Actus B Mini and Actus G (175mm vs 155mm).
The Actus DB2 is dedicated to digital backs, it does not accept digital cameras. So, if you have pretty much any digital back, it will mount to the Actus DB2, via an interface adapter made to fit the native camera mount of your digital back (most commonly Phase One/Mamiya 645, Contax 645, Hasselblad H 645, Hasselblad V).
Benefits of a digital back are that you can use short view camera lenses, which are limited with digital camera bodies, because the sensor is pushed further away from the lens elements, which expands the focal flange distance beyond many the spec of most short view camera lenses. Digital backs can work with ESS (Electronic Sensor Shutter) with many lenses, or with a copal or X shutter outfitted view camera lens. Digital Backs can be manually rotated by removing and re-seating the SLW Adapter, but Cambo also makes a rotating lever solution for digital backs in Phase One/Mamiya 645 and Hasselblad V Interfaces.
Those who only want to use a digital back on their view camera.
Those who are not as concerned with size and weight.
Those who value the most movements possible.
Those who want a fuller feature set from their view camera.
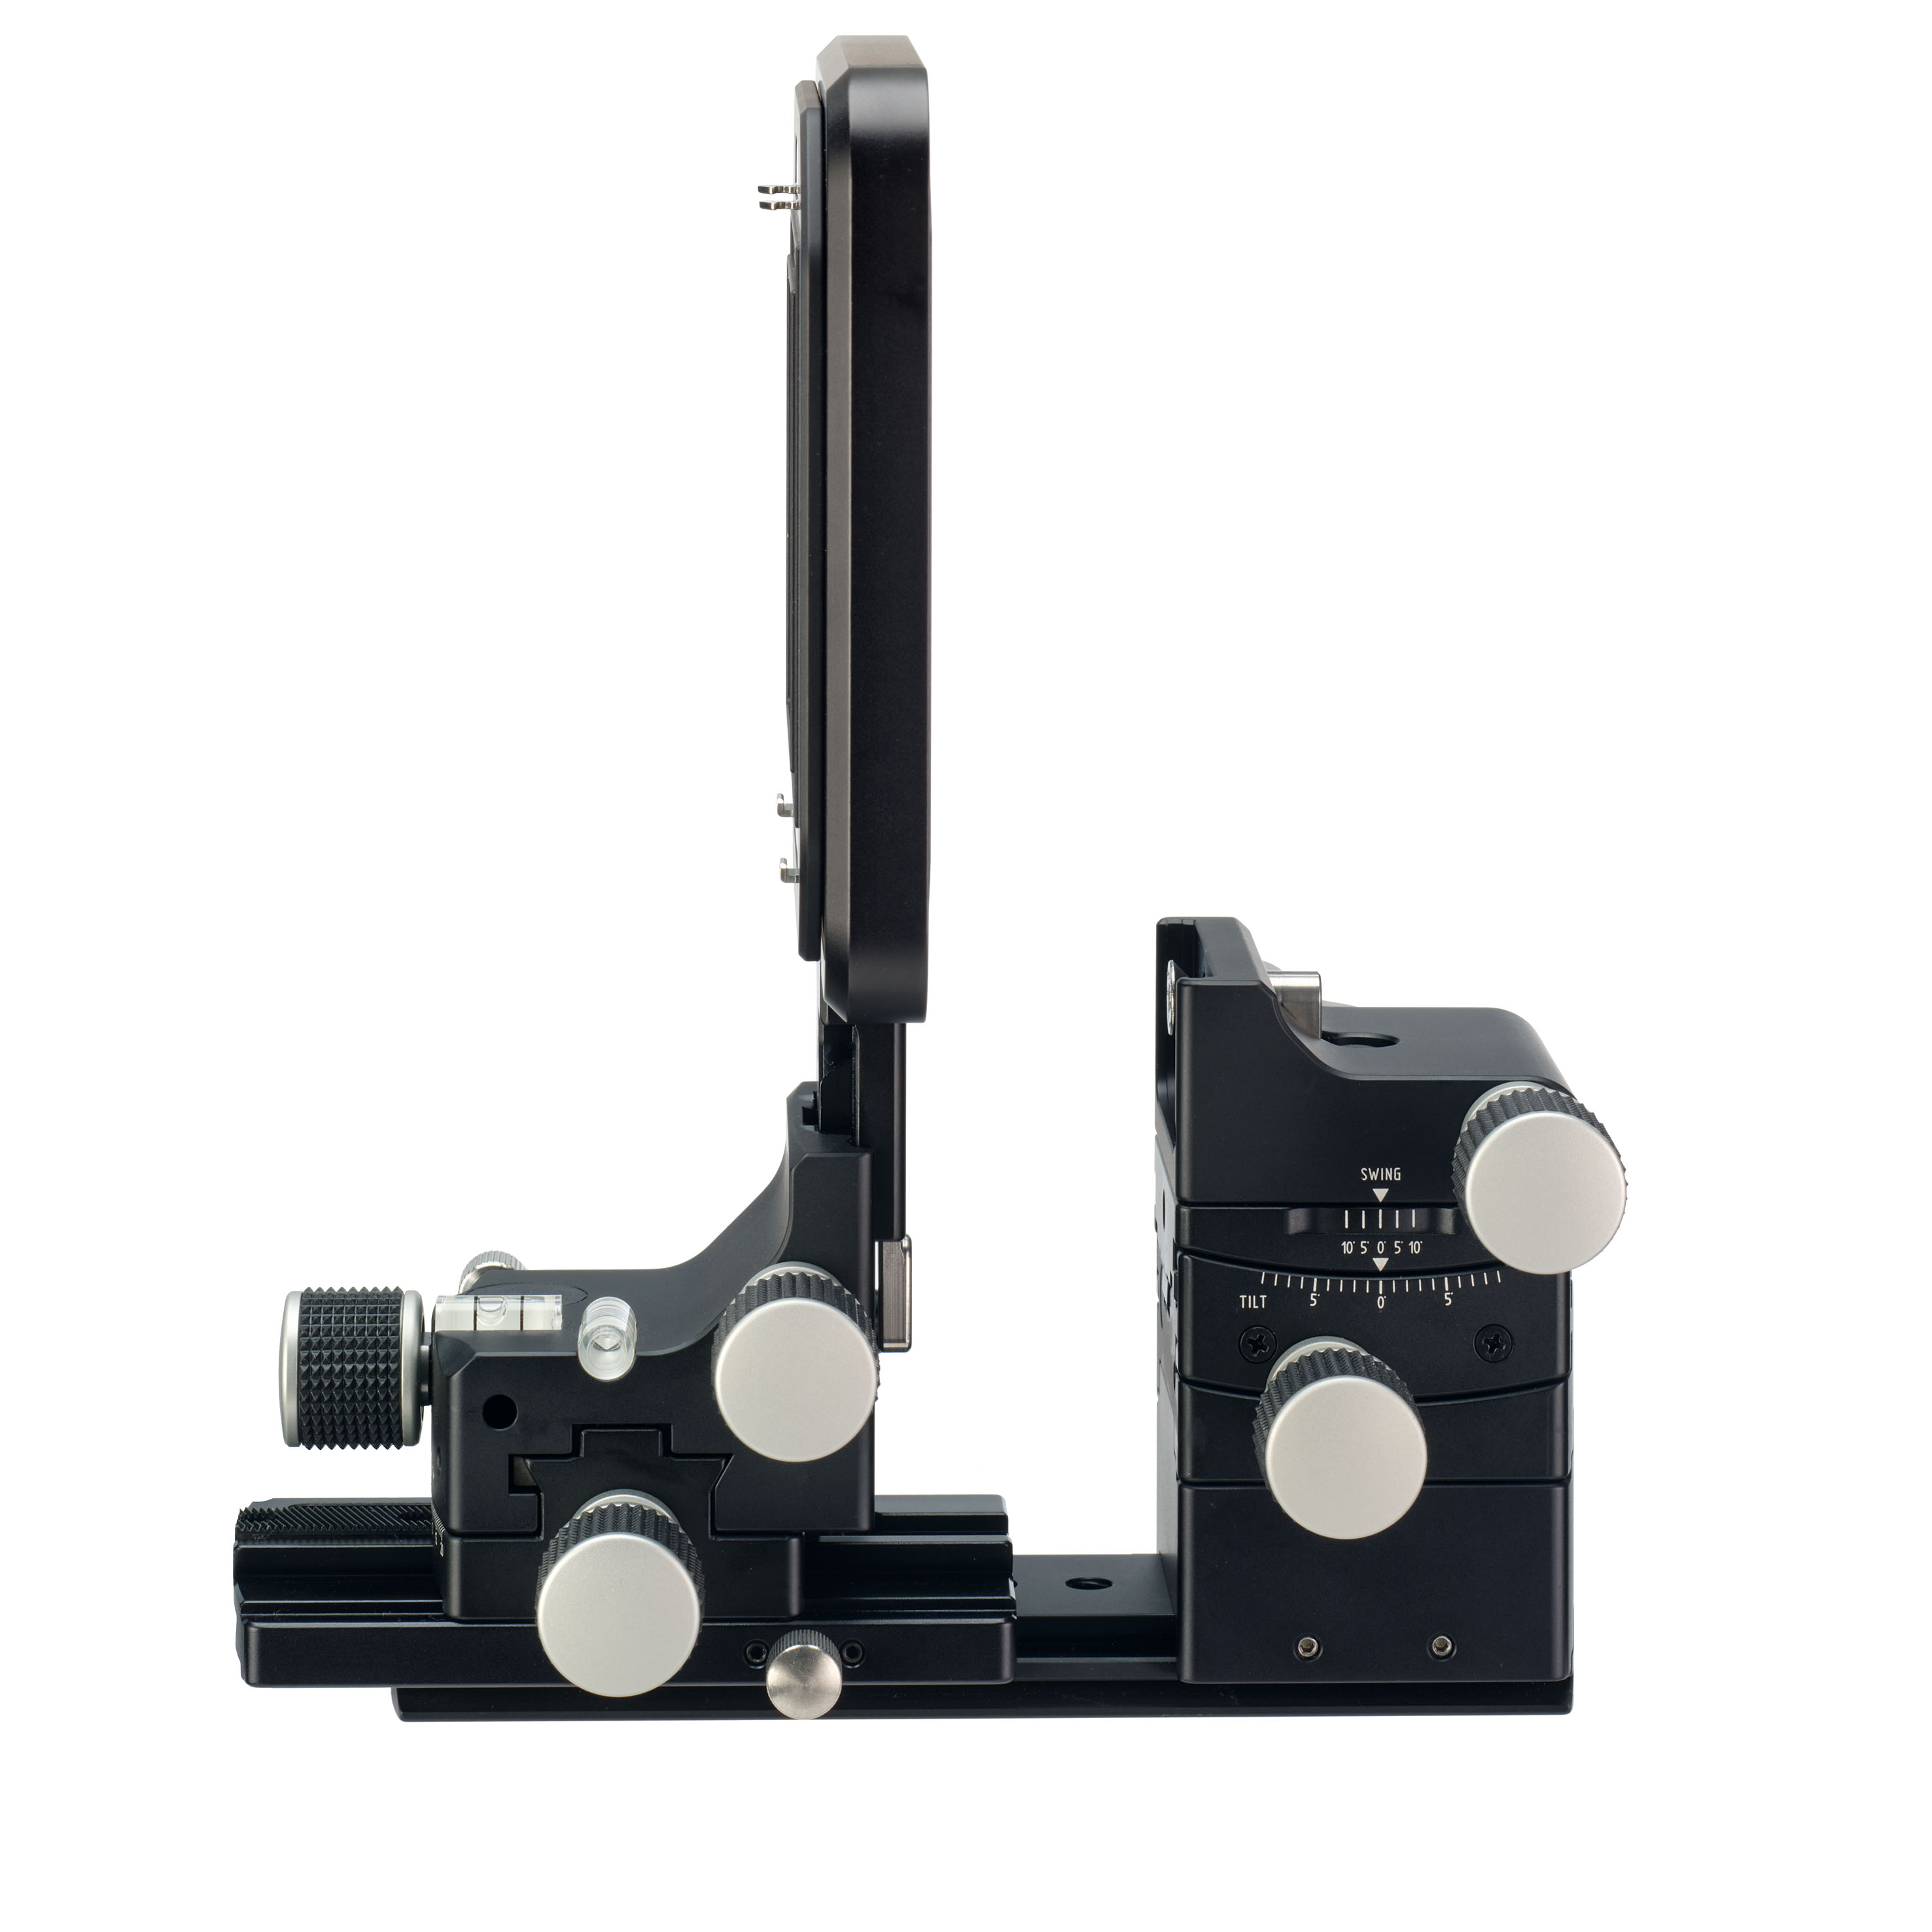
Cambo Actus-MV
Cambo Actus MV with Phase One IQ4 150 and Phase One 40 HR-W X Shutter Lens Front View
Hmm, now what could the MV in Cambo Actus-MV stand for? Most Volume? Many Variables? Morally Viable? Well, no, it stands for Maximum Versatility. There are good reasons for this. While the Actus MV is the largest/heaviest of our group of Cambo Actus view cameras represented here, it also has the most capability, the most features, and can be used with the most camera/lens combinations.
The Actus MV is fully geared, but also adds nearly all movements to both standards. Now there are full movements (shift/tilt/swing) on both standards with the exception of rear swing. And some of the movement latitude has been expanded. The tilt and swing adjustments also now have friction locking, so all movements can be locked or restricted.
Cambo also produces fine focus and fine tilt gearing (that increases the gear precision by a factor of 5x), which is an option on all Actus View Cameras, but is standard on the Cambo Actus MV. The Actus MV also comes with a longer base rail and now telescopes, meaning both standards can move away from each other, to expand the bellows draw beyond what the existing rail would allow. There is also a quick release for both standards to slide off the rail, making for fast, easy packing.
While it is larger and heavier than all other Actus View Cameras, it still presents a slim footprint that makes it easy to pack. Digital Backs can be manually rotated by removing and re-seating, but Cambo also makes a rotating lever solution for digital backs in Phase One/Mamiya 645 and Hasselbload V Interfaces (which is also a compatible option for the Actus DB2).
** Legacy digital backs can be used if they are in any of the following interface mounts (with corresponding Cambo SLW Adapter): Phase One/Mamiya 645/Contax 645/Hasselblad H 645/Hasselblad V/Sinar 3 30/45, Leaf AFi/Sinar Hy6
Quick Tips/Fun Facts/Fancy Questions
On all Cambo Actus models except the Actus MV, the front Swing movement can turn 360º! This can allow you to add a bit more bellows extension if you are already at the max limit of your focus rail.
Can you really use your classic Panasonic G1 with that little sensor on a Cambo Actus? Yes, of course! And you can shift that sensor a long, long way inside those image circles.
Can you use a Fujifilm X100VI on a Cambo Actus? No, you cannot – why? Because the lens is fixed to the camera. But you could use a Fujifilm XT5!
Yes, you can use a film back on the Cambo Actus. There’s enough clearance for a 6×7 opening, and Cambo indeed makes an adapter that accepts Mamiya RB 6×7 film magazines, as well as ground glass and a viewing loupe.
The shortest focus rail for the Actus is 155mm. The longest is 450mm.
Cambo does not manufacturer optics. However, they pick optics from other manufacturers and create custom Actus mounts (called Actar lenses) that incorporate an Actus lensboard and a manual aperture ring on the lens (when needed). Typically what must be taken into account – is there the the ability to create a manual aperture ring, does the lens have an ample image circle, and does it provide sufficient focal flange distance in order to achieve infinity focus with most of the compatible cameras that can be used on the Cambo Actus View Cameras. See the article “Seeing Sideways with Cambo Actus” at the bottom of this article for some more details.
There are numerous beneficial accessories available for the Actus, including Fine Focus Gearing, Extra Long Bellows, Extra Long Rails, Base Tilt Mechanisms, Compendium Lens Shades, Remote Focus Whips, Rotating Digital Back Adapters.
You can mount Rodenstock and Schneider view camera lenses in Alpa or Cambo WRS lenspanel to a Cambo Actus View Camera via adapters, but only if they are short barrel versions.
You cannot mount a Hasselblad 907x/CFV 100c to an Actus via the XCD Bayonet (only X1D/X2D). The shutter release button prevents this, but just remove the 907x portion and then you can mount the CFV 100C digital back itself. With ACDB-991 on Actus-MV and Actus-G; for Actus-DB2 you only need the SLW-80.
Why can’t I use my native lenses with my camera on the back of the Actus? Several reasons, one being electronic lenses have no way to communicate with their native camera body when separated. And even if you worked around that, the bellows and standards of the Cambo Actus are in between the lens and body and essentially act as an extension tube, so you would at best lose infinity focus.
Cambo frequently puts together “Kits”. For example, A Cambo Actus-GFX kits includes the bayonet for the Fujifilm GFX cameras, a Cambo Actus-XCD kit includes the bayonet for the Hasselblad X1/X2D cameras, and at times Cambo will also include select Actar lenses as a full kit with a choice of camera bayonet..
If you desire 1:1 macro with a view camera lens longer than 120mm, you will need a longer rail than the default rail (typically at least the AC-330, which is a 300mm rail).
The following 3rd party lenses can be used with Cambo Actus view cameras: View camera lenses in Copal-0/1/3, M39, Leica R, Hasselblad V, Mamiya RB-RZ, Nikon F, Mamiya 645, Pentax 645, Canon EOS EF, Alpa 12.
Cambo Actar lenses come in the following focal lengths: 15mm, 19mm, 20mm, 24mm, 35mm, 60mm, 80mm 90mm, 120mm and 105 Macro. Every Cambo Actar Lens is compatible and will achieve infinity focus with any digital camera or digital back you can mount to an Actus with the exception of the Cambo Actar 15 and Actar 60 with DSLR bodies and the original Fujifilm GFX 100.
Cambo makes a lensboard for Hasselblad V Lenses that incorporates a shutter activator.This means you can use the leaf shutter in the lens for use with higher sync with strobe.
Have More Questions?
There are in depth articles about every model of the Cambo Actus View Cameras from our website linked below. And if you’d like to find out more, or discuss the viability of a view camera solution for your use, just reach out to us!
By Steve Hendrix
Thanks for reading! If you have any questions feel free to reach out!
For decades Photokina was the photo industry’s leading trade show. It wasn’t a yearly event. The biennial frequency was a good reason for exhibitors to put a lot of effort and resources in it. Which in turn generated great interest from the public, which in turn… A bit of a chicken-and-egg story. Brands like Kodak and Fujifilm usually occupied one complete hall of the venue. Cambo was always present. Maybe not booking a hall of its own, but with a very respectable booth.
Saturday April 6th Fujifilm will host an event at the Telegraphenamt Hotel in Berlin. A bit tongue in cheek it’s named Fujikina. We’re glad that they invited us to participate. The real Photokina may have been great, a small event like this usually gives more opportunities to interact with guests. Who may bring their own gear to experiment with the solutions we’re showing. All very welcome.
At Fujikina Cambo will show various solutions for Fujifilm cameras. The Cambo Actus and Actus-MV view cameras, the RPM-GFX helical to tune your GFX for archival photography, and the new Cambo Film Capture Stage RPS-500. Feel free to bring your own negatives or slides to put it to the test.We’re looking forward to meet you.
This may very well be our shortest blog in years. All specs and details about Cambo solutions for the archival industry can be found on our website, but this video probably gives a good overview of the RPS copy stand in just a few minutes. And it has a guest appearance of Cambo USA’s Anthony Wallen.